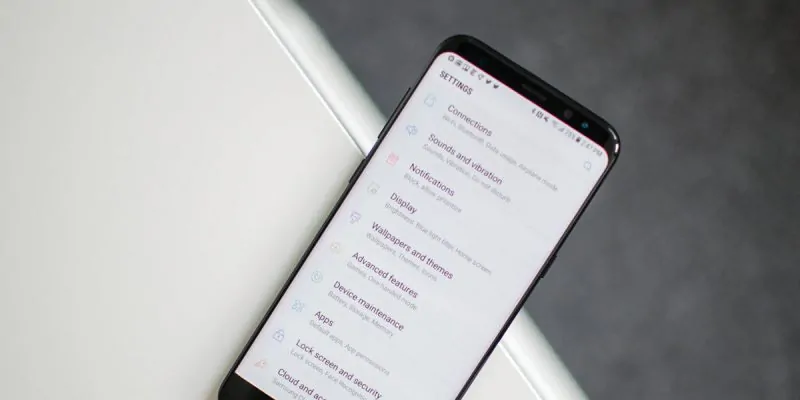
Even with encryption and other security features, unless we make use of them correctly, our smartphones can pose a serious threat to our privacy. The new Samsung Galaxy S8 and S8+ make no exception.
Google, phone manufacturers, app developers and so on – everyone wants to track our habits and behaviors. While it don’t think it’s possible to prevent all our data from being collected we can certainly minimize it by disabling the right settings.
Security & privacy settings you need to disable on Samsung Galaxy S8
The Galaxy S8 has various settings which can be customized to improve your privacy and security. Most of them are enabled by default, which is why today we’re going to focus on security & privacy settings you need to disable on Samsung Galaxy S8.
Lock Screen Notifications
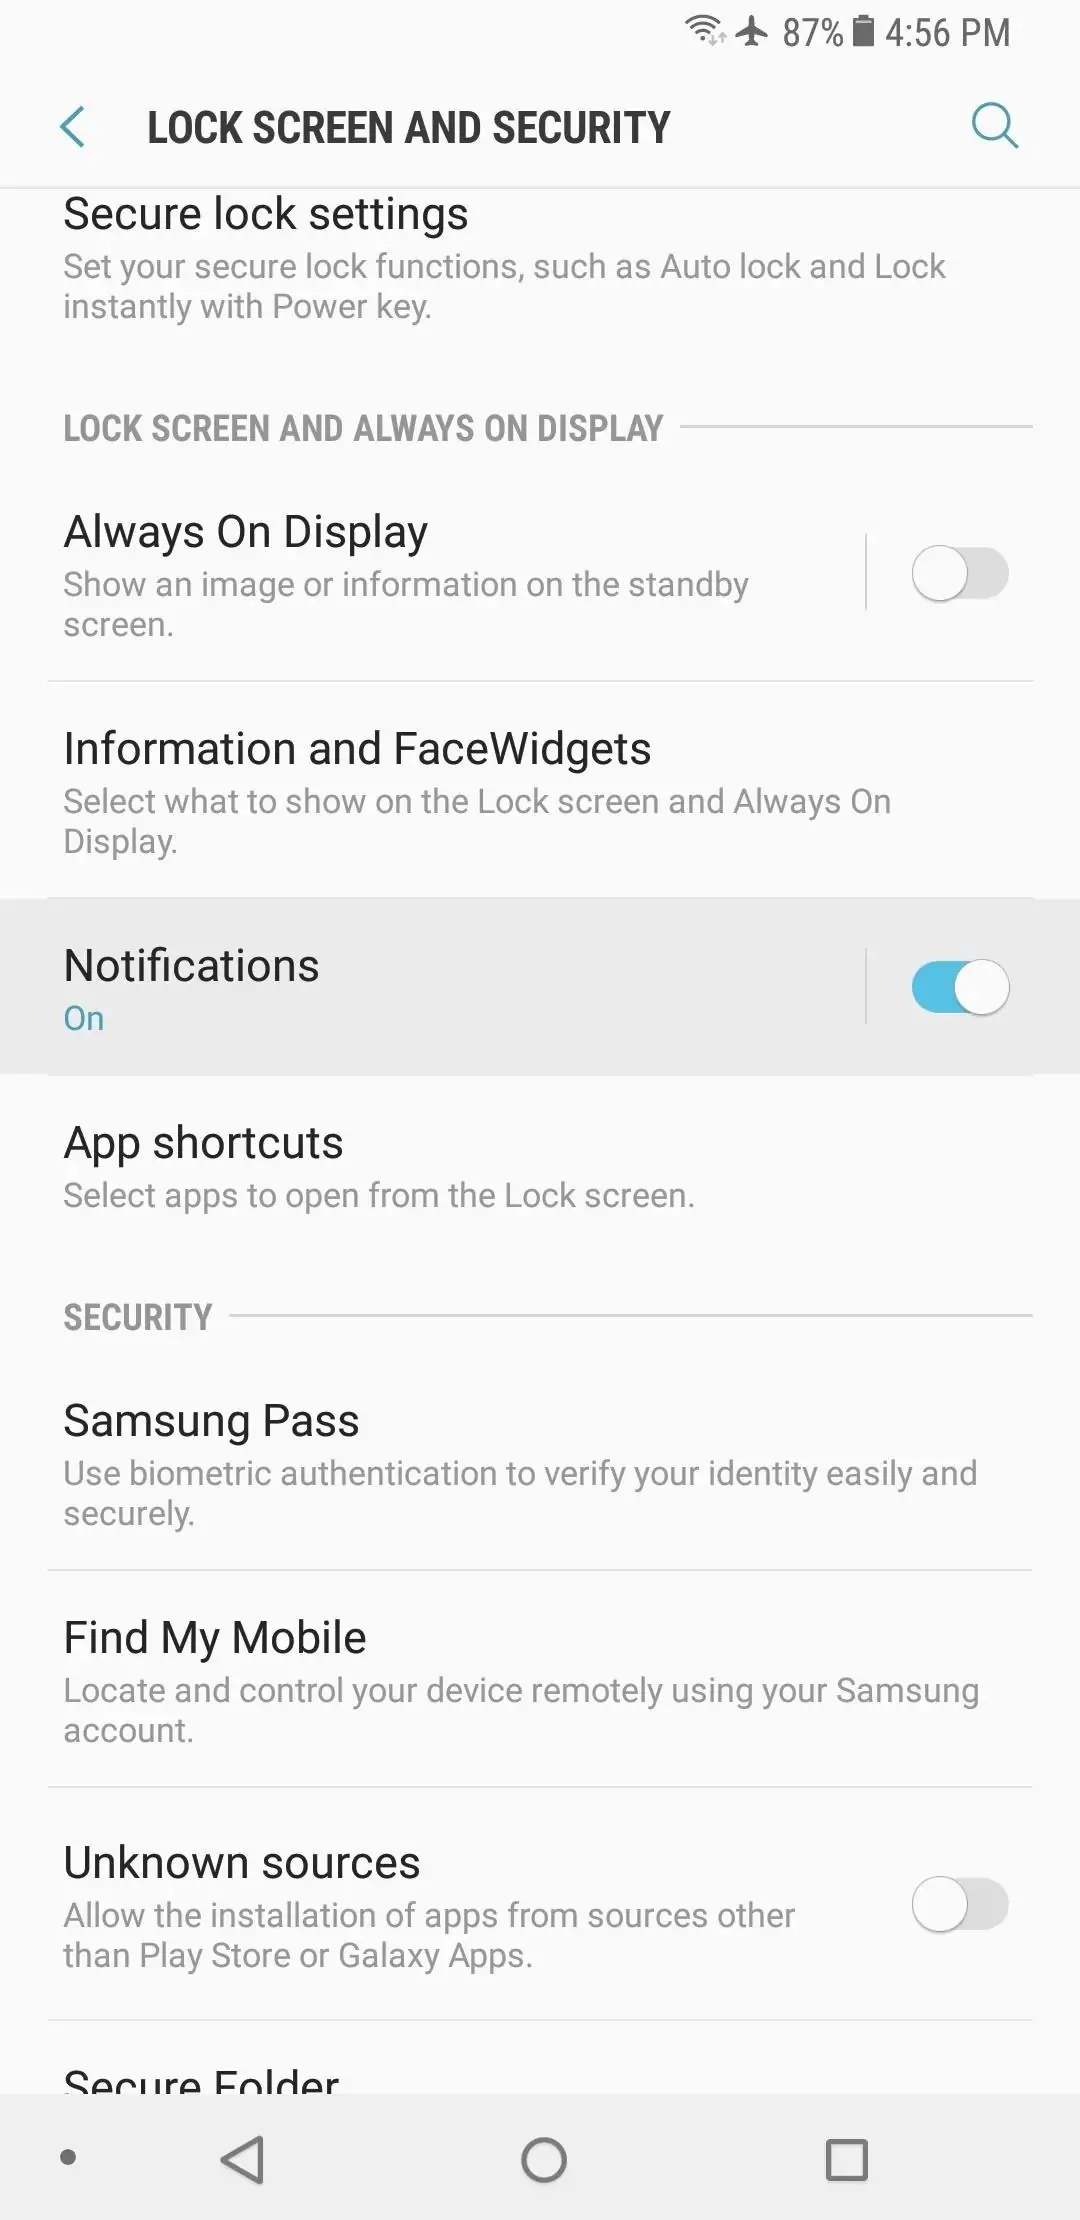
Sometimes lack of privacy can be the greatest security risk. It’s certainly convenient to receive notification previews on the lock screen but it’s easy for someone else to peek over your shoulder. Assuming you’re not willing to take that risk, navigate to Settings -> Lock screen and security and tap on Notifications.
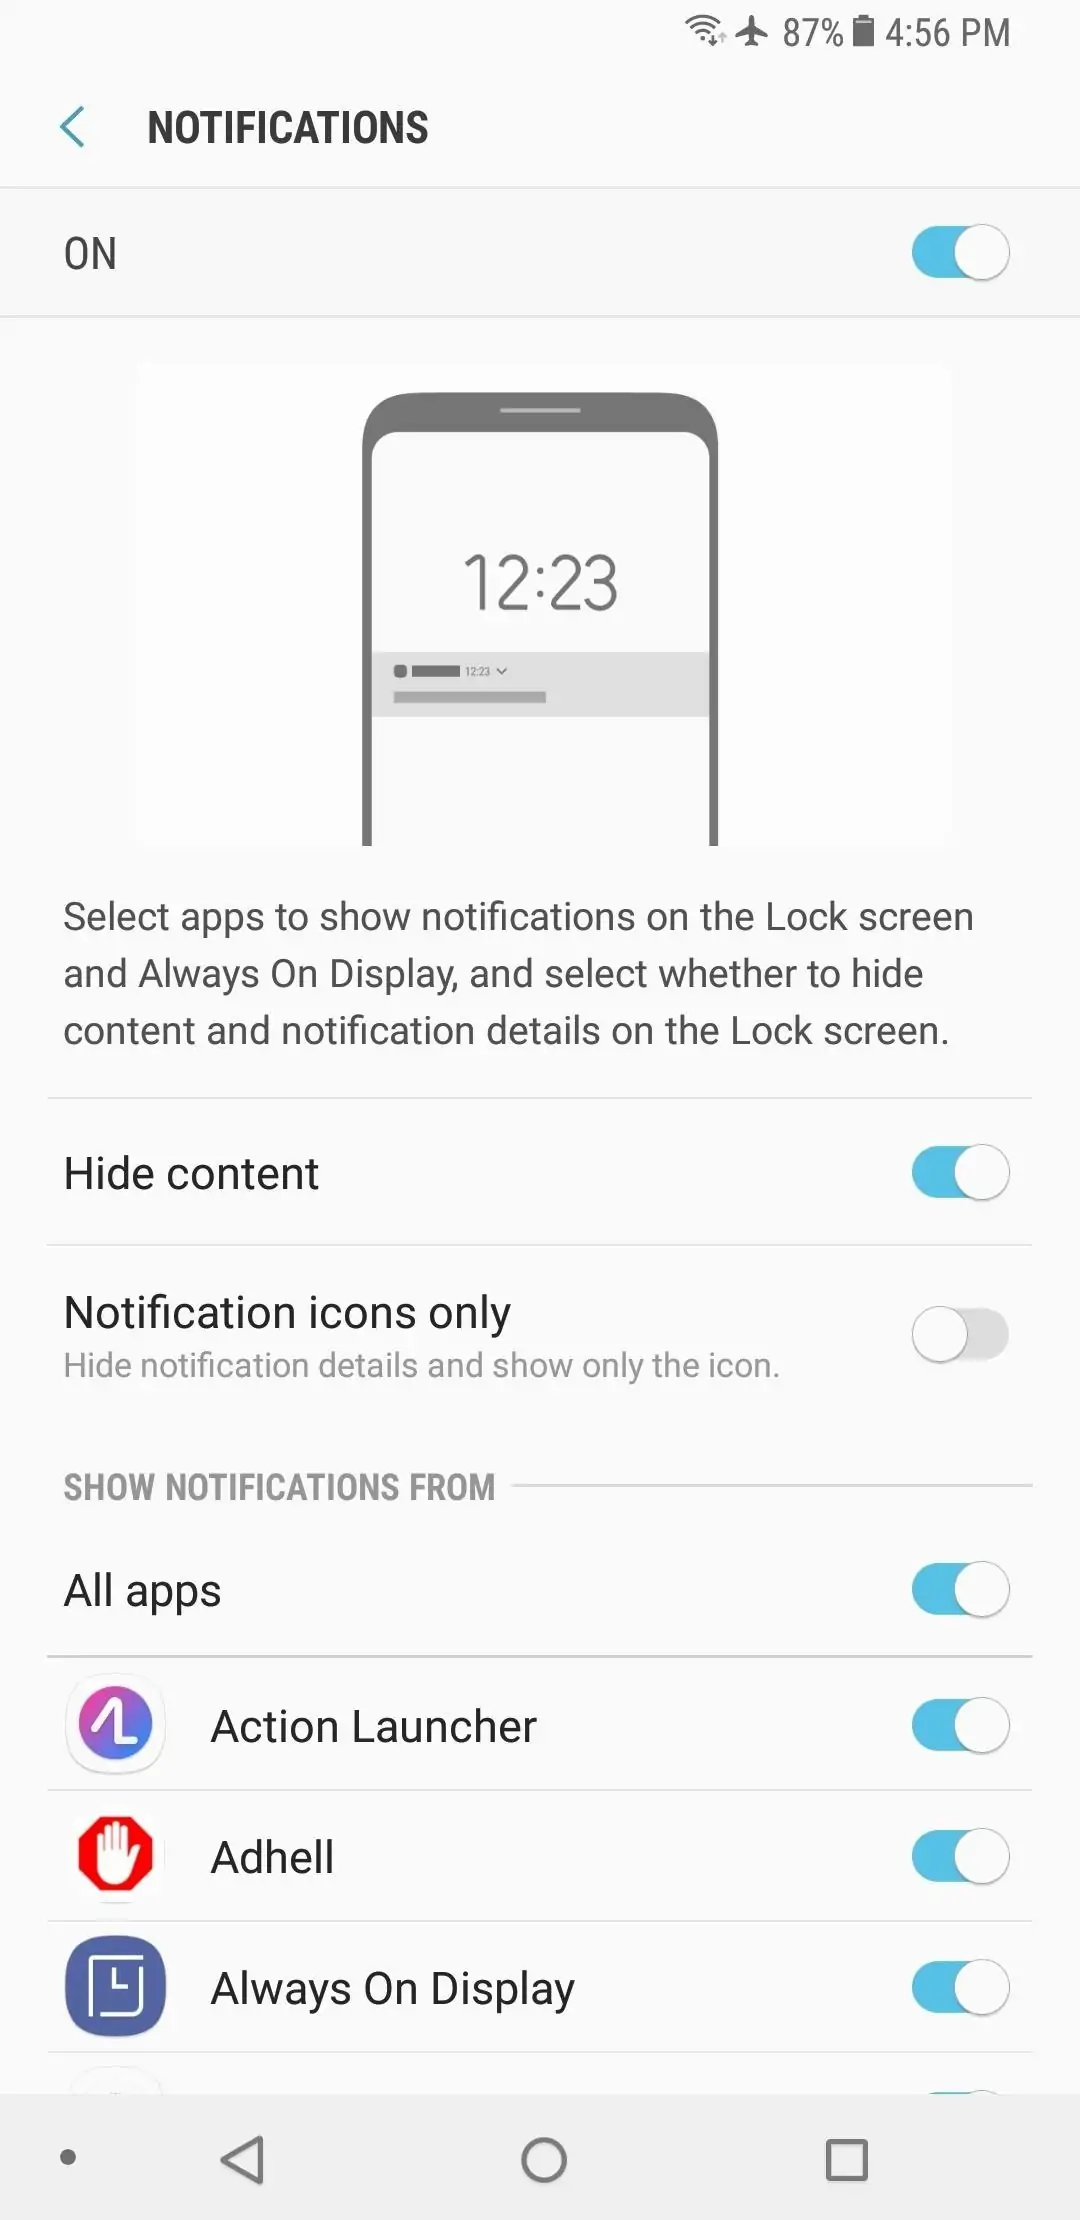
On the Notifications settings screen, the first thing you should do is to enable the “Hide content” option. This will ensure you can see notifications on the lock screen, but not their contents. You can also enable the “Notification icons only” as well as prevent specific apps from showing notifications on the lock screen.
Of course, if you don’t want to see notifications on the lock screen at all, you can disable them completely by toggling the switch at the top of the screen.
Facial Recognition
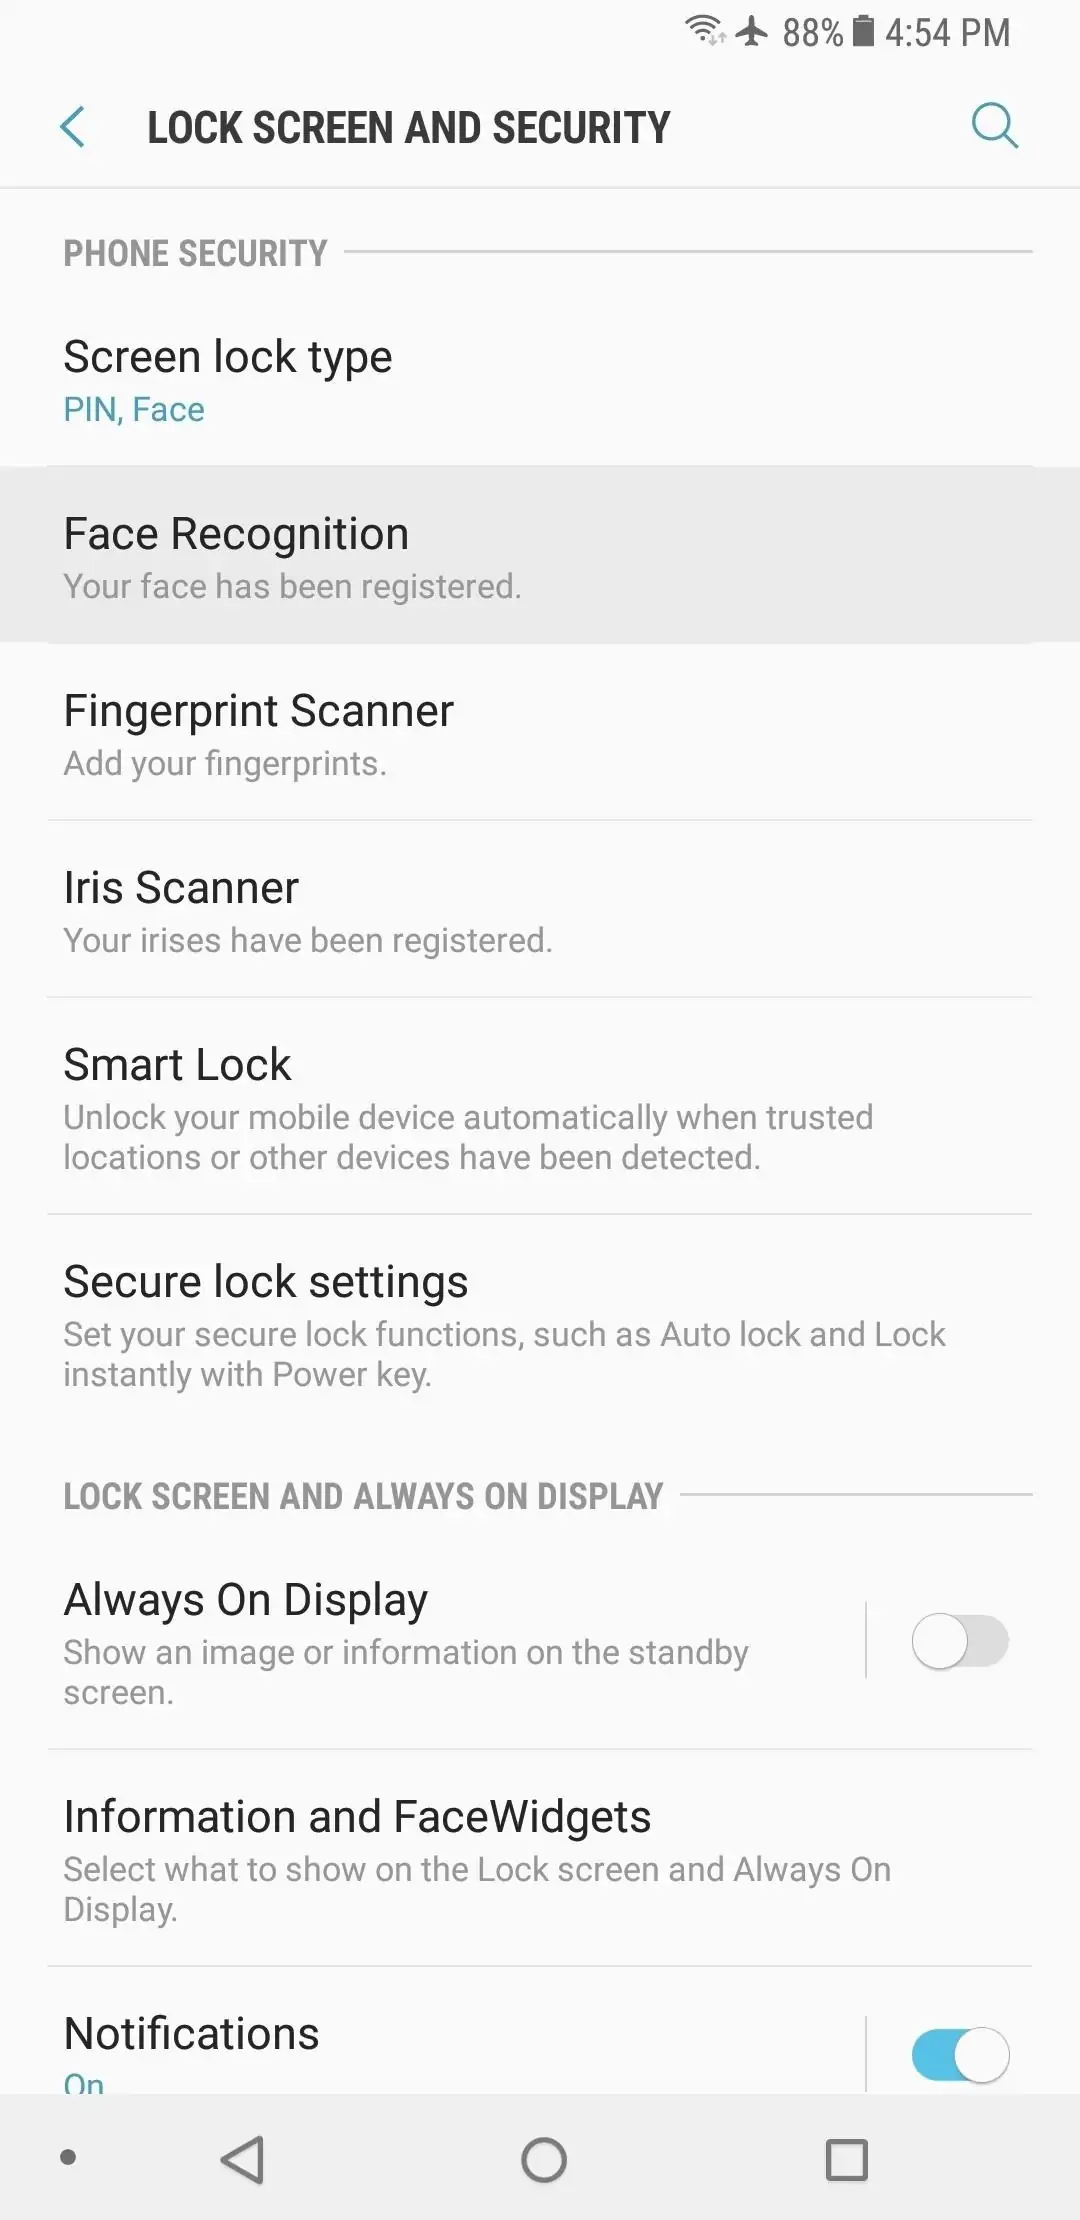
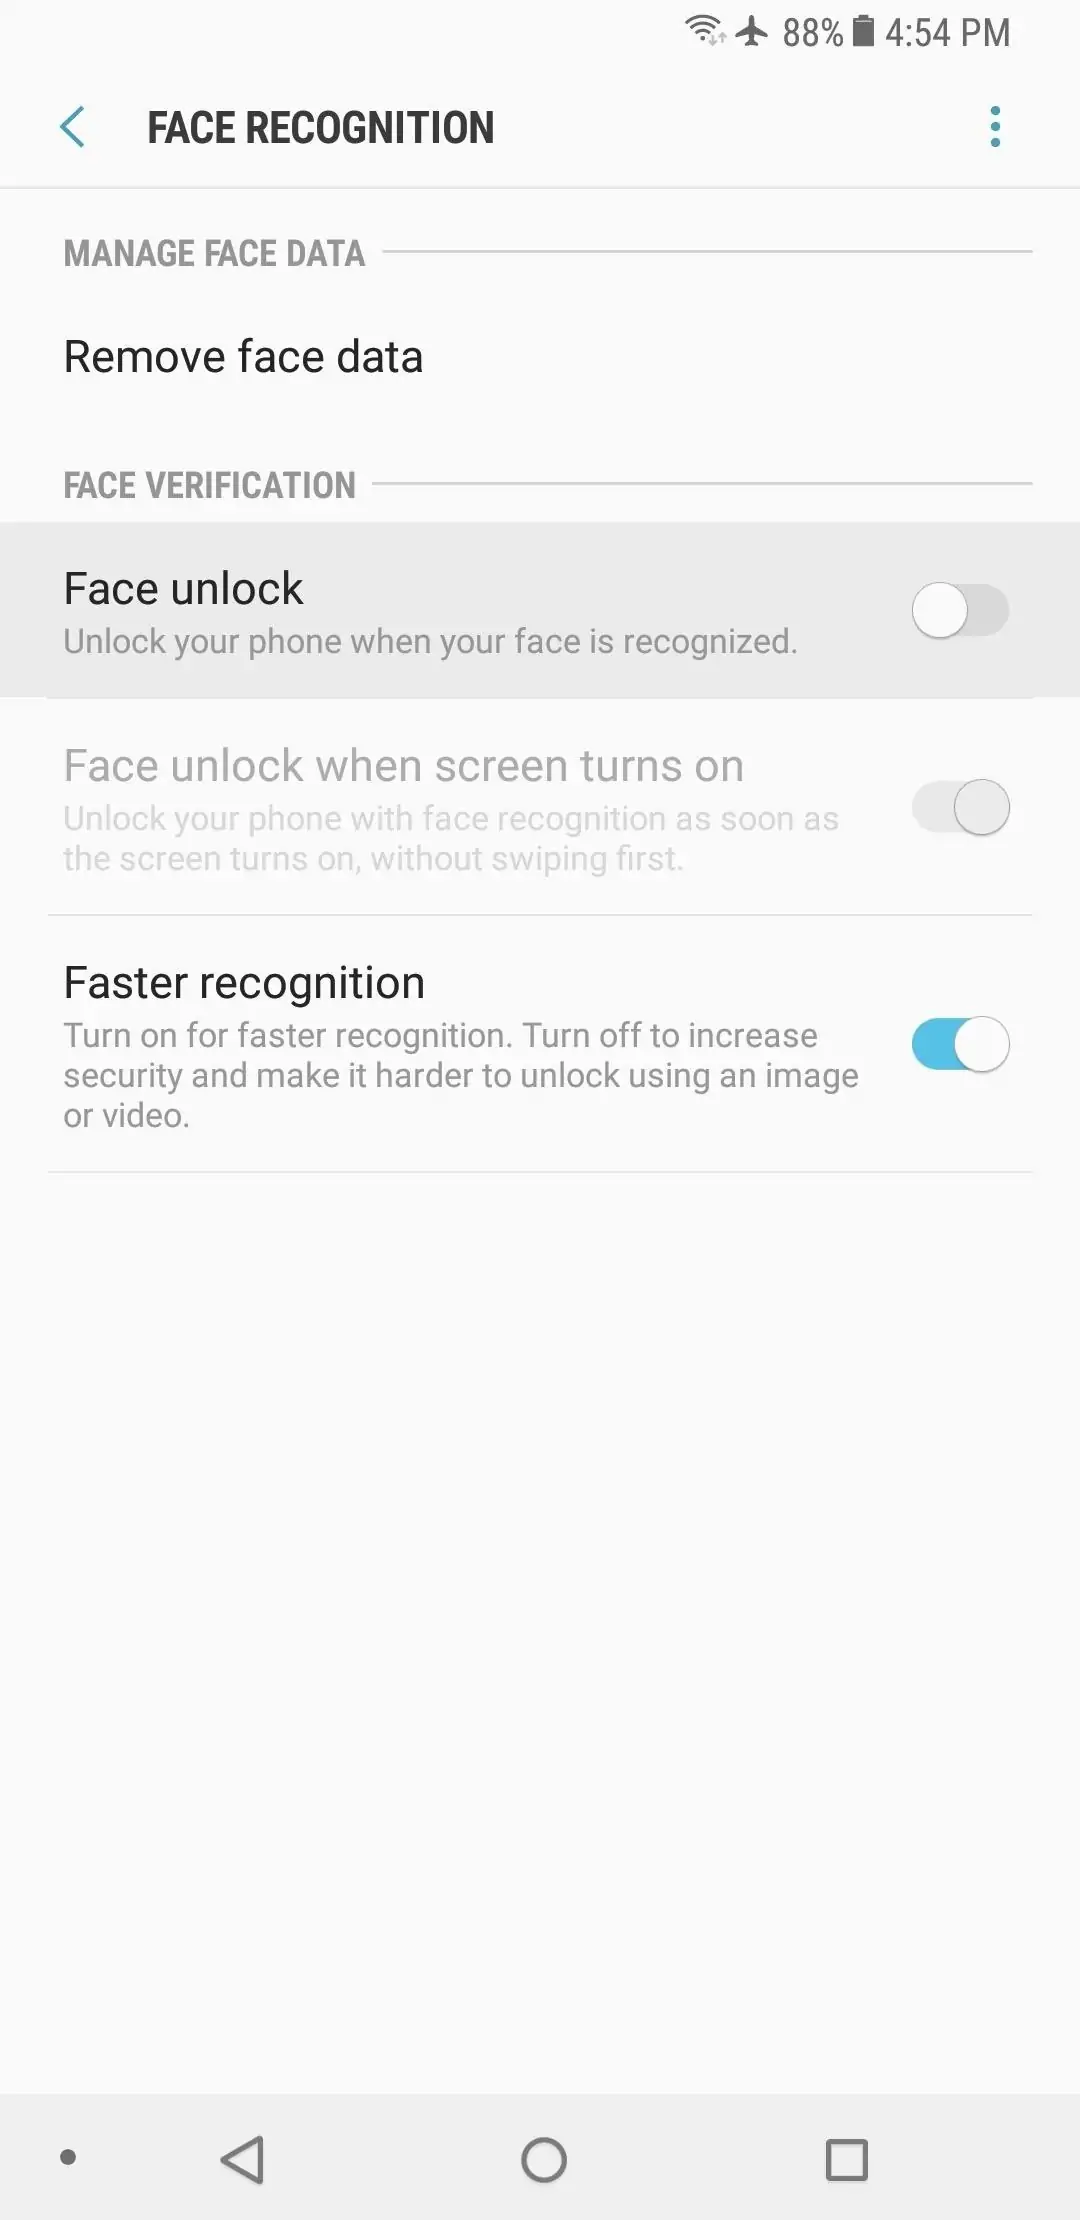
Galaxy S8’s facial recognition is not the most reliable security method. It’s been hacked using regular photos so you shouldn’t use it if you want your phone to be as secure as possible.
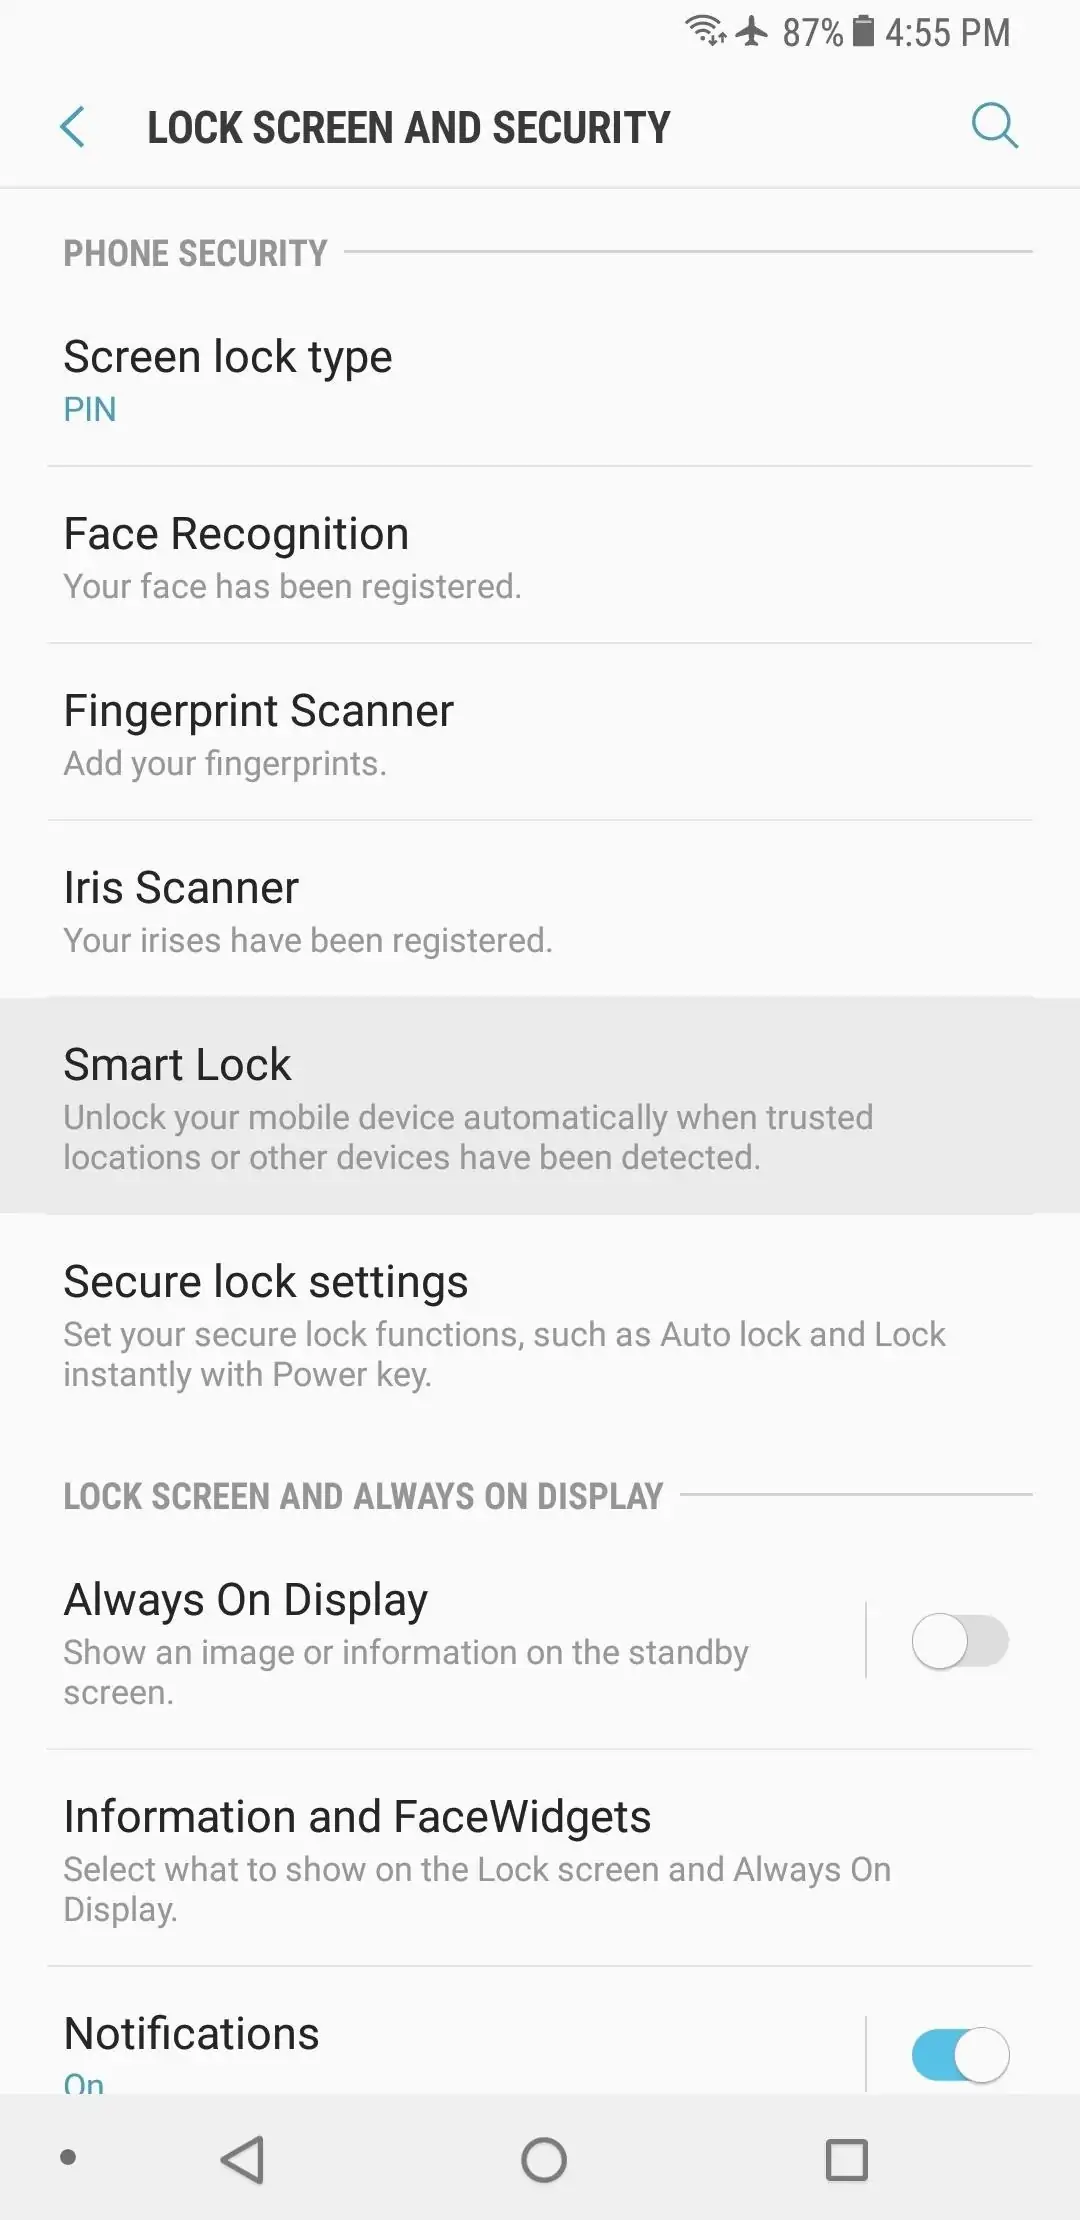
To disable it, go to Settings -> Lock screen and security -> Face Recognition.
There, disable the “Face unlock” option. Finally, it’s a good idea to revisit the “Screen lock type” settings page and make sure you have a password, pattern, or PIN set.
Smart Lock
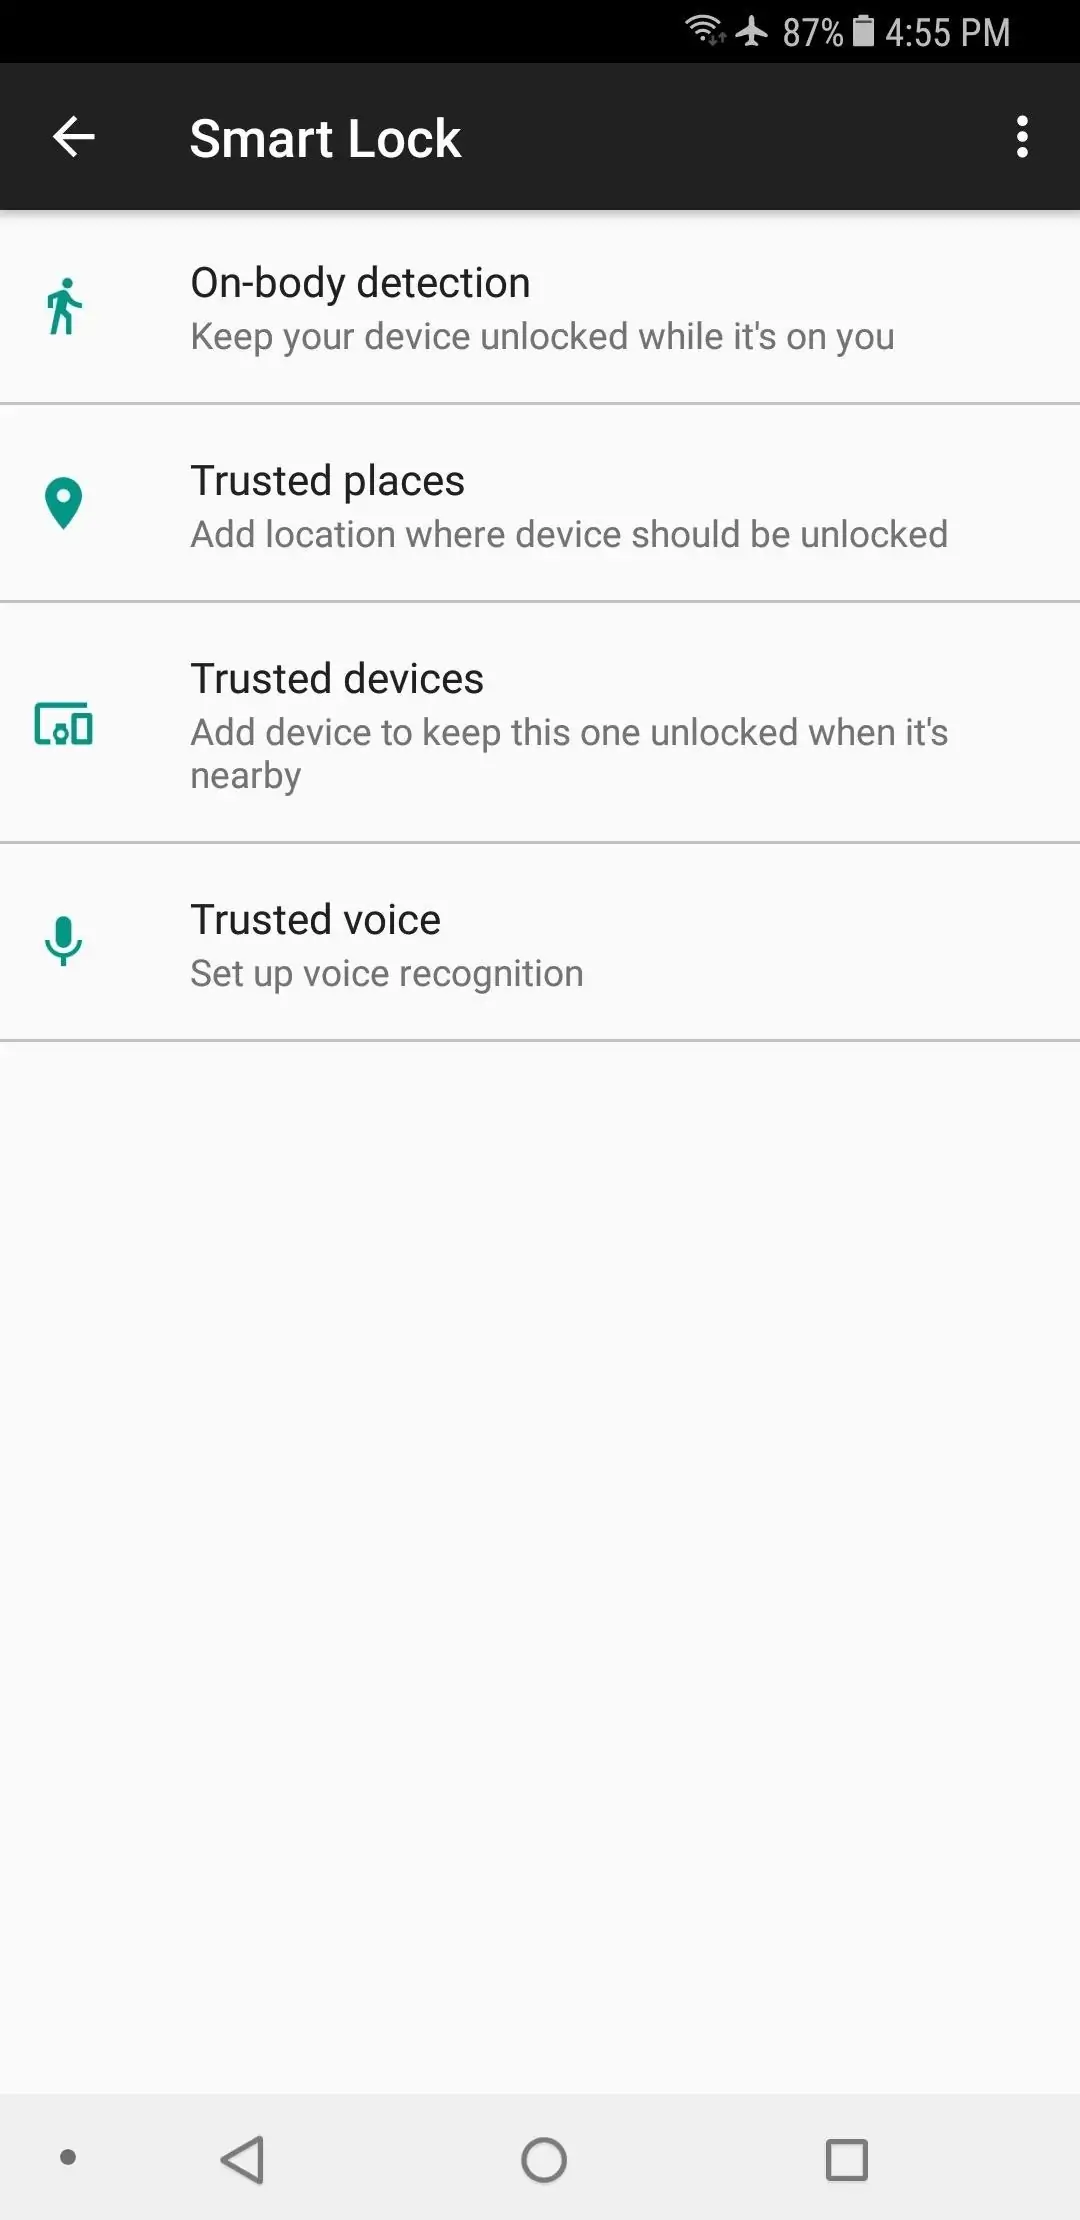
Since we’re still in the lock screen security department, it’s certainly worth talking about Smart Lock. This feature disables lock screen security when you’re in a trusted place, when your phone is paired with a trusted Bluetooth device but there are other options as well. You can also set Smart Lock to enable while the device is on you or using voice recognition.
You can find these options in the Lock screen and security Settings menu under “Smart Lock”. If you really want your phone to be secure at all times you should disable all the Smart Lock options but at the very least “On-body detection”, “Trusted devices” and “Trusted voice”.
And if you insist on using “Trusted places” choose the locations you consider safe carefully and try to keep them to a minimum.
Iris Scanner
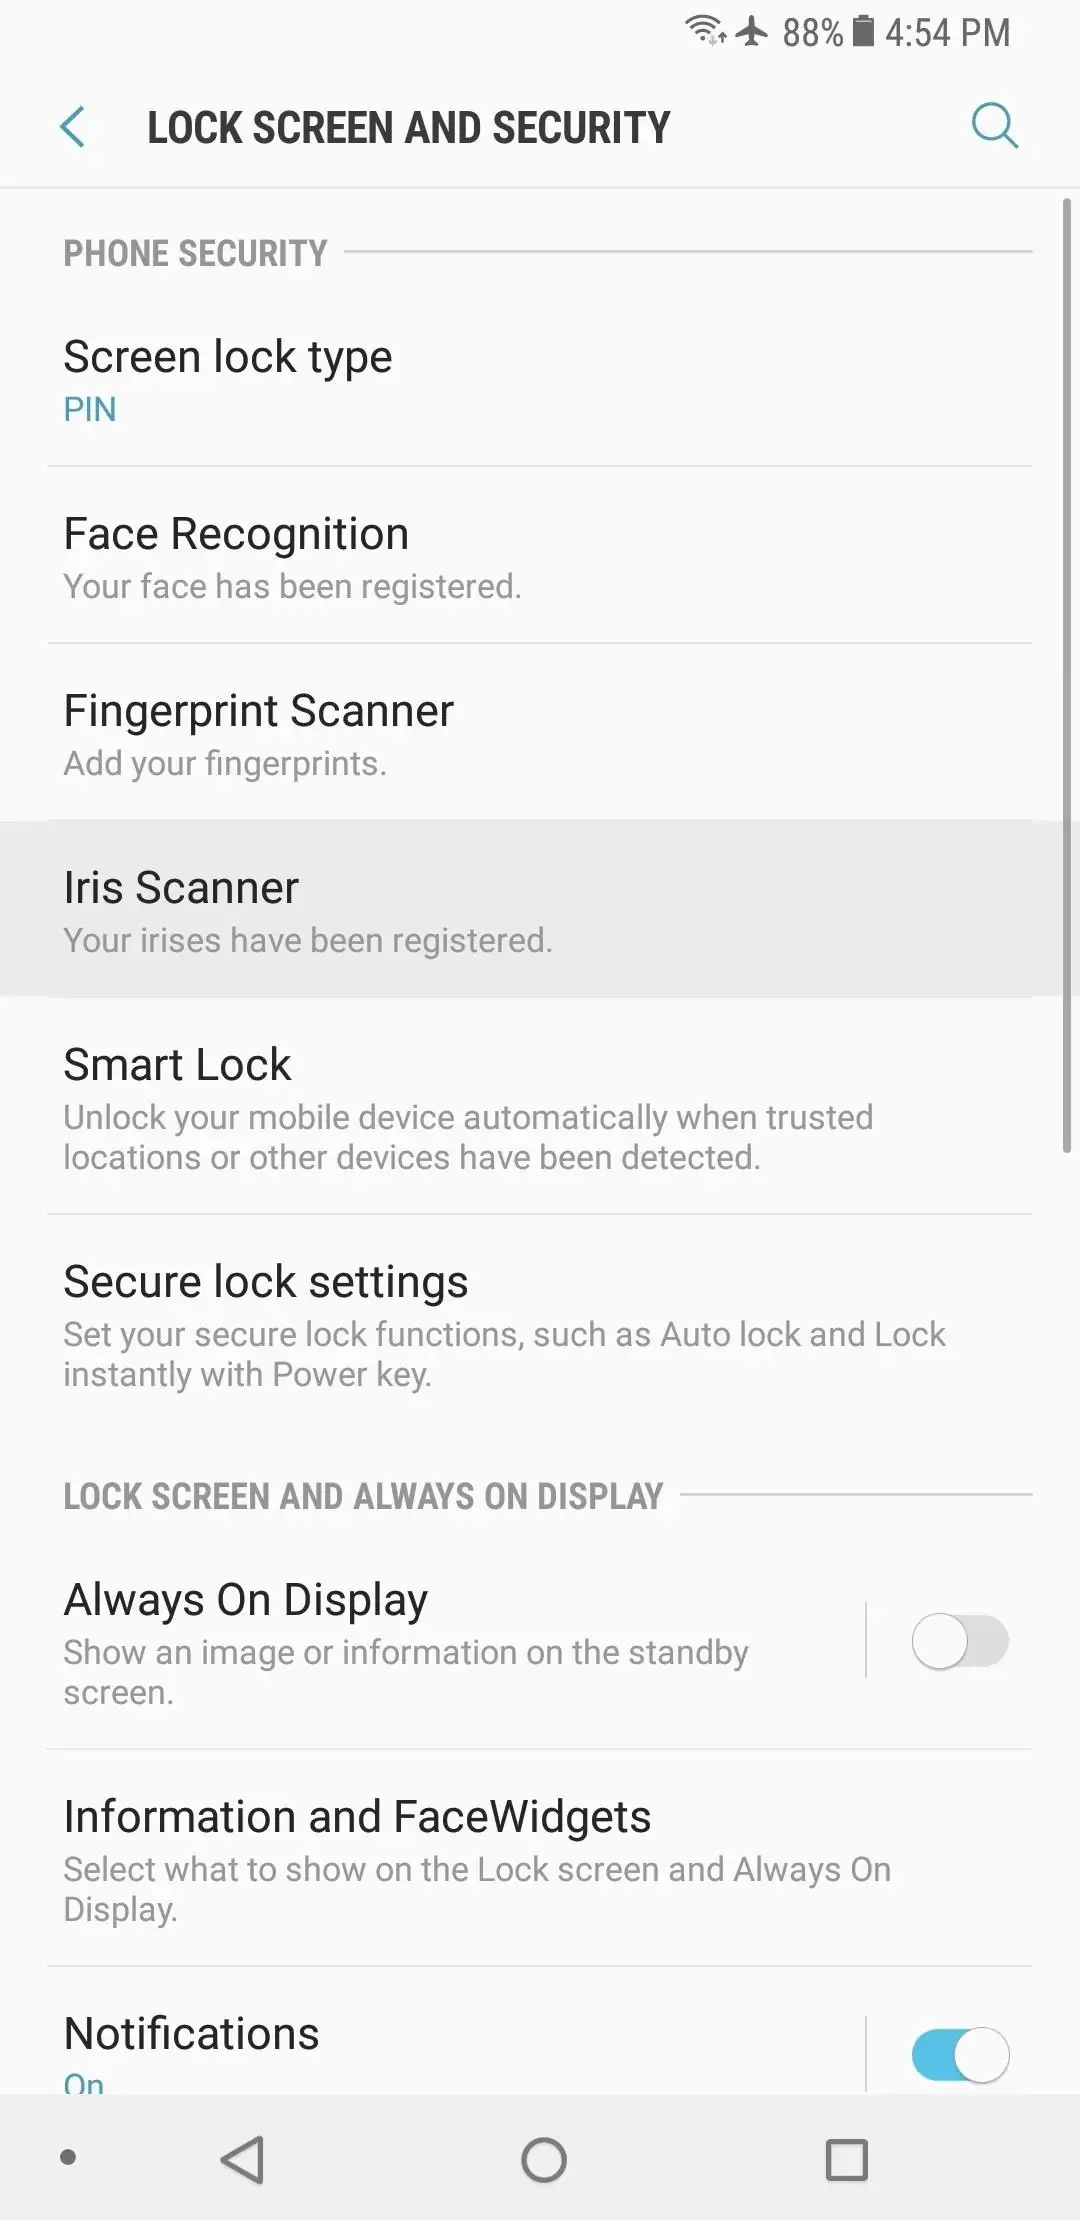
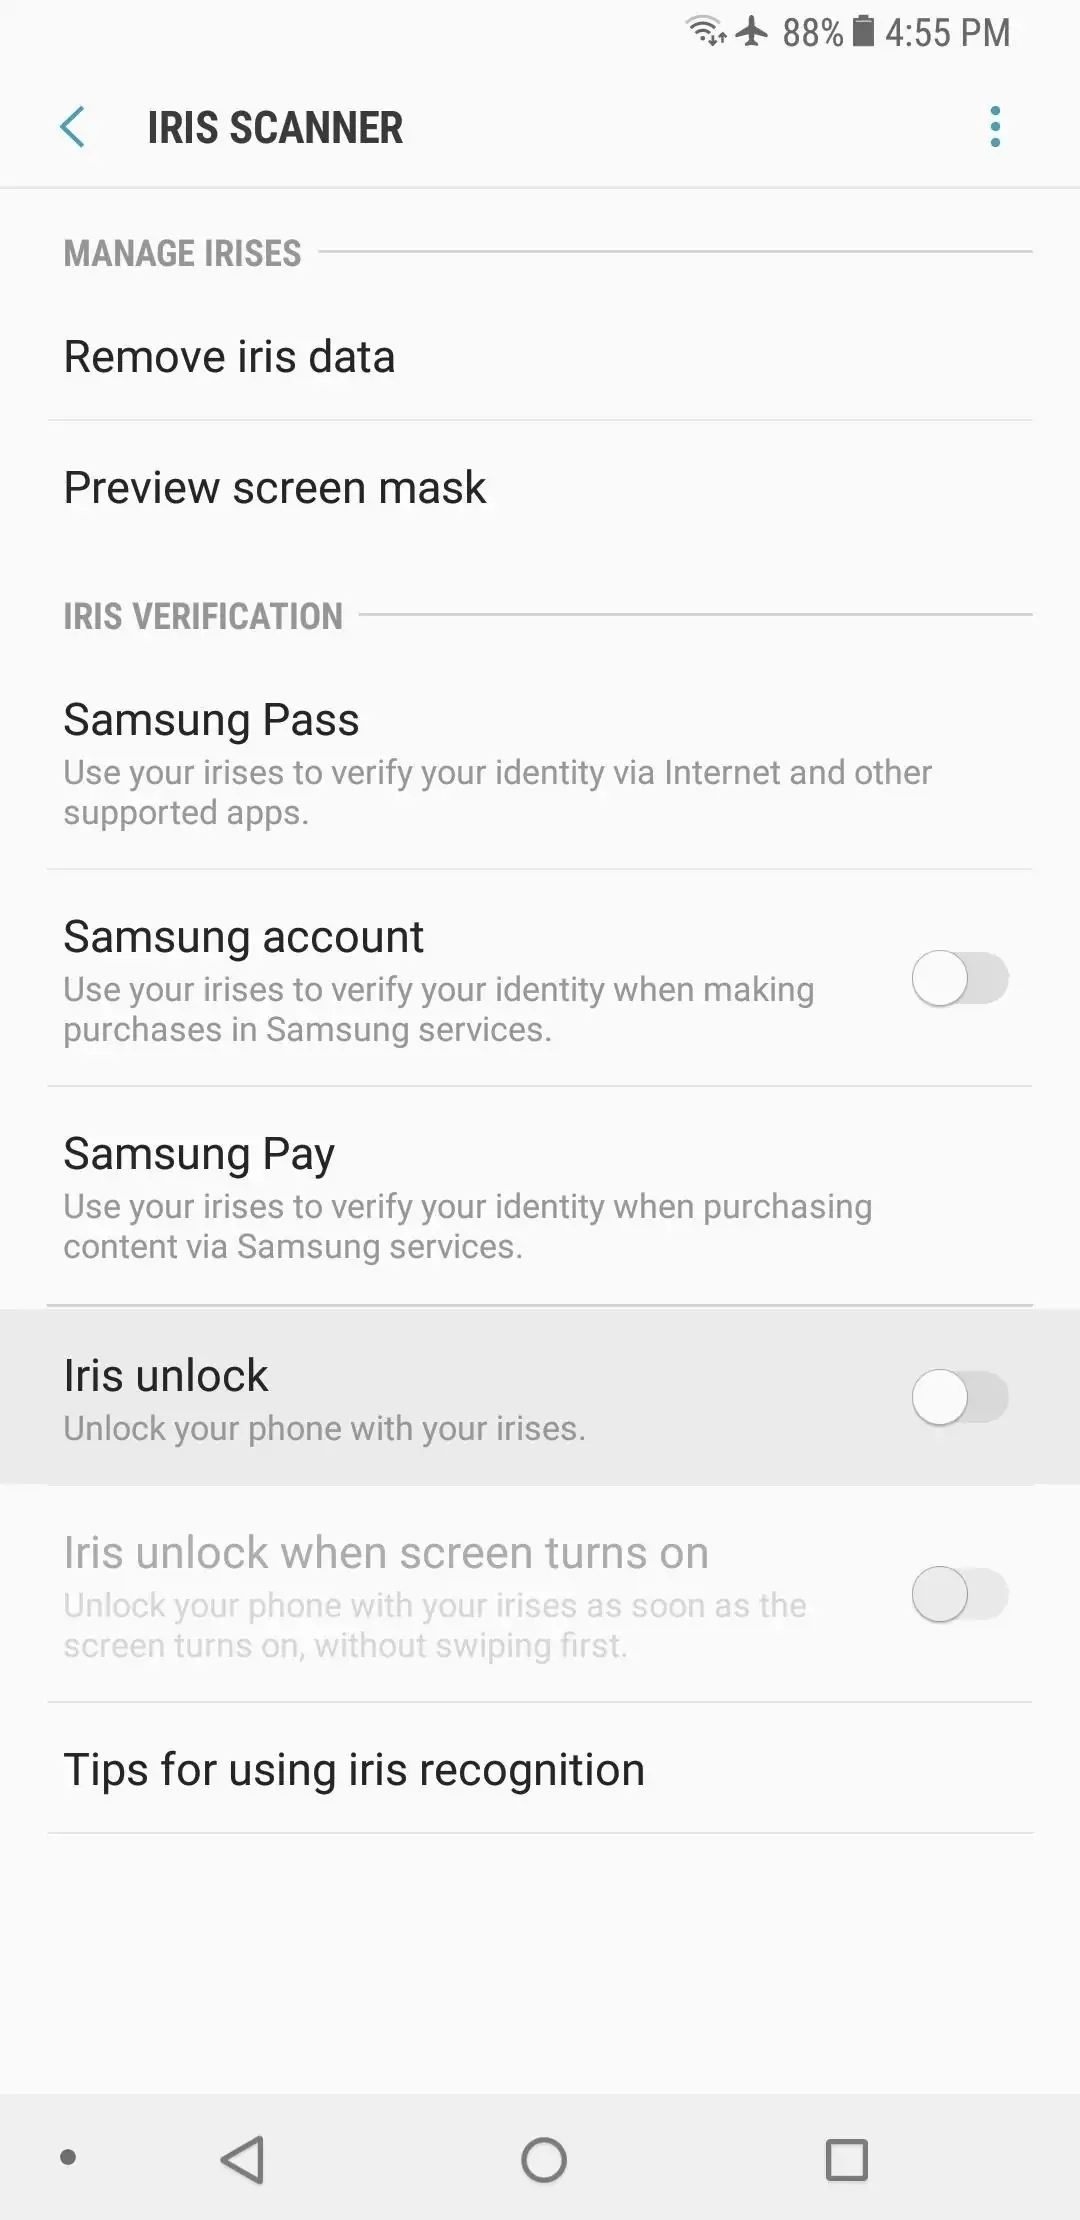
The iris scanning feature built into the Galaxy S8 is more reliable compared to its face recognition capabilities, but still not unhackable. A photo of your eyes taken with an infrared camera could bypass the lock screen. Perhaps that’s not something that would happen to anyone but considering that iris scanning can be hacked, it’s not the best idea to rely on it.
To disable this feature, navigate to Settings -> Lock screen and security -> Iris Scanner. Disable the “Iris unlock” option but also make sure you have a password, pattern or PIN set because you’ll need another lock screen security method instead.
Location History
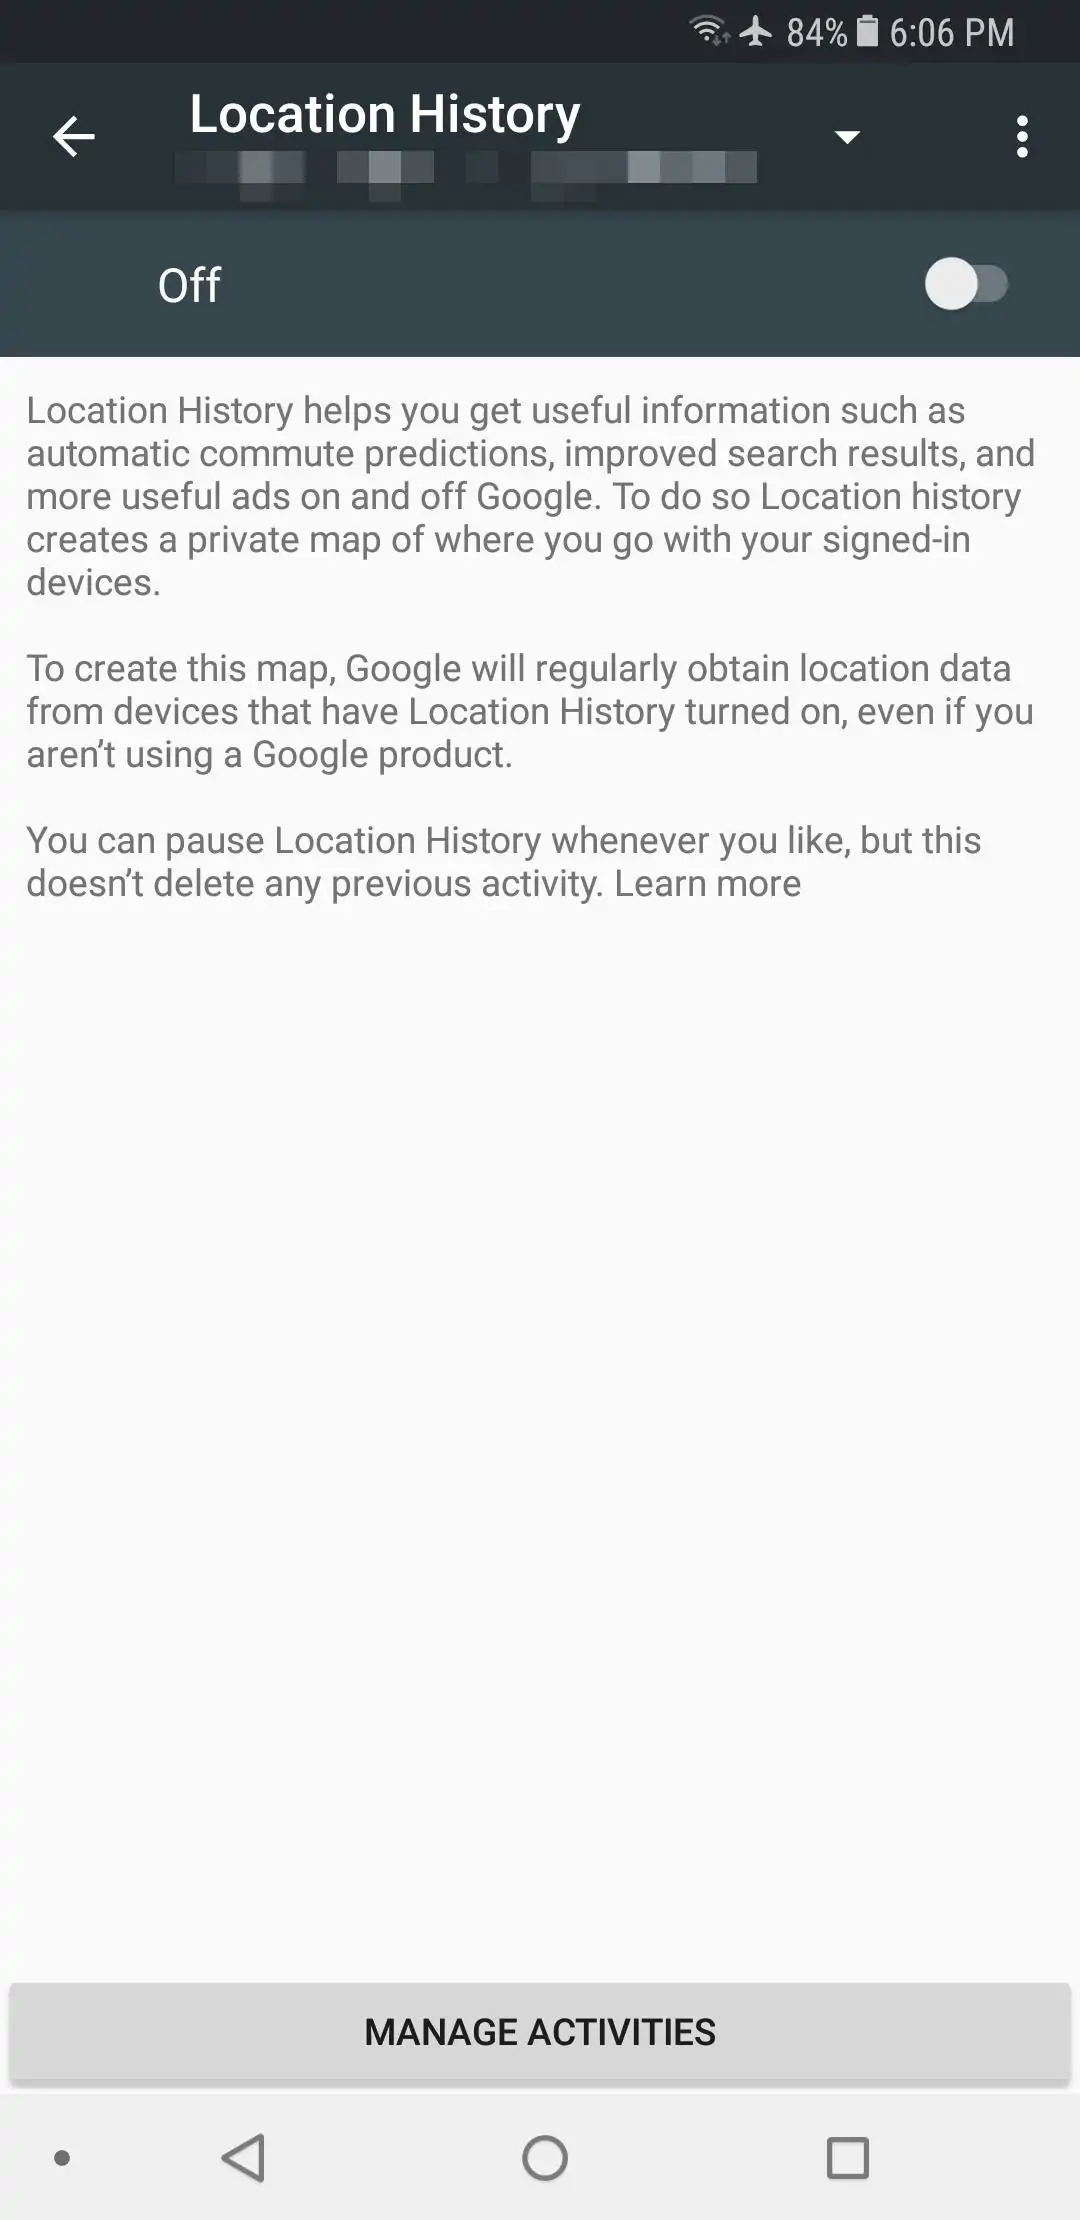
Location History is exactly what you probably think it is. This feature logs all the places you go while having your phone with you and you can access it by visiting this link (you’ll need to sign in with your Google credentials).
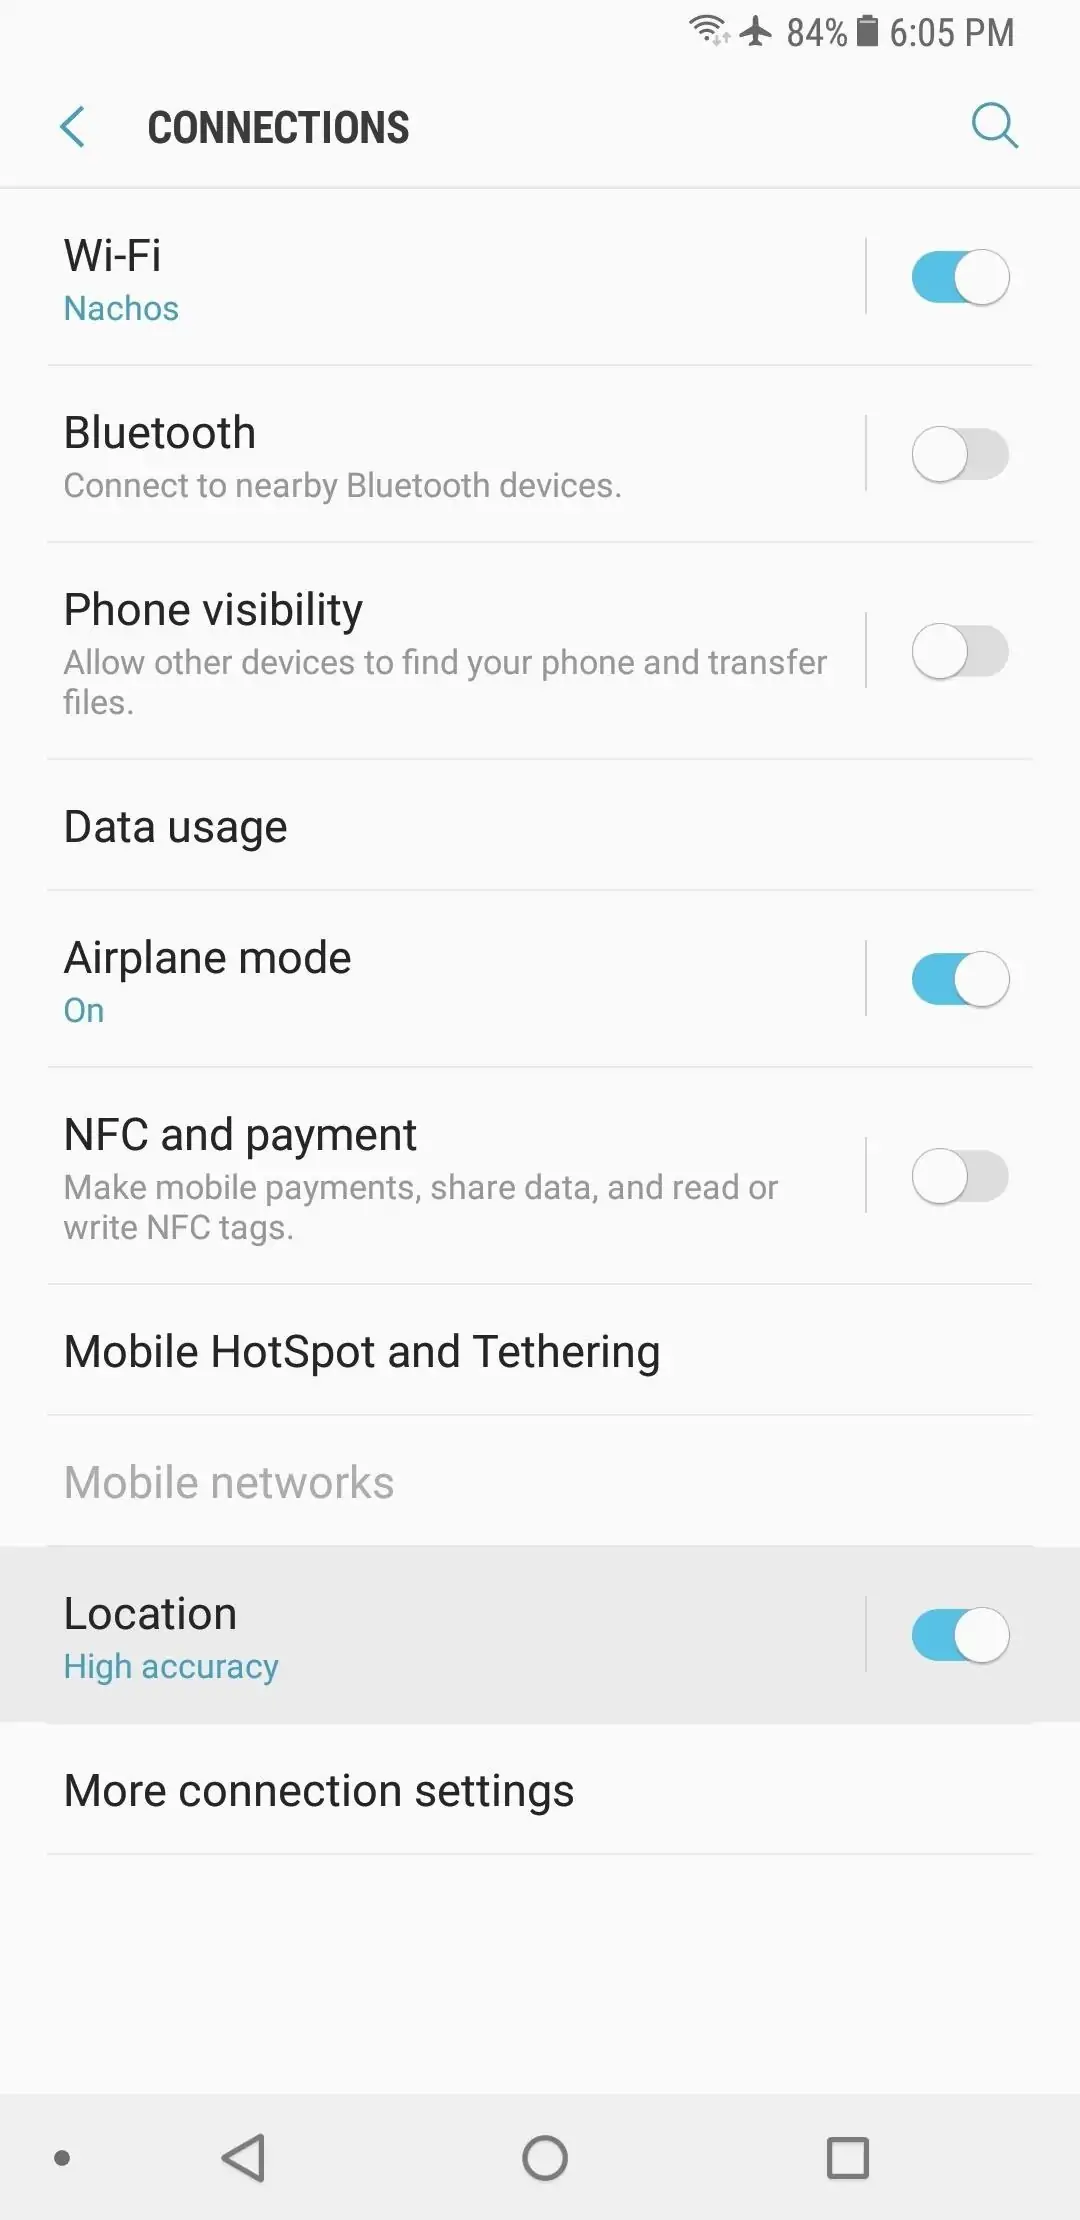
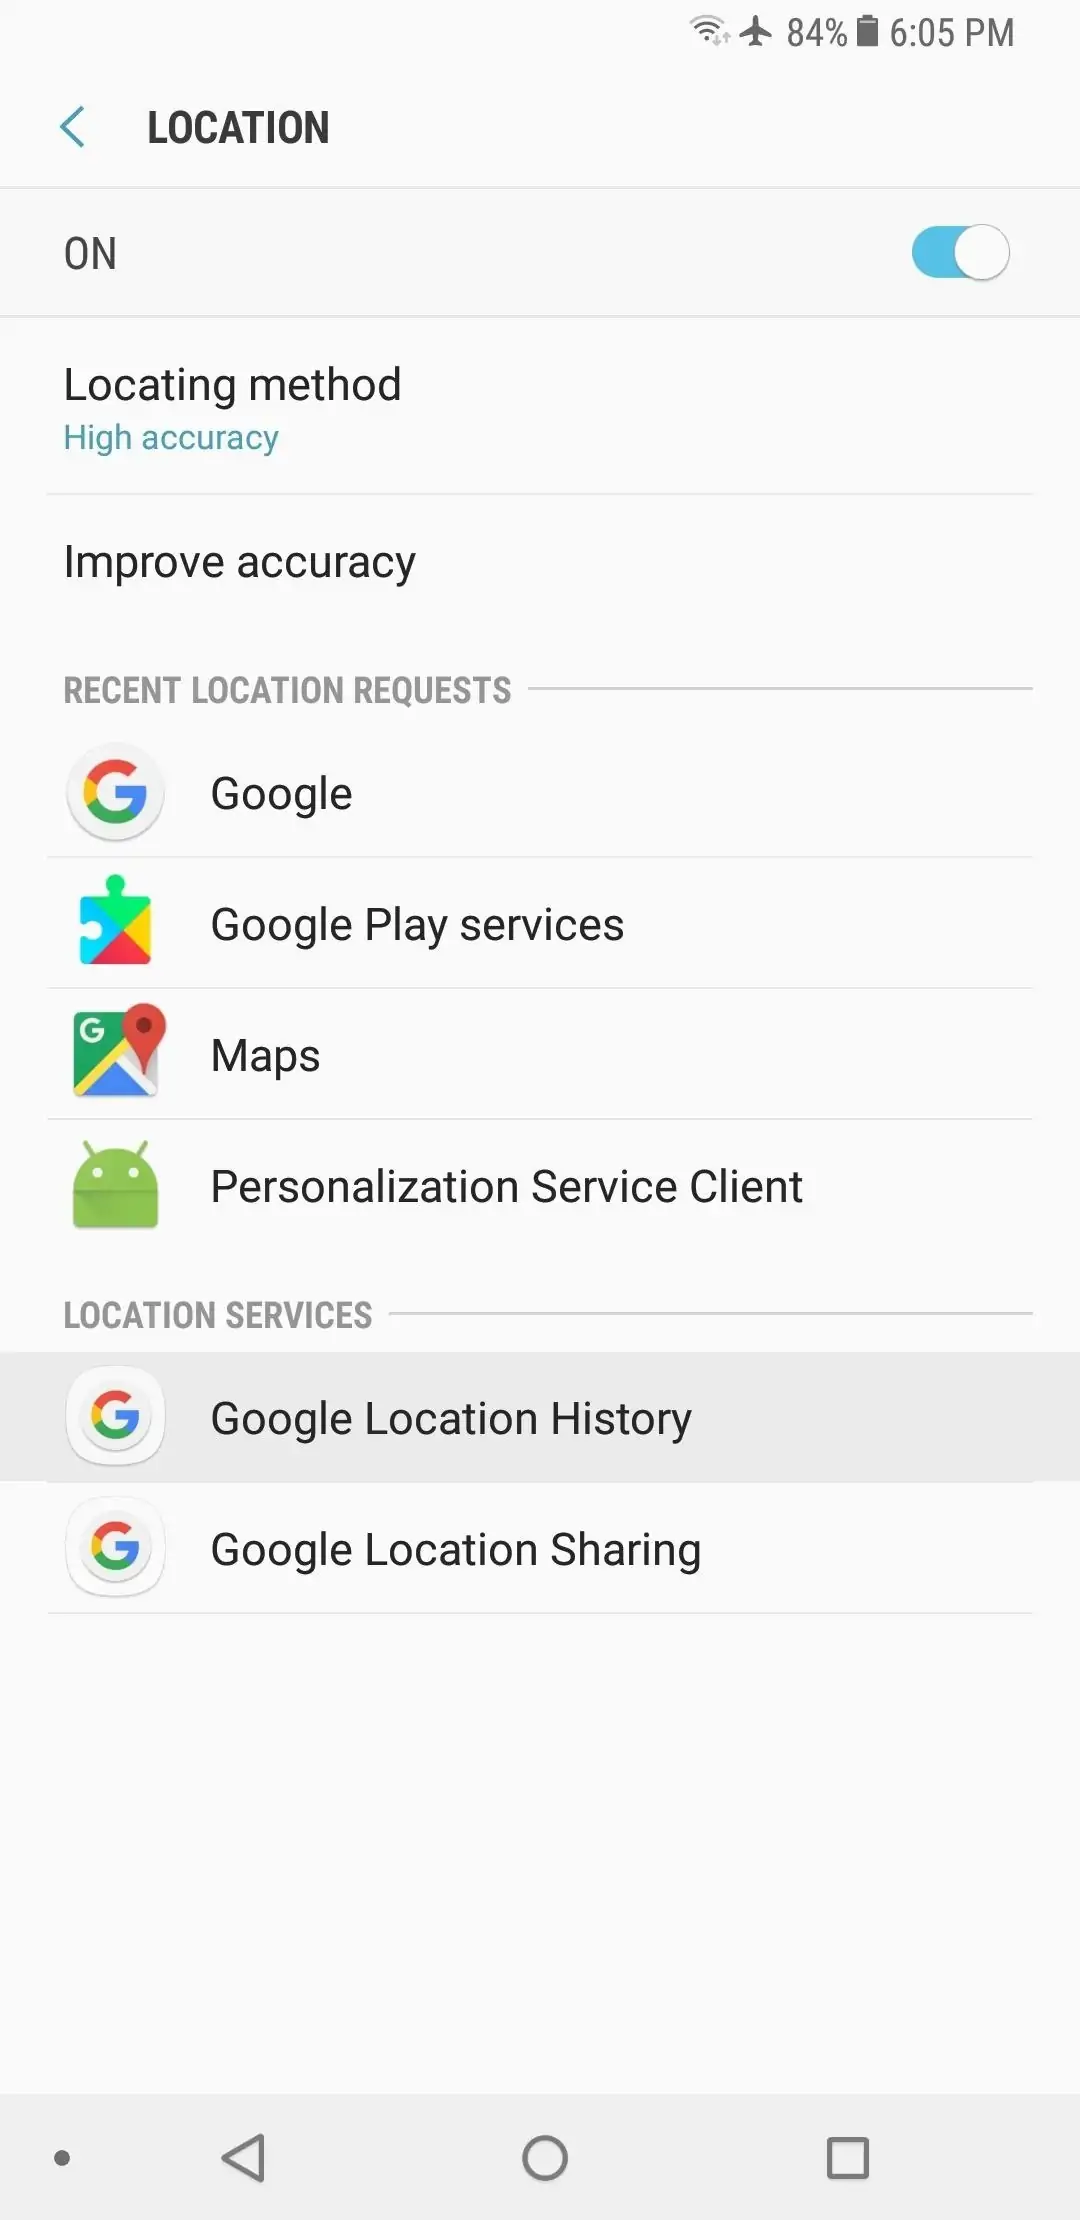
Many people think of Location History as a privacy intrusion and if you’re one of them, you can disable it from Settings -> Connection -> Location.
On the following screen, tap on “Google Location History” and toggle off the switch at the top of the screen.
App popups and notifications
While we’re focused on using our smartphones it’s very easy for a co-worker, a friend, a family member, and even complete strangers (especially in public places) to peek over our shoulder.
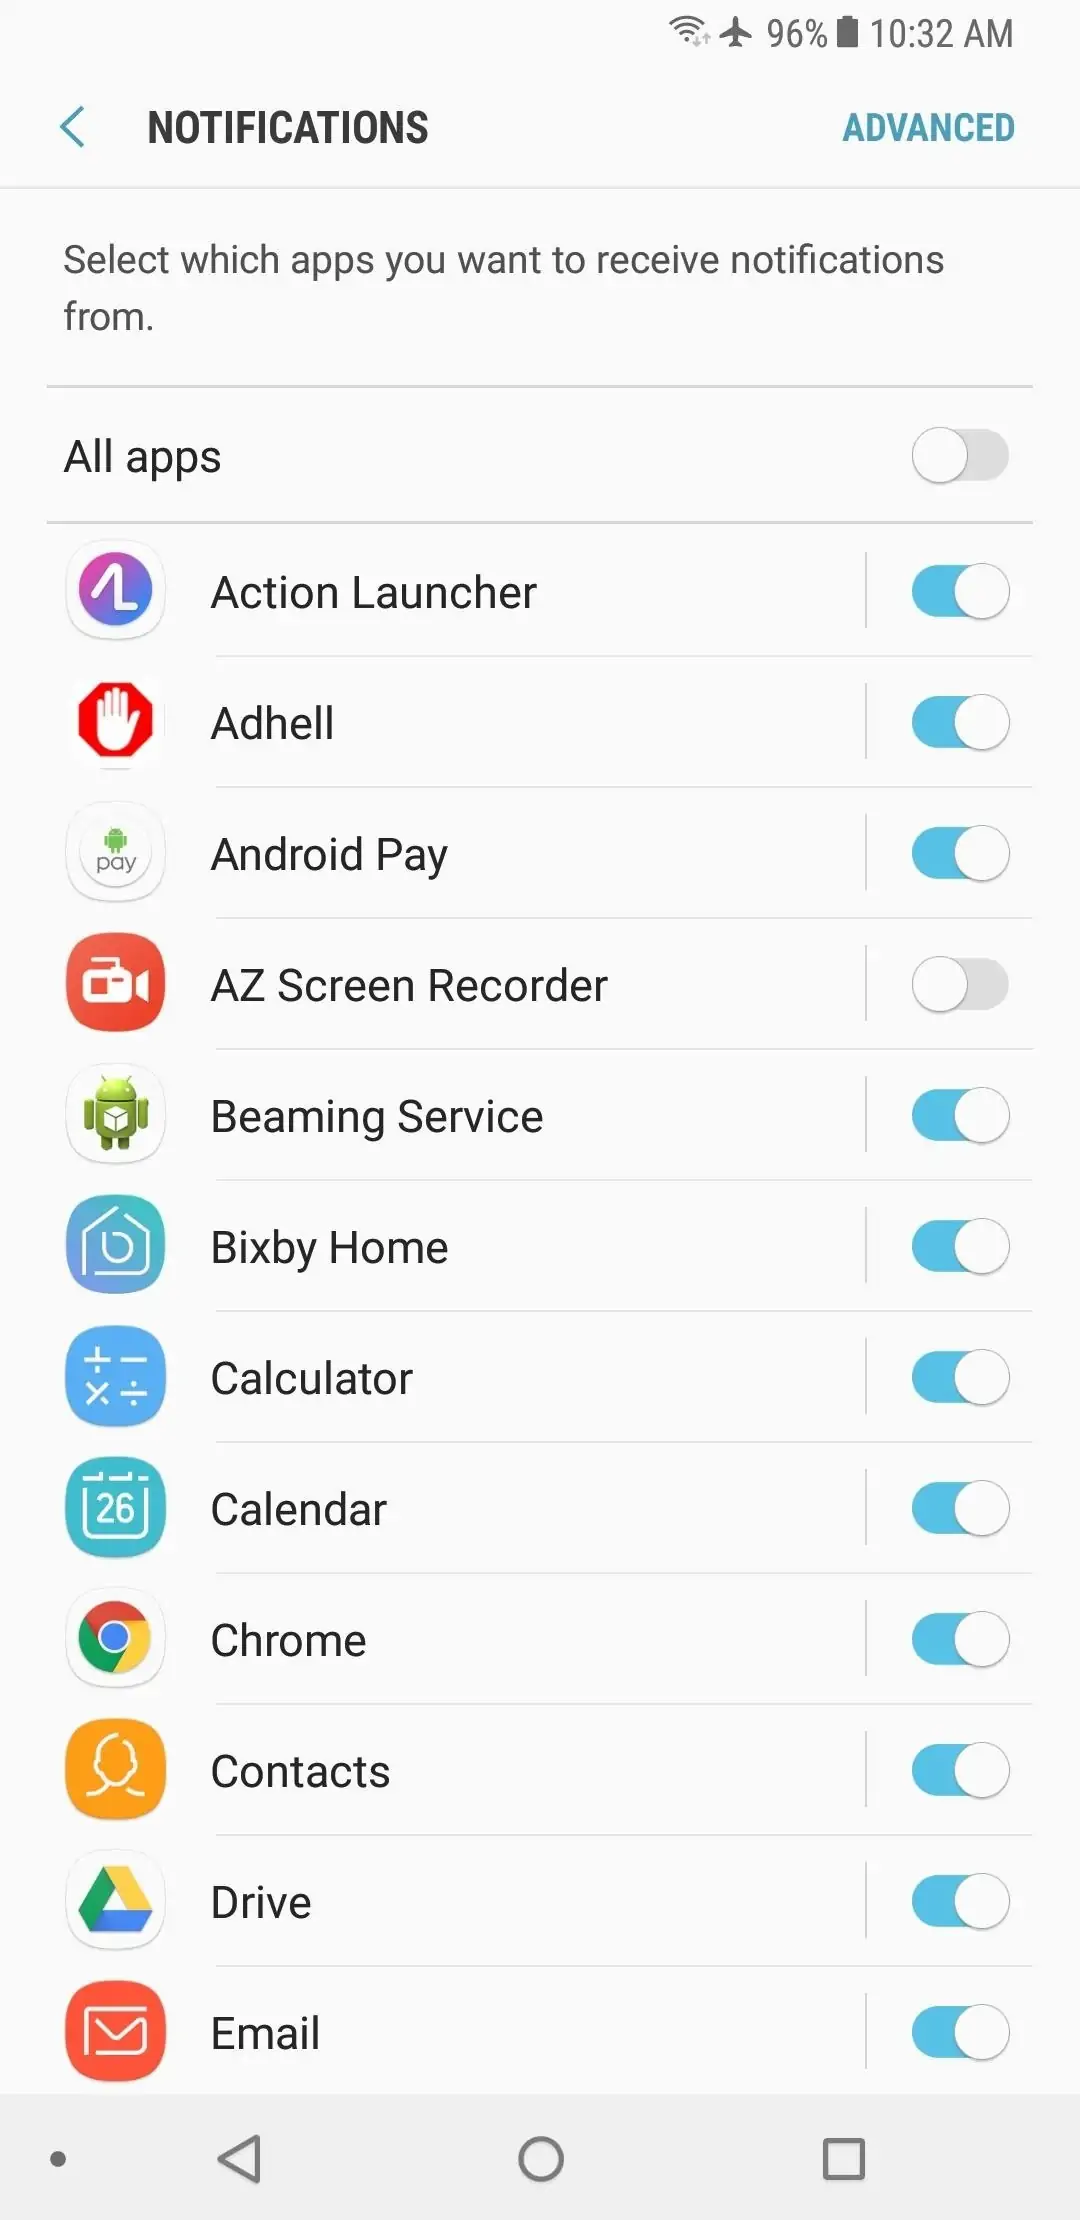
Go to Settings -> Notifications and you’ll have some options for improving your privacy. First of all, you can disable the “All apps” option which would prevent all apps from sending notifications. That’s not an ideal solution.
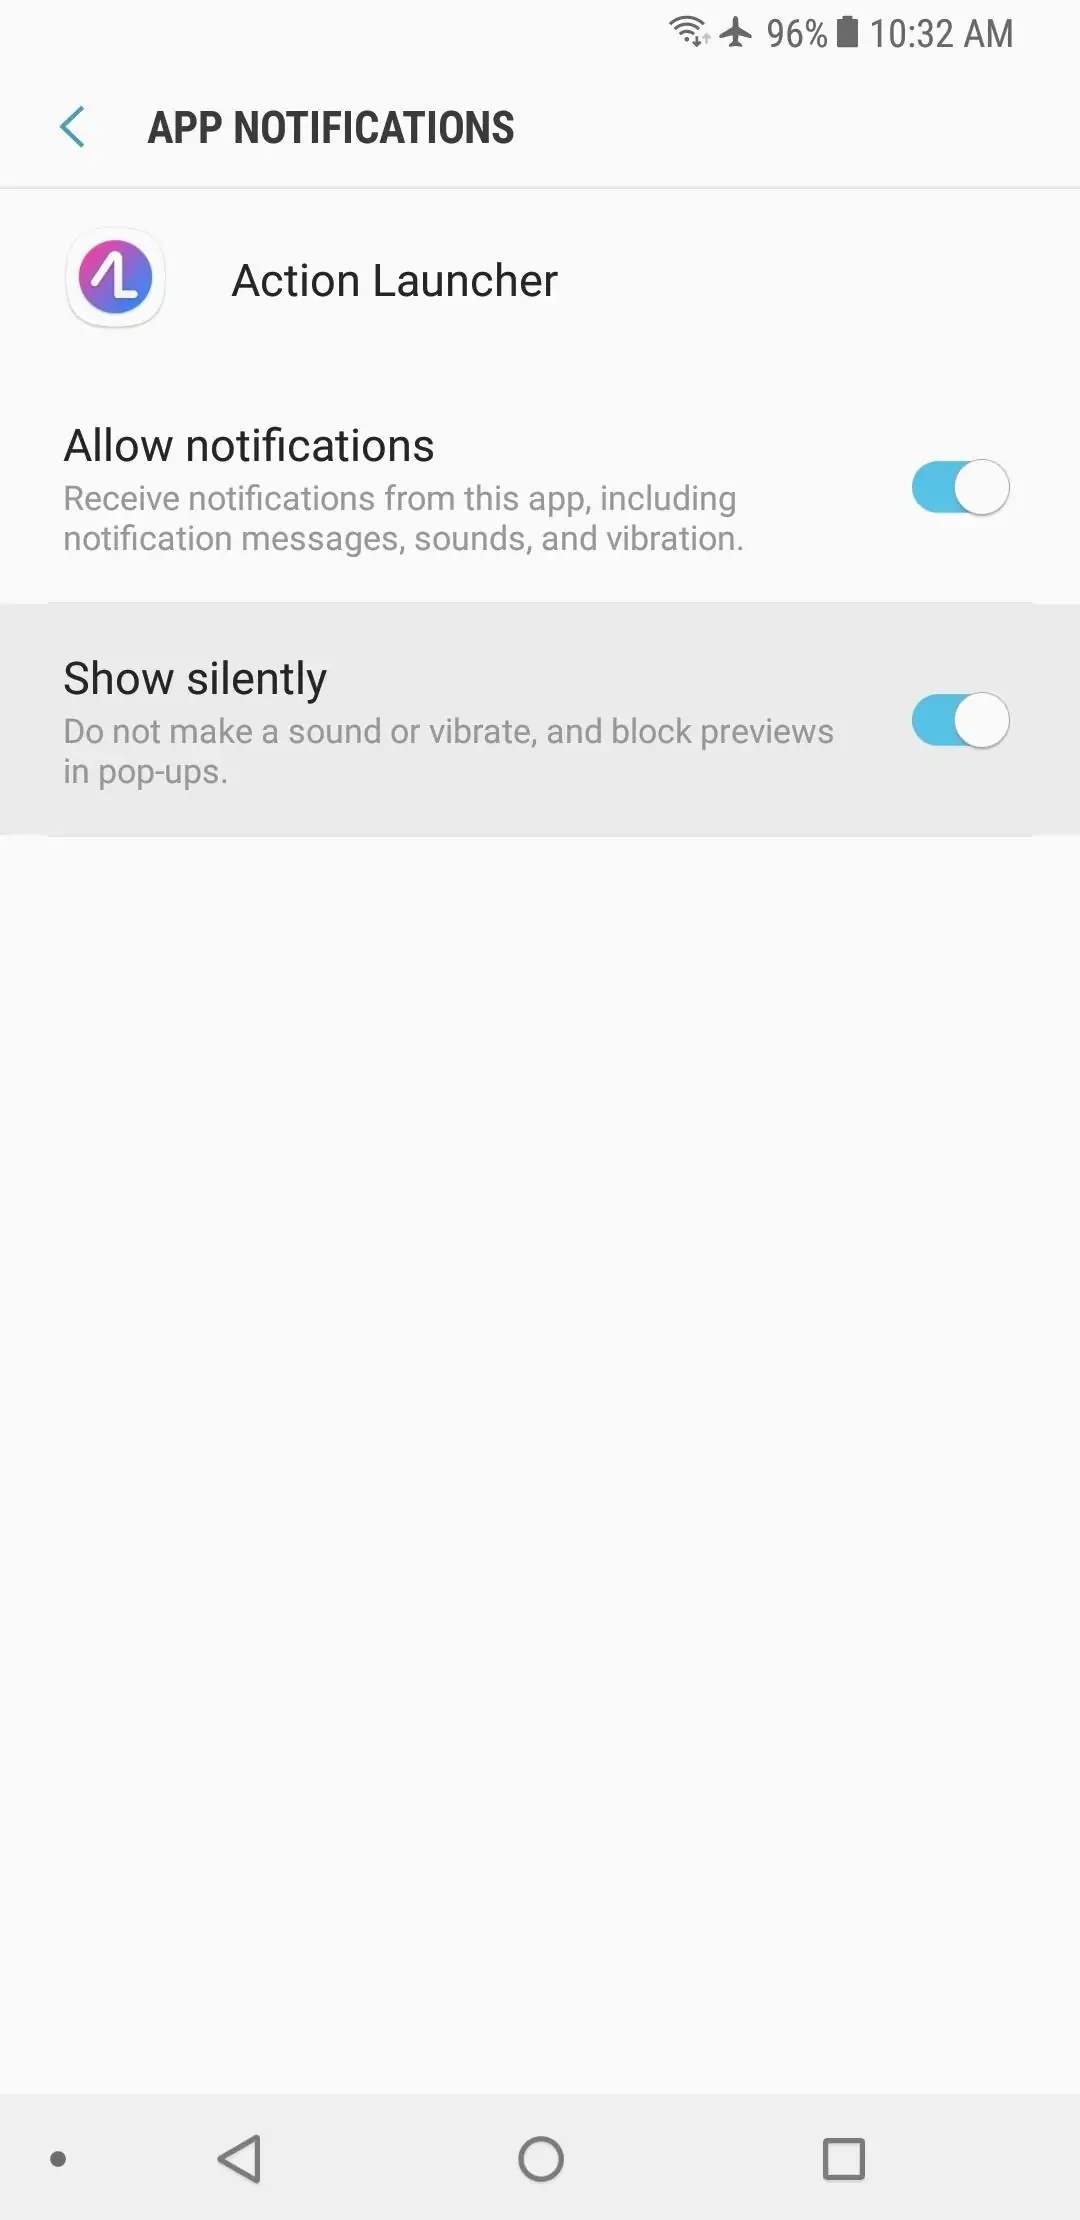
Right below, there’s a list with all the app that can send notifications. You can tap the name of any listed app and another settings page will open. There, you can enable the “Show silently” option which will prevent notification popups from being displayed at the top of the screen. However, you can still read those notifications from the notification drawer, but at least it will be your choice and you have the option to make sure no one else can see them.
Device administrators
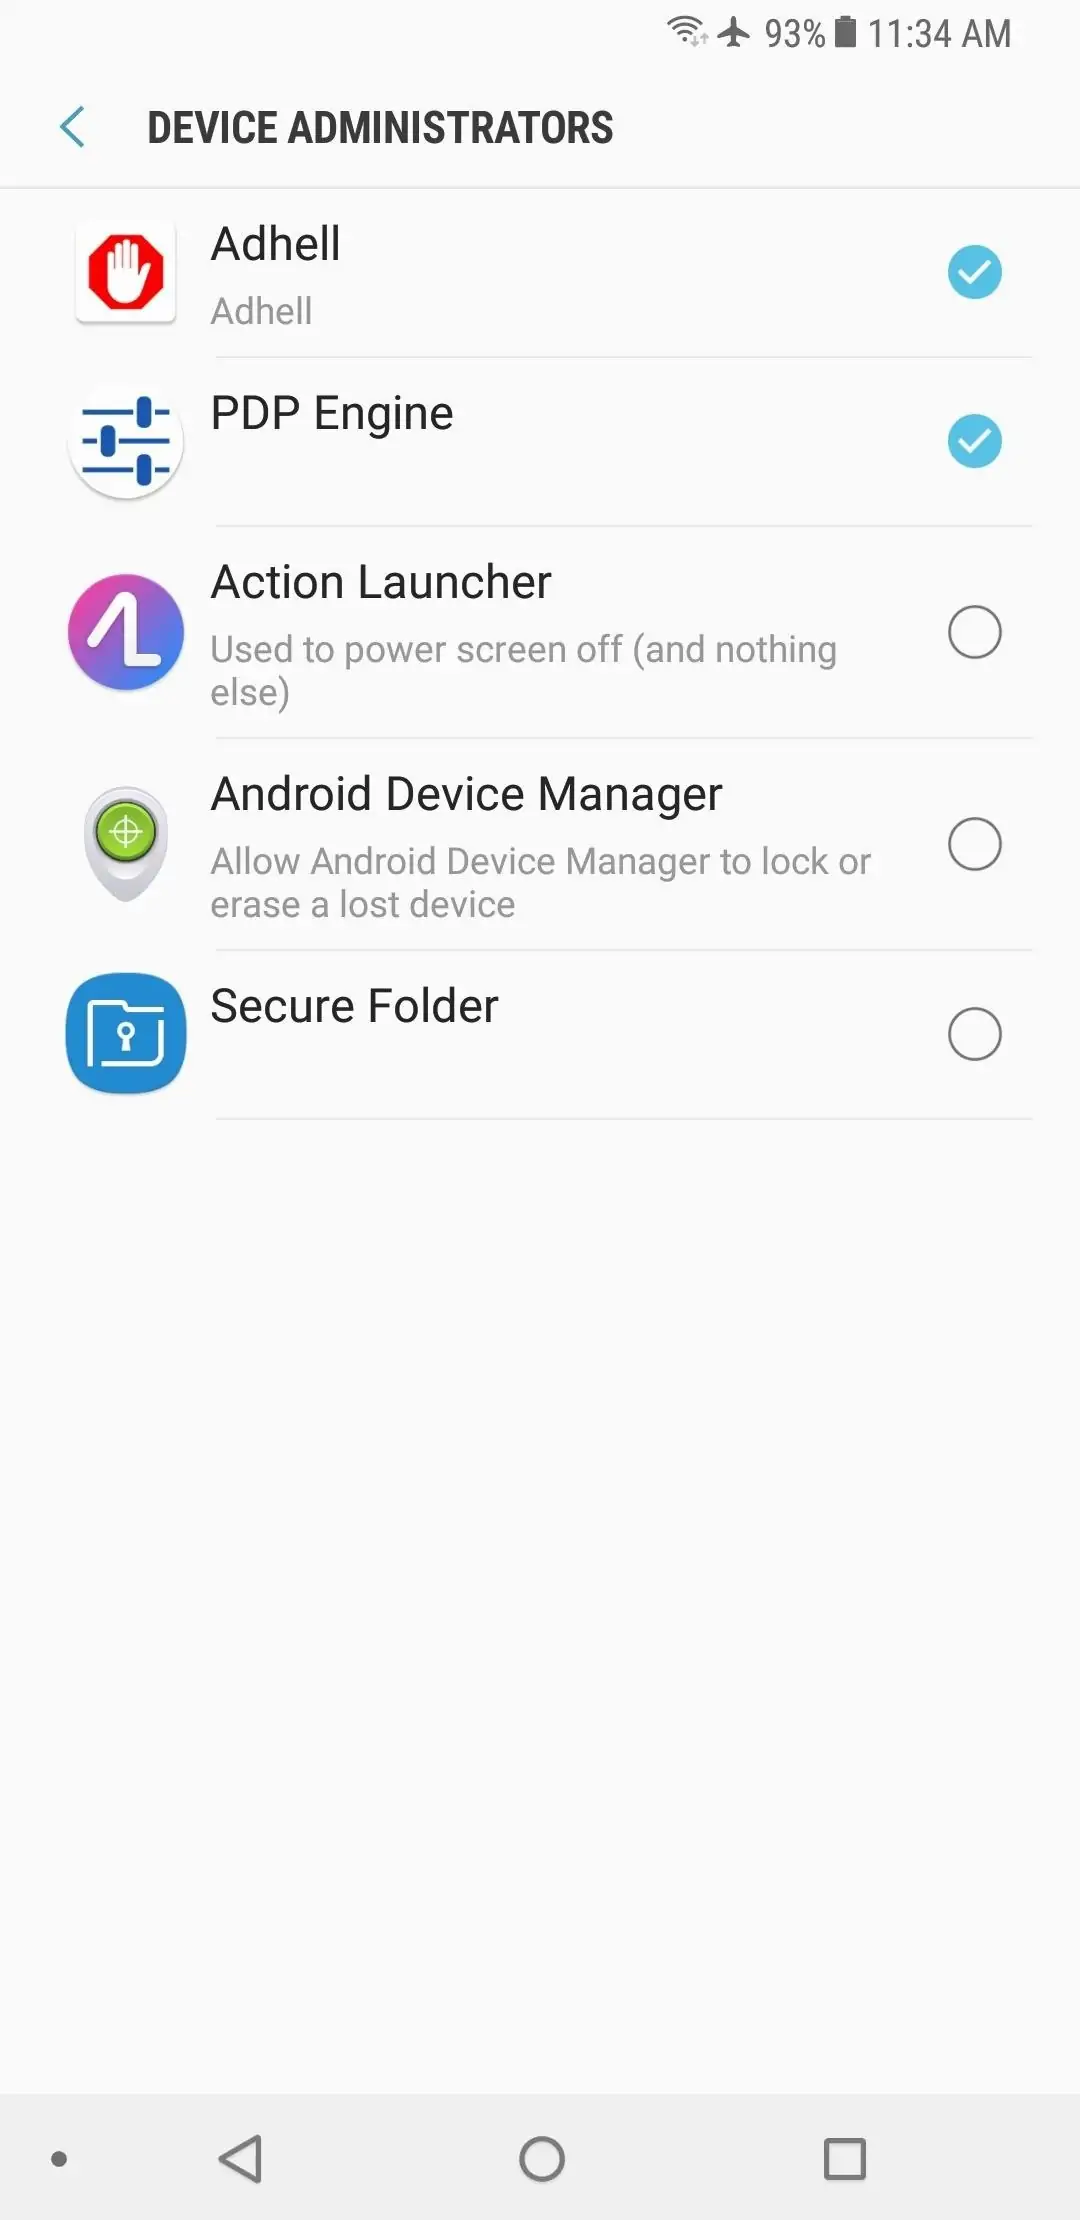
“Device administrator” access is one of the requests some apps need for their features to work. They can never get device administrator access unless you provide it, but it’s one of those permissions that are very important when it comes to security.
For example, malicious apps profit from “Device administrator” access to prevent you from uninstalling them. Even if it’s the user who provides access, it can happen by accident or because he/she didn’t know what this permission means at that time.
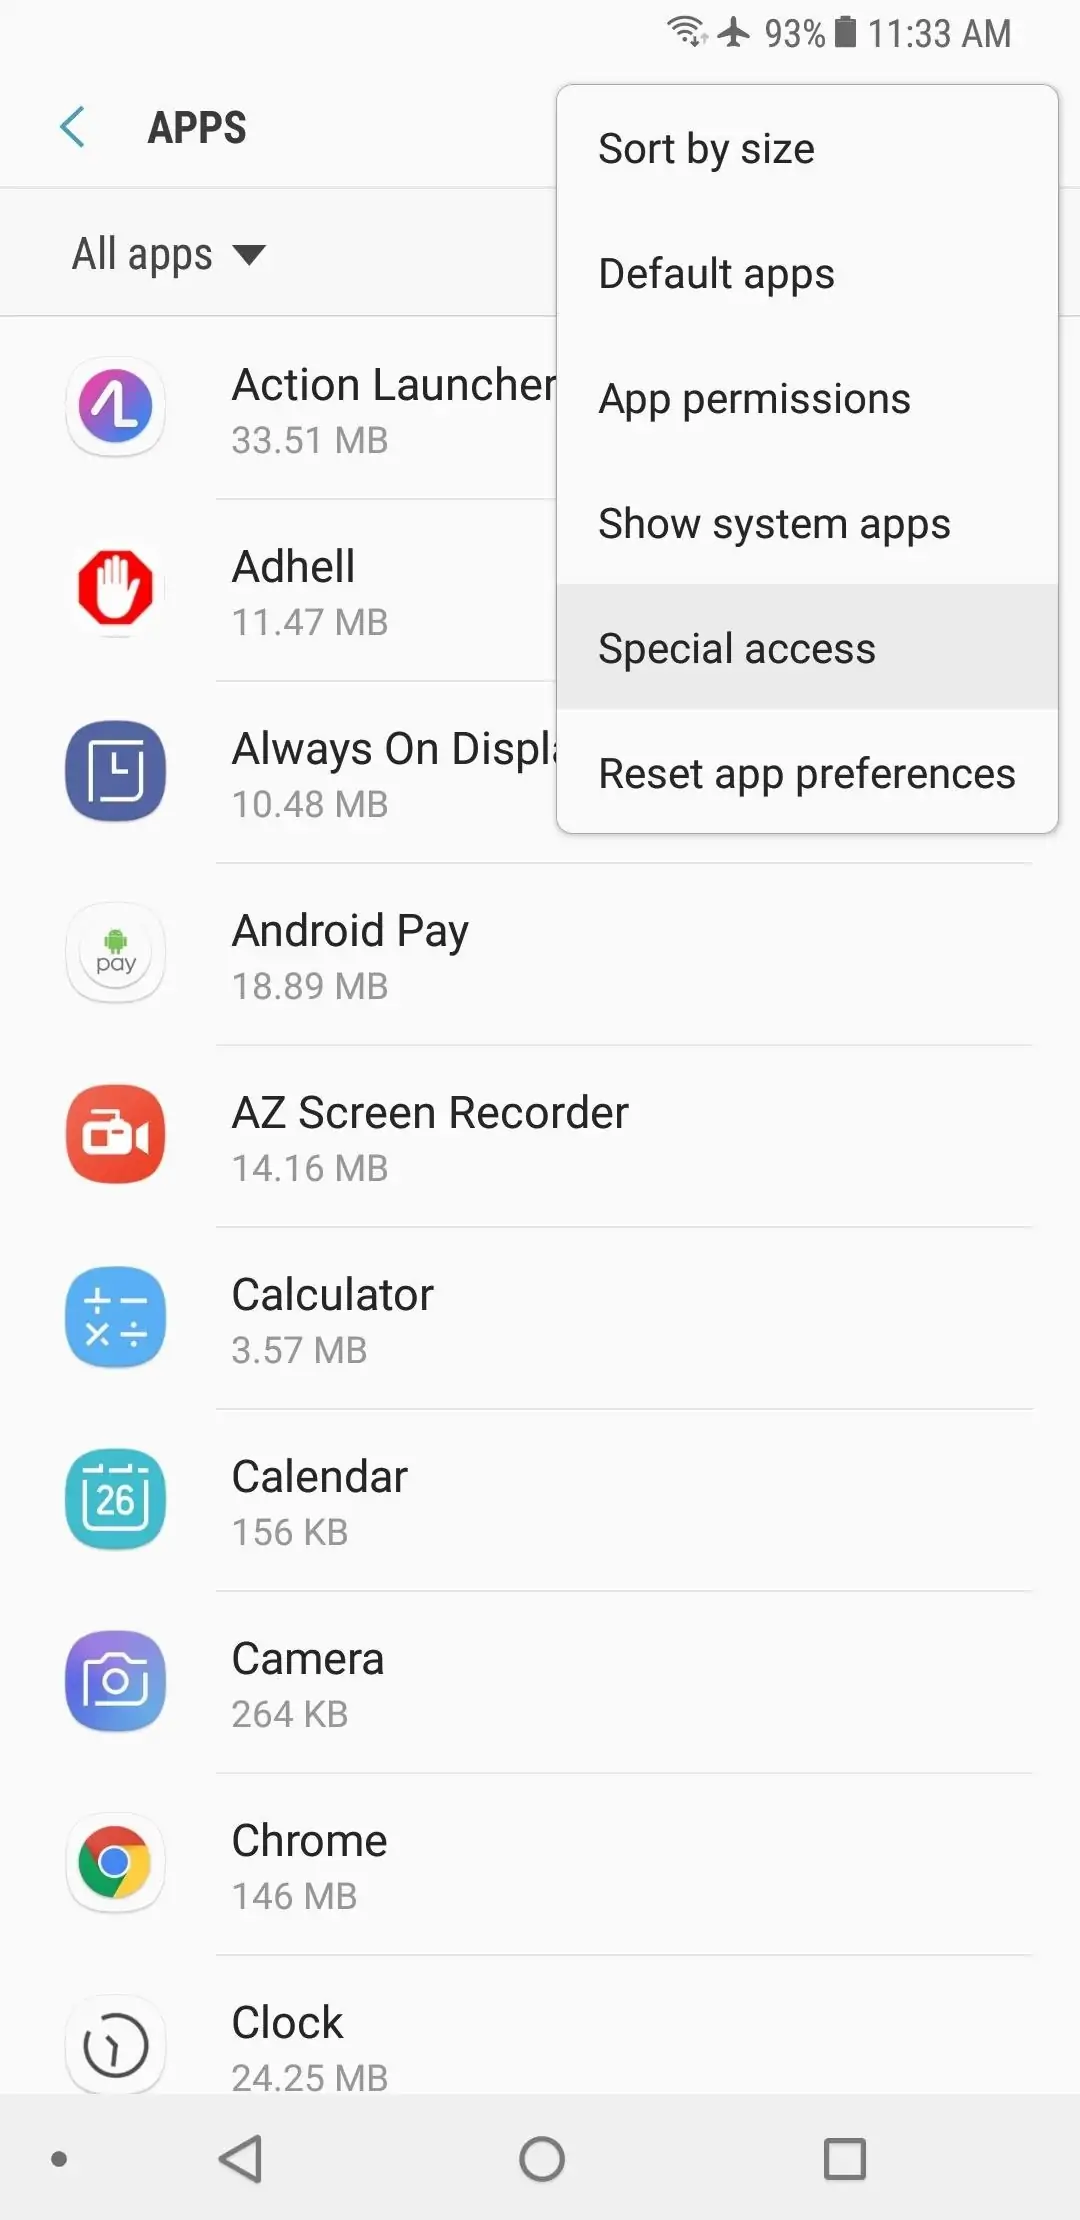
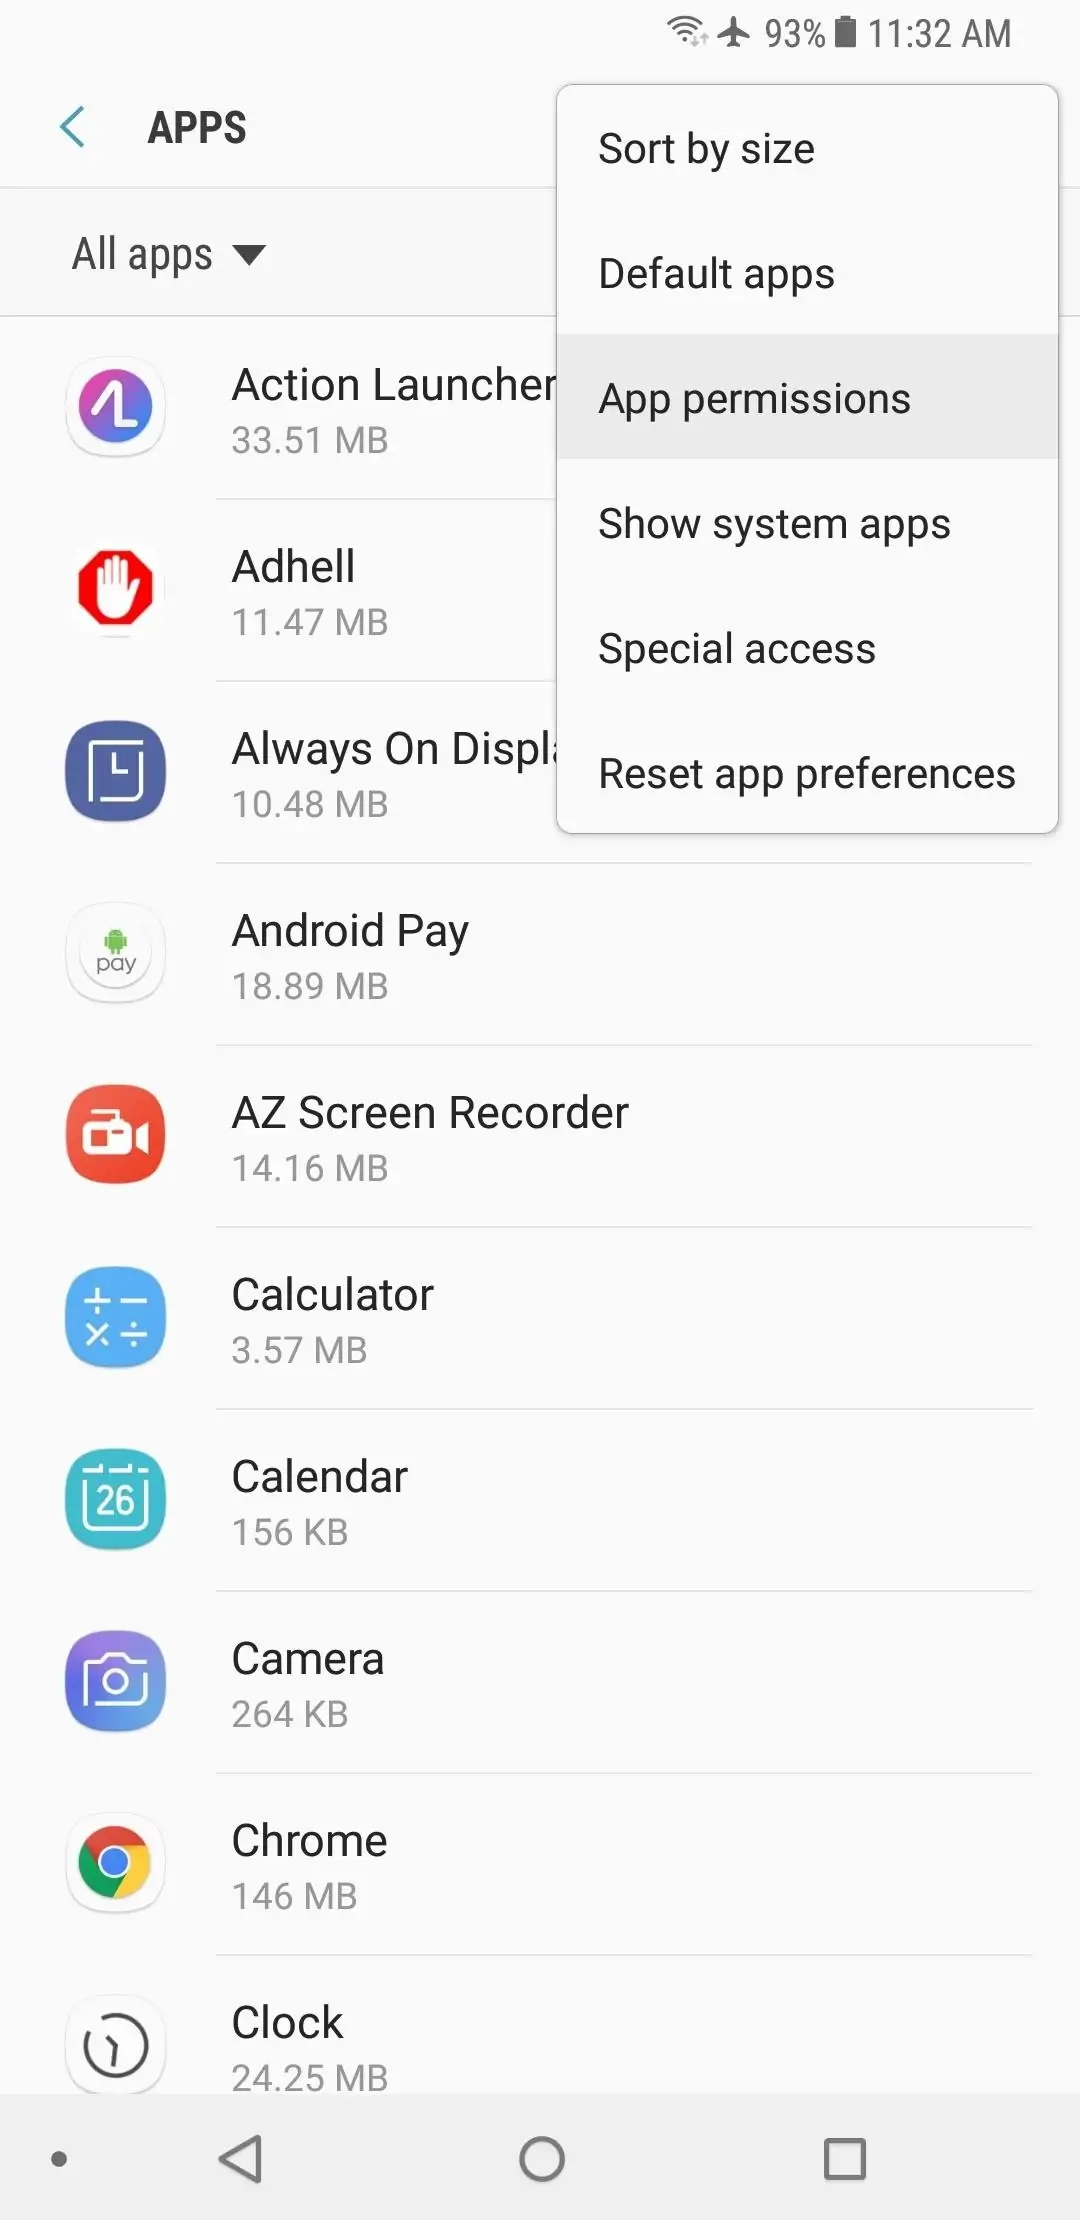
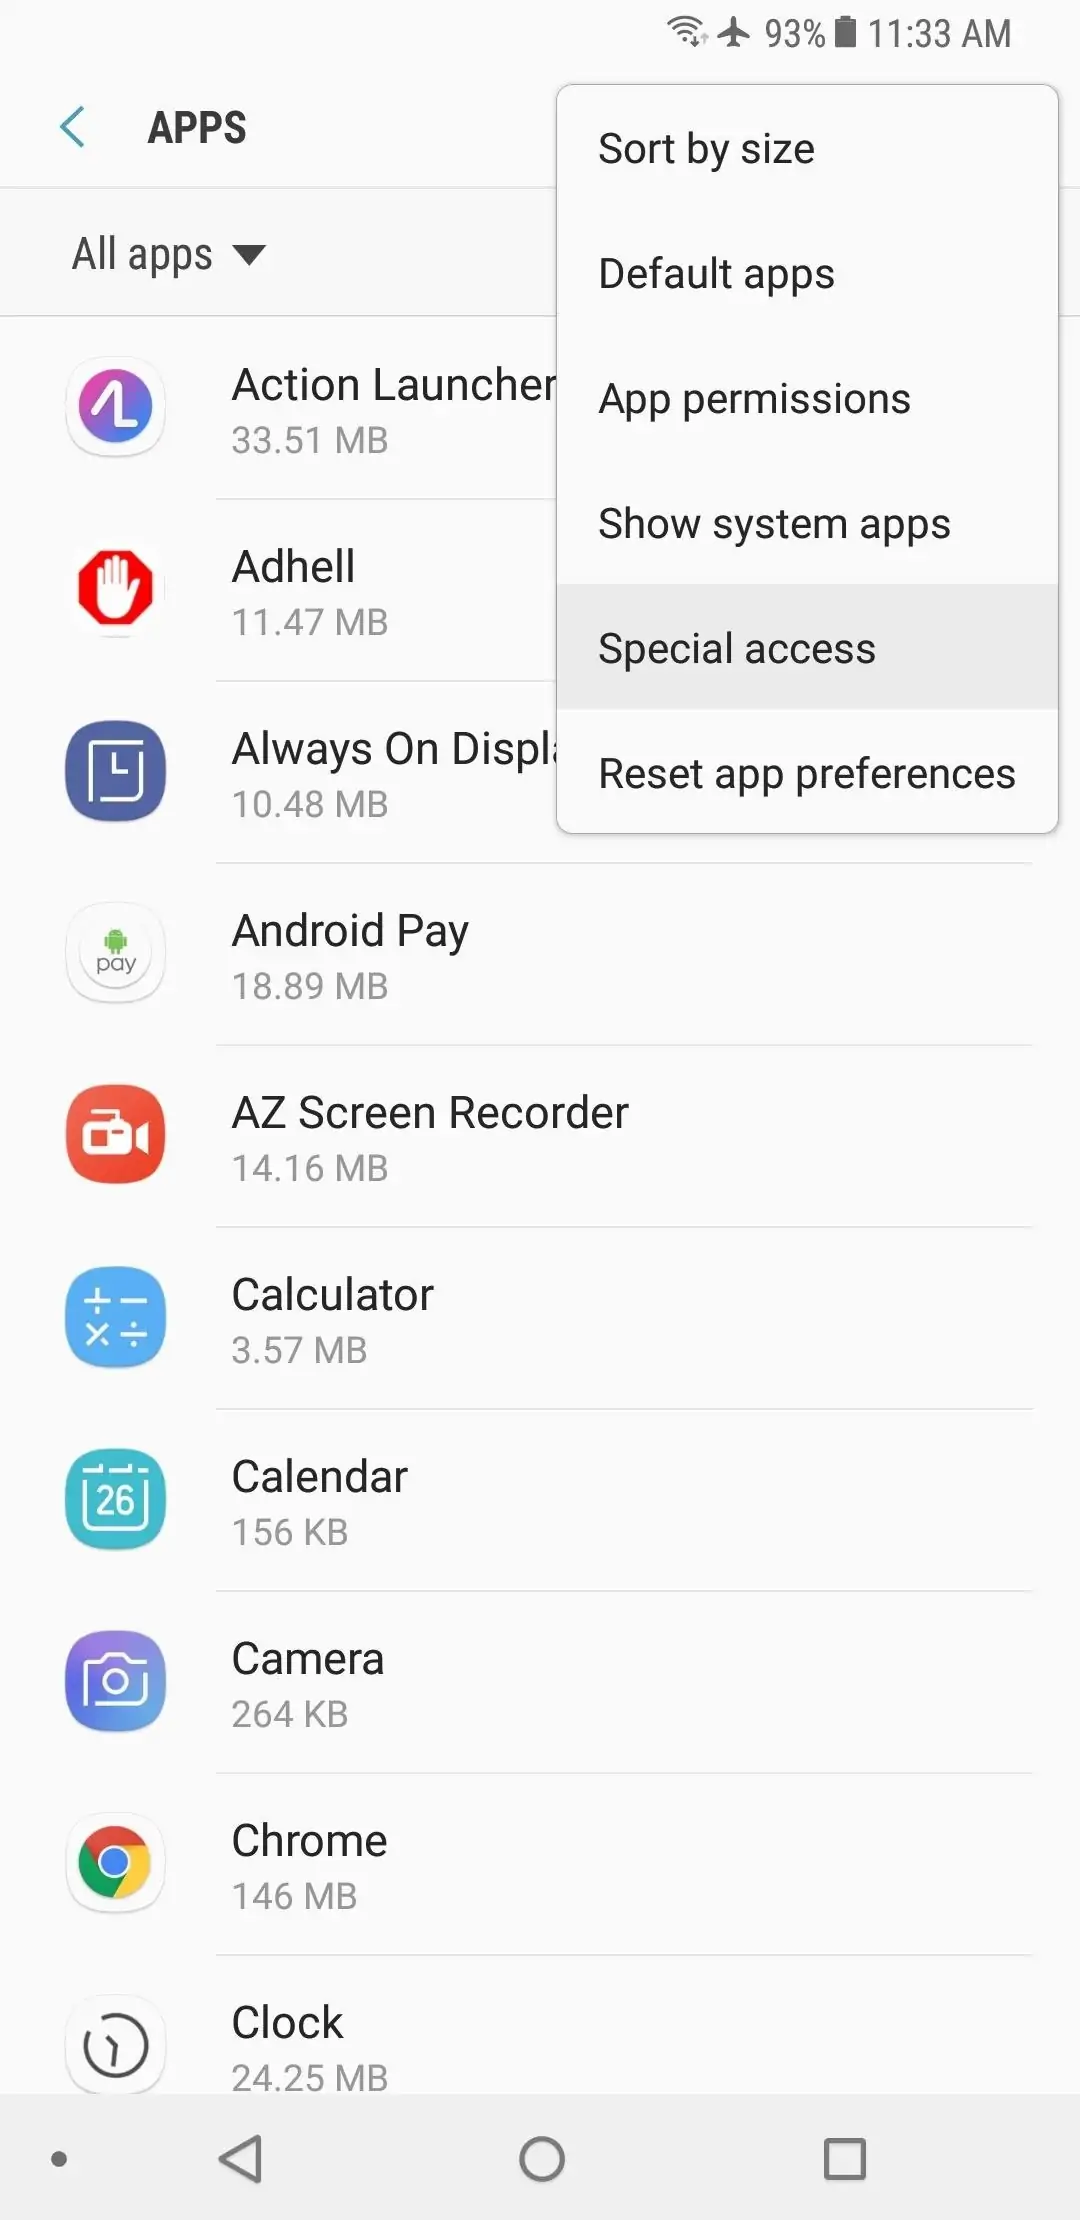
It’s a good idea to check which apps have “Device administrator” access and remove the ones you find suspicious or don’t remember granting them this permission. To do this, navigate to Settings -> Apps and tap on the menu button in the upper-right corner then select “Special access” from the listed options.
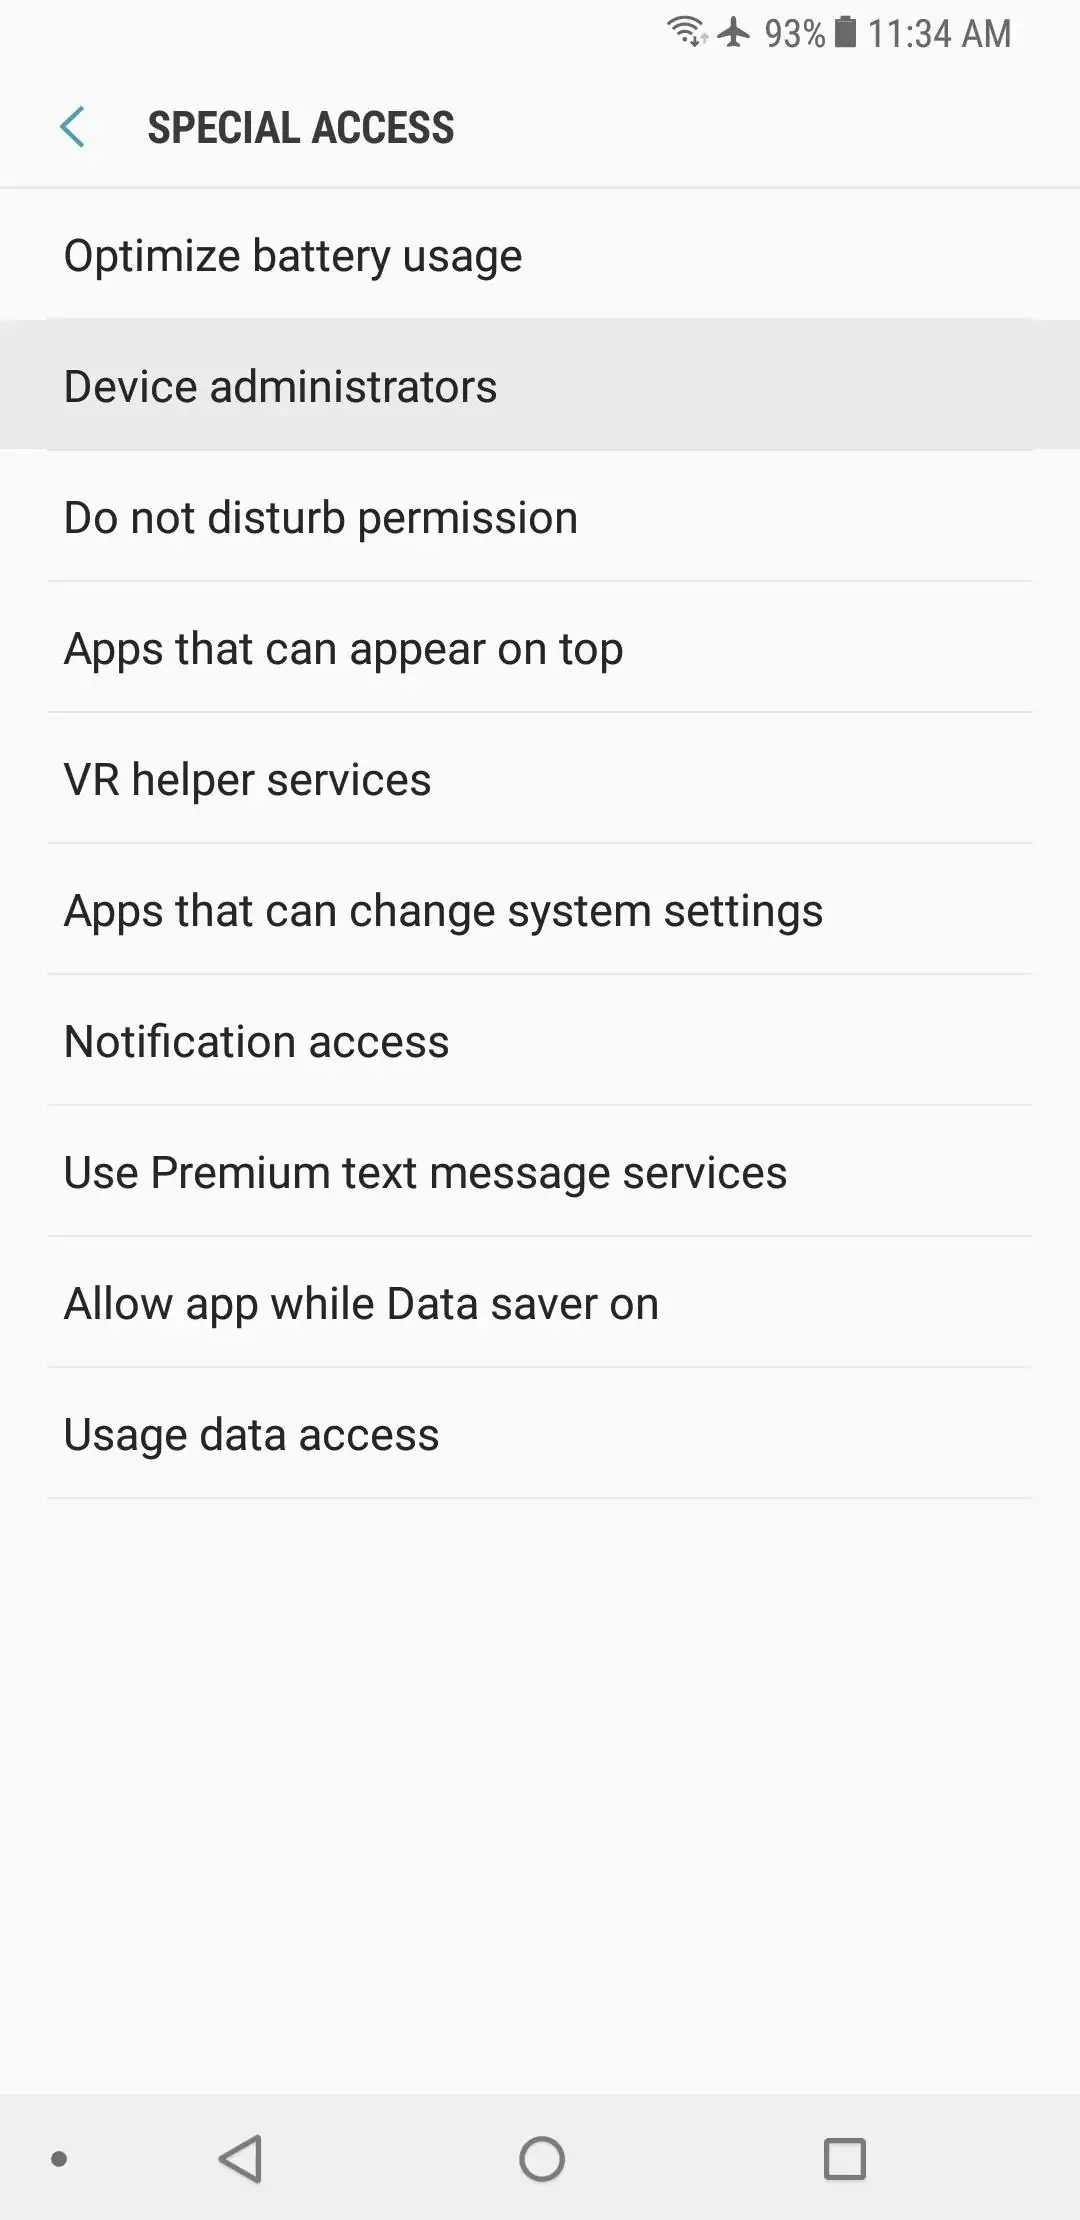
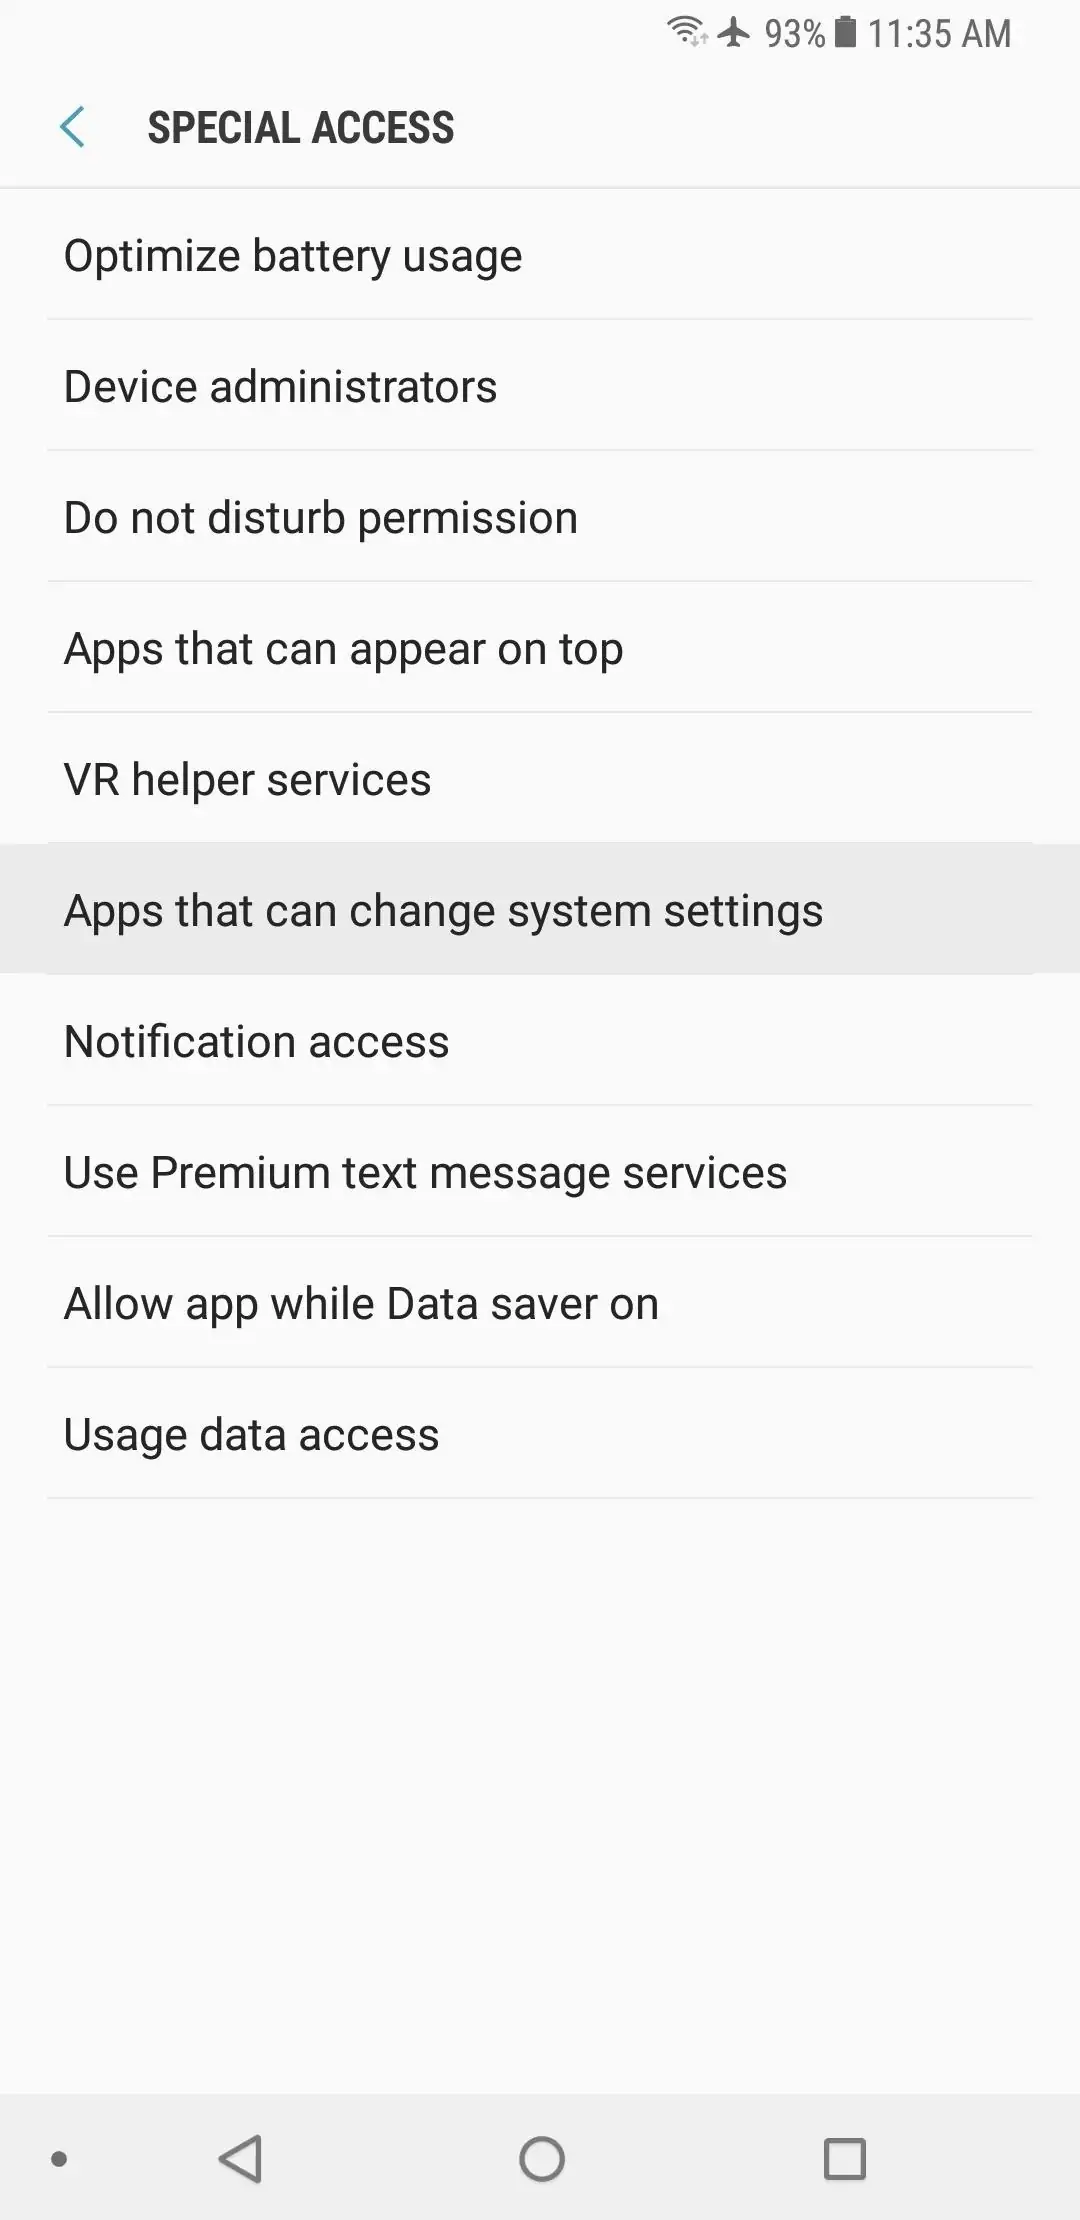
To continue, tap on “Device administrators” to see all the apps that have this permission. Then, you just need to deselect the ones you consider suspicious.
Camera, location & microphone access
A lot of apps ask for permissions during their welcome guide and it’s pretty easy to miss them if you just hit “Next” to go through it faster. It’s a good idea to review current app permissions every now and then.
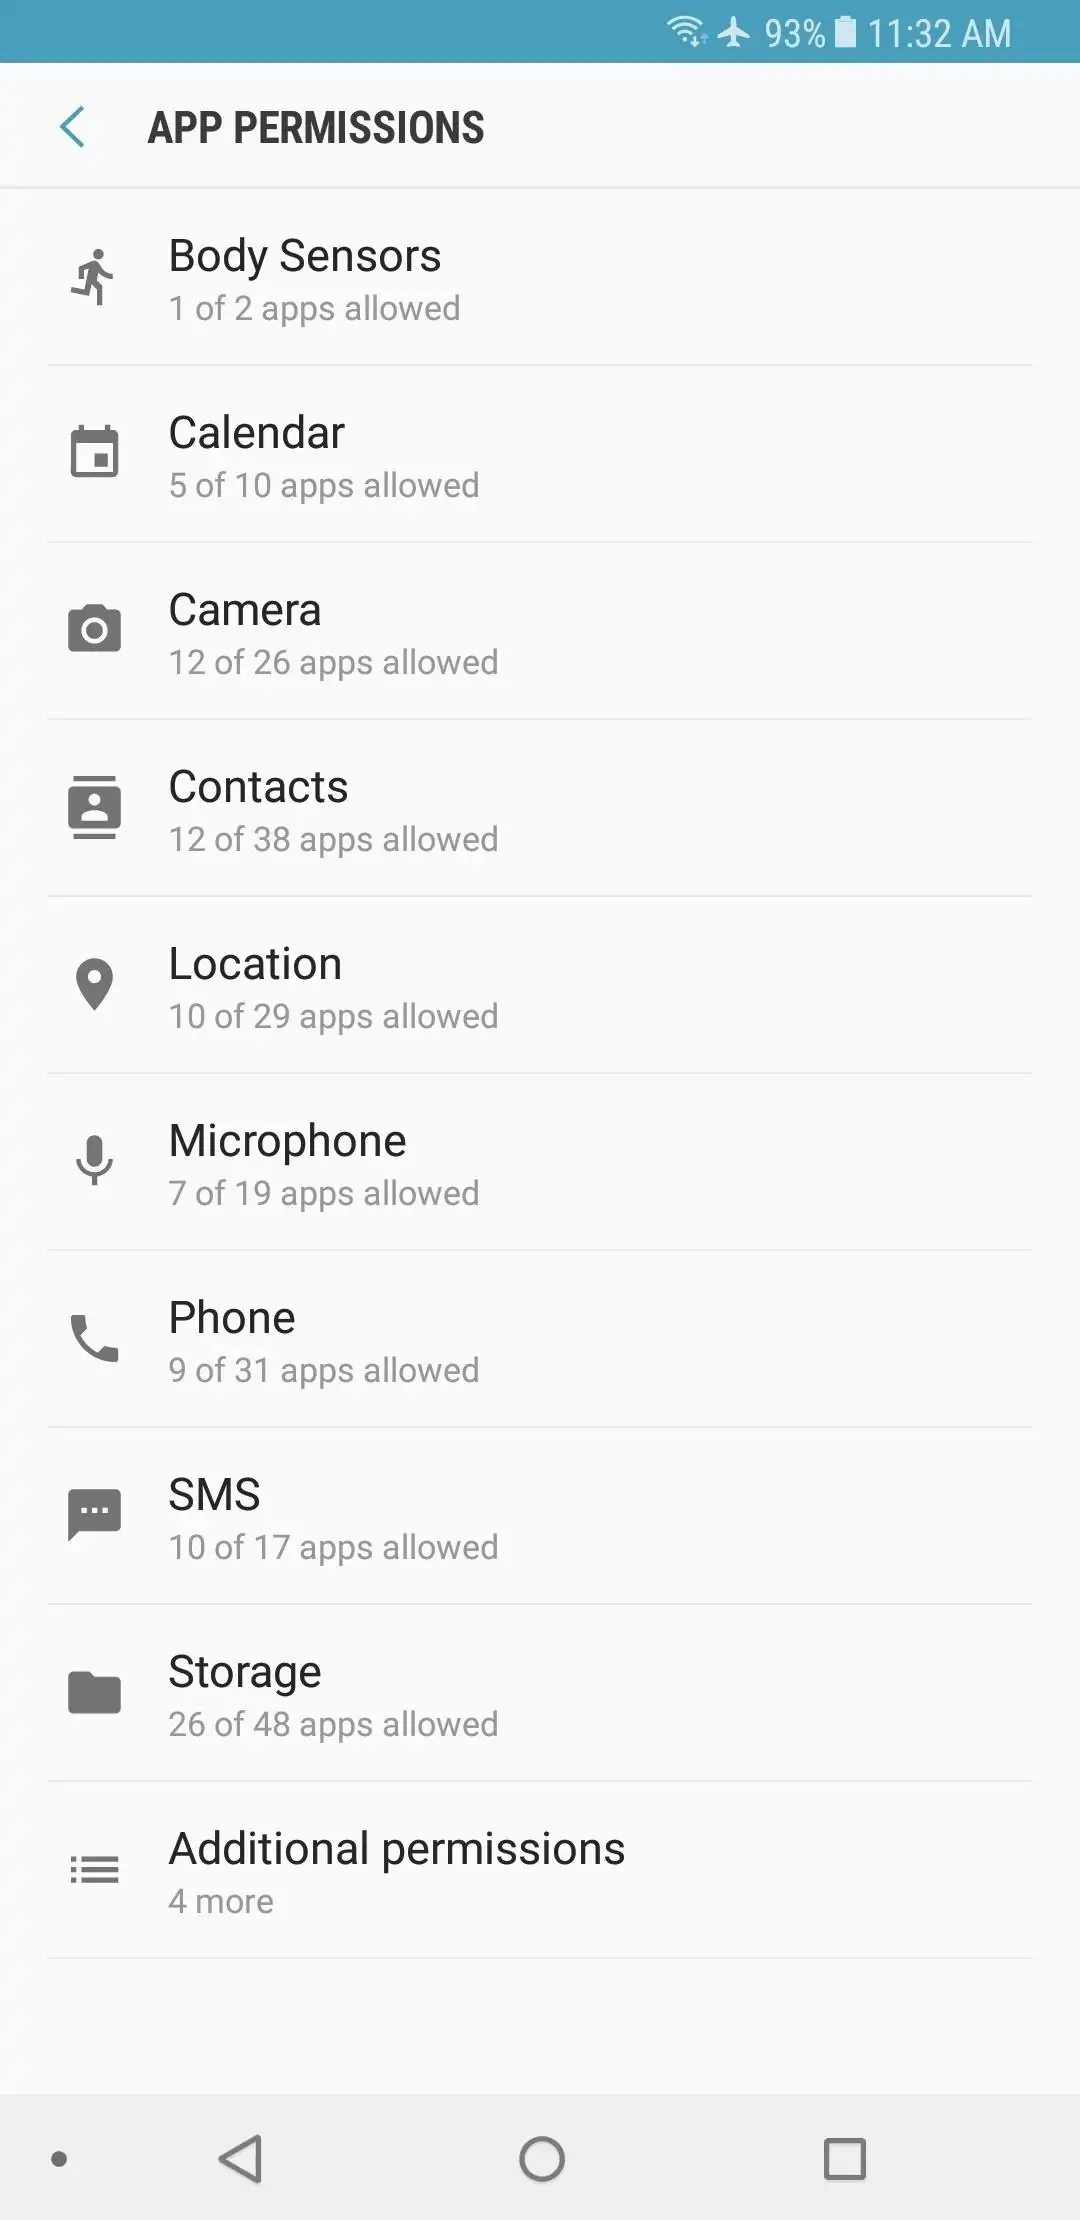
To do it, go to Settings -> Apps and tap the menu button in the upper-right corner. Select “App permissions” from the listed options.
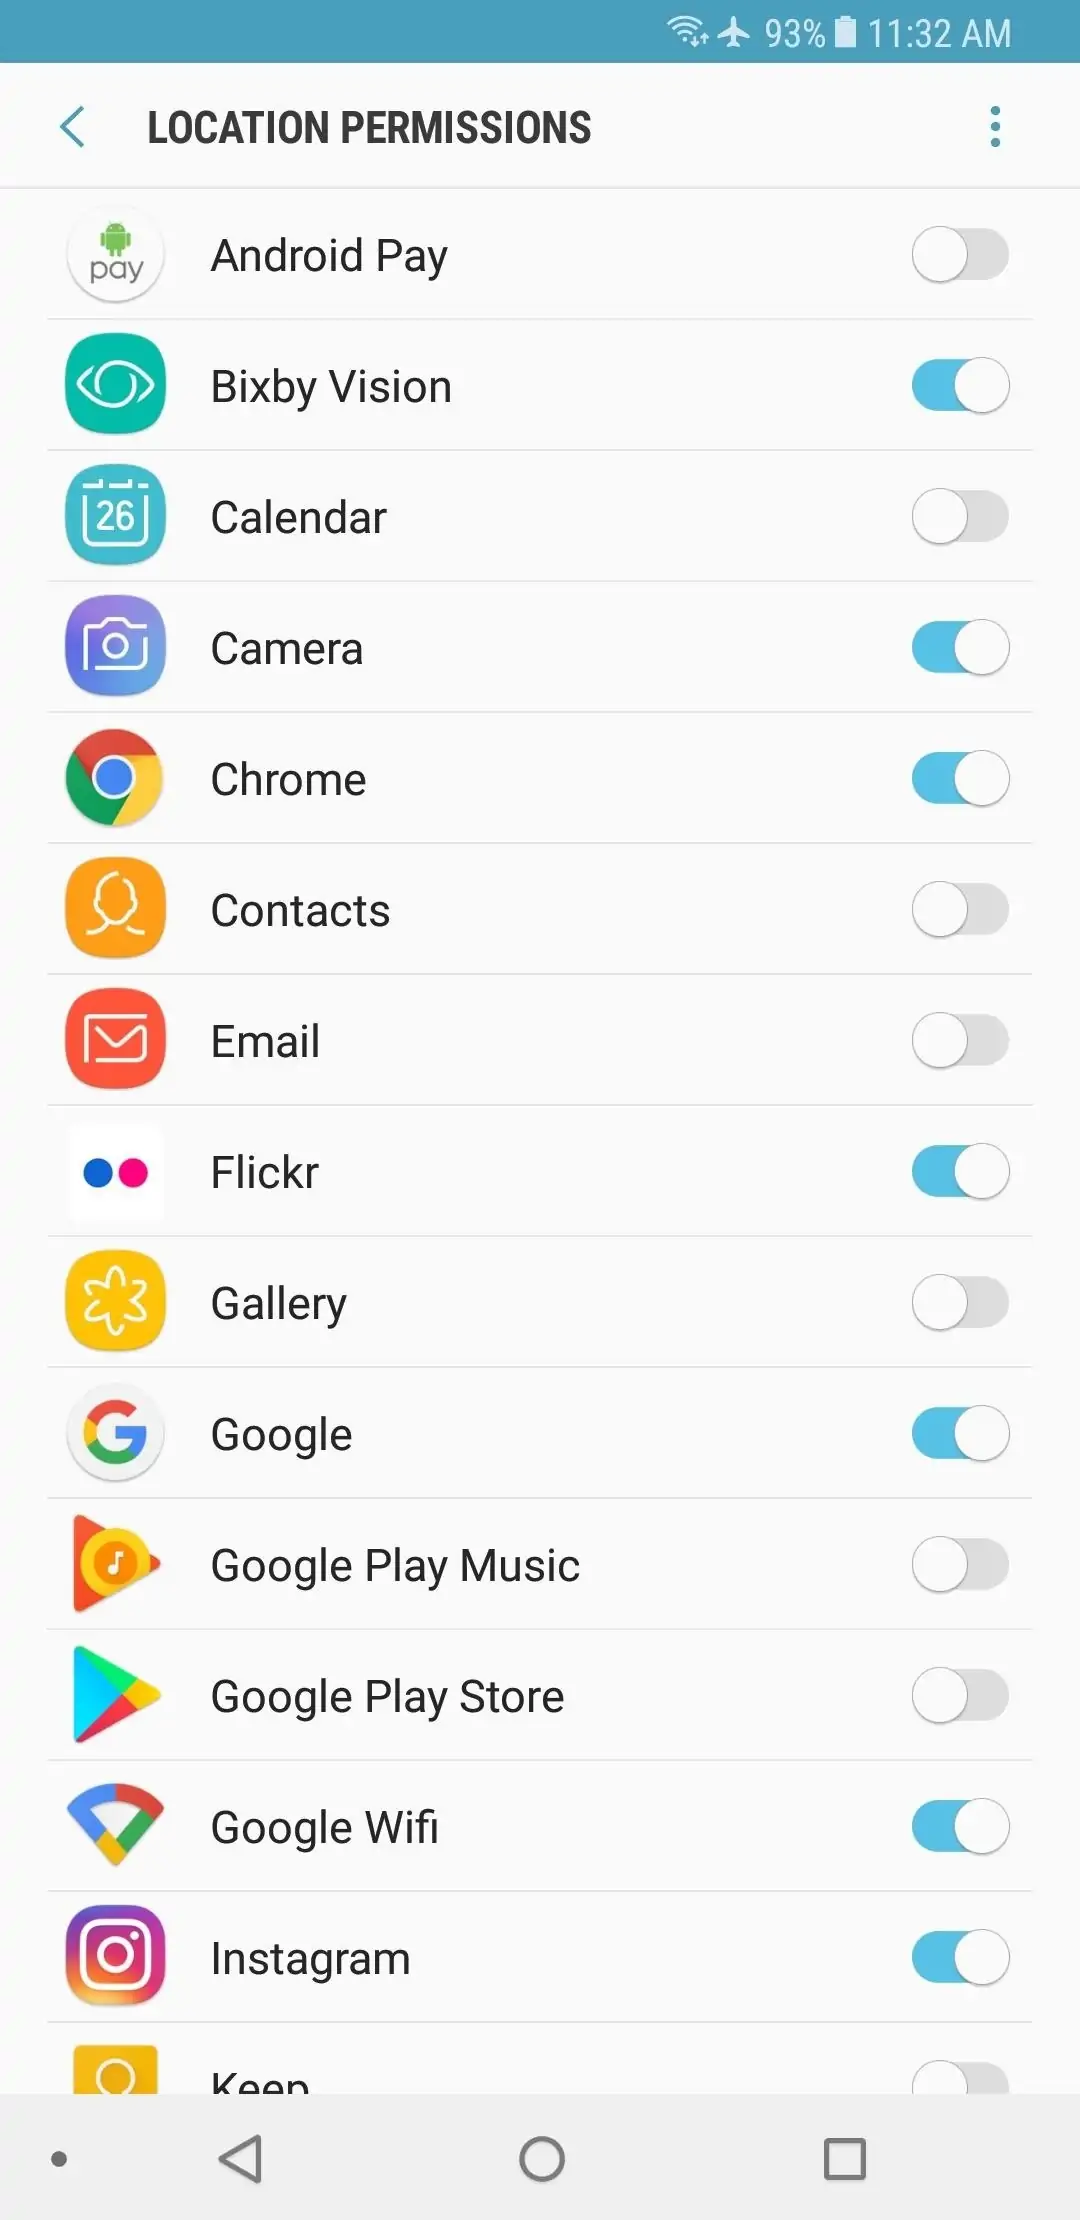
On the App Permissions screen you will need to tap on “Camera”, “Location”, and “Microphone” one at a time, to review and customize which apps can access them. There are other permissions listed there and you can certainly analyze those as well, but these three are the most sensitive ones.
Apps that can change system settings
There’s a special Android permission which allows apps to enable and disable system settings. While this is a useful permission and most of the apps that require it wouldn’t work with out it, it can also be dangerous when granted to the wrong apps.
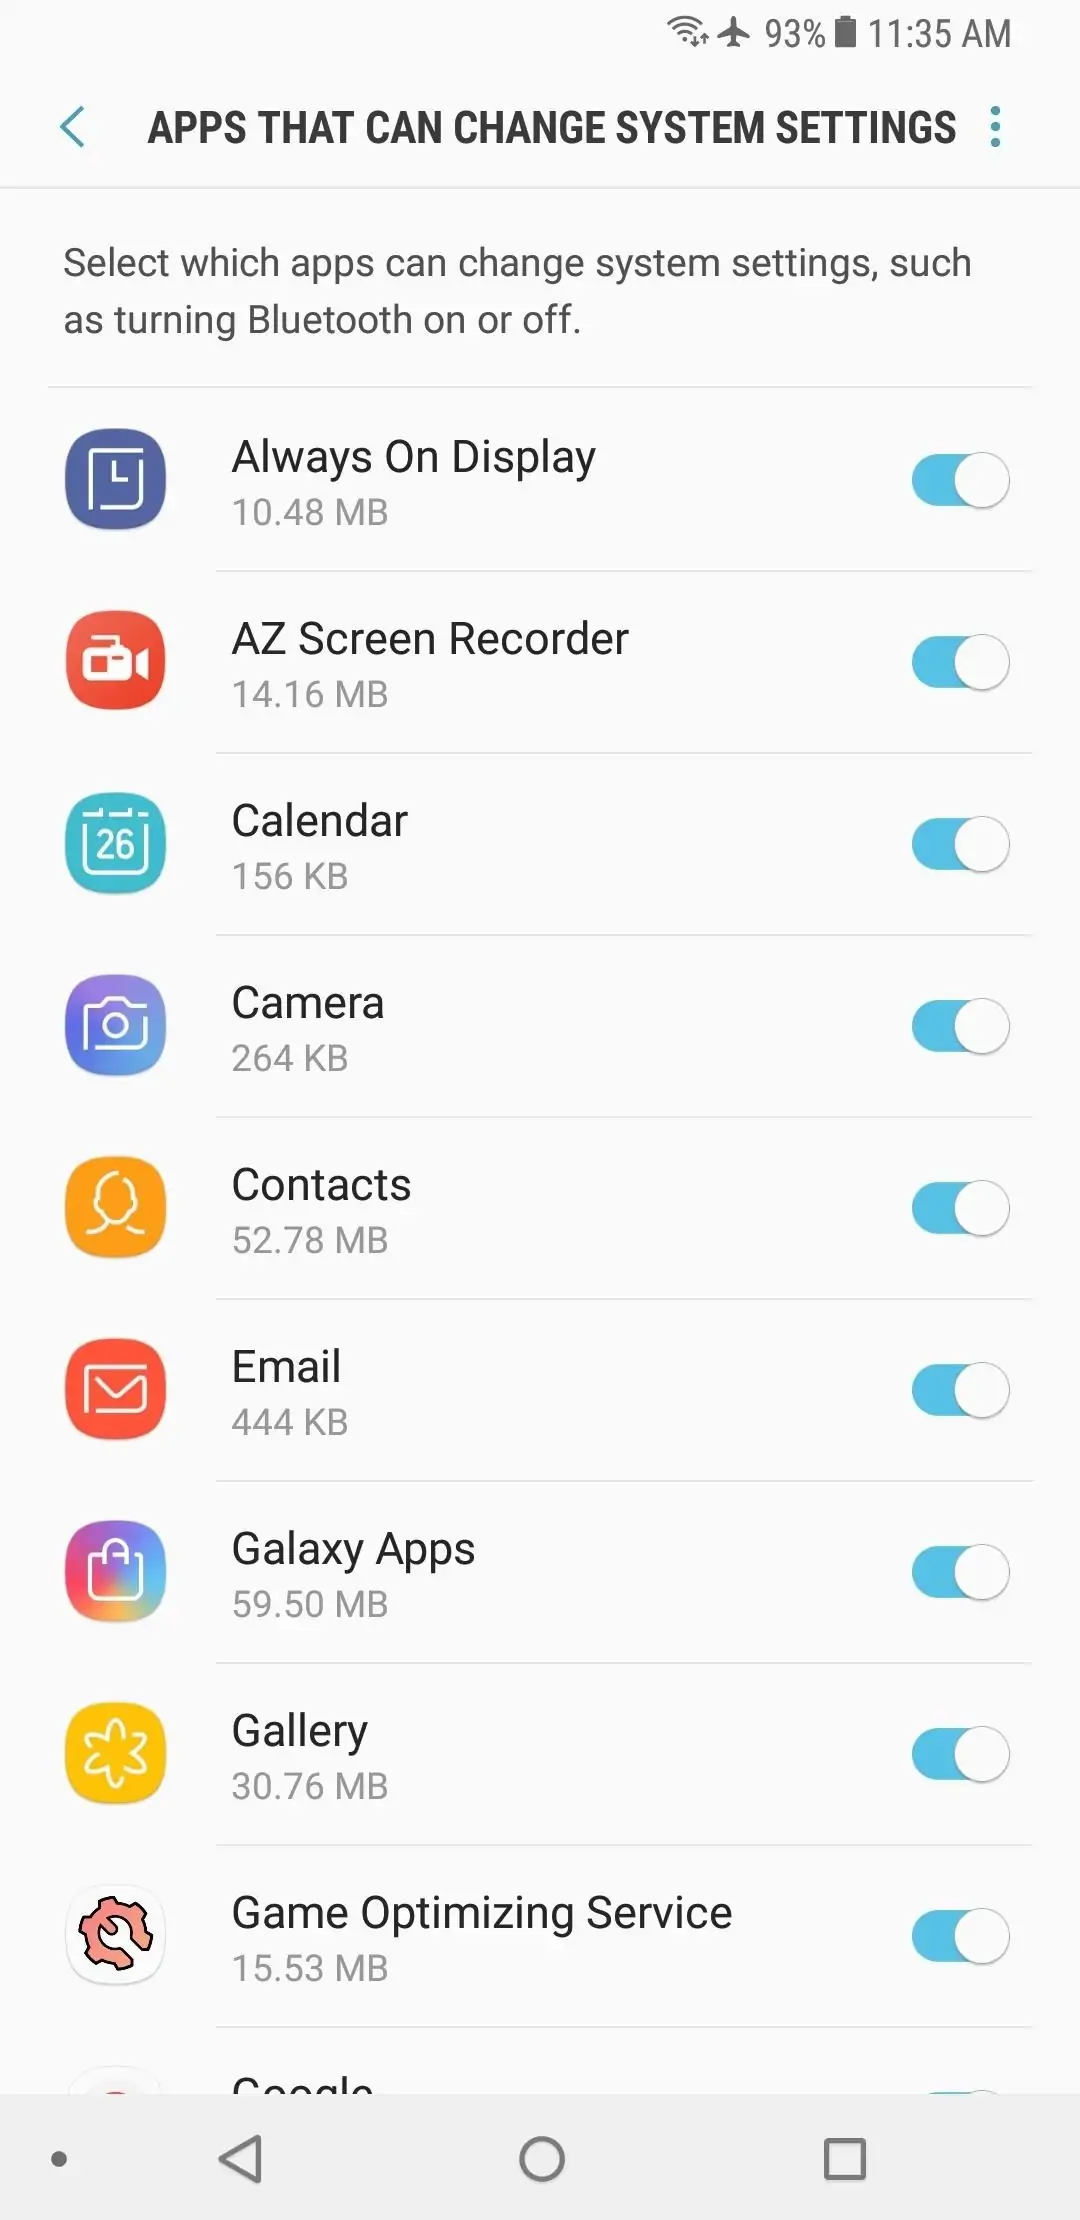
To view all the apps that can change system settings go to Settings -> Apps and select “Special access” from the overflow menu. On the following screen, select “Apps that can change system settings”.
Then you can analyze the list and revoke this permission for the apps you feel don’t need it.
Unknown sources
There have been cases of malicious apps that managed to sneak into the Google Play Store or smaller manufacturer app stores but those are pretty rare. Most of Android malware comes from third-party sources.
To make sure you don’t accidentally sideload a malicious app from an external source go to Settings -> Lock screen and security and make sure the “Unknown sources” option is disabled. This option prevents apps that are not from Google Play Store or the Galaxy Apps stores from being installed.
Notification access
Depending on their features, some apps will legitimately need to access your notifications. However, there can be apps that request this permission without actually needing it.
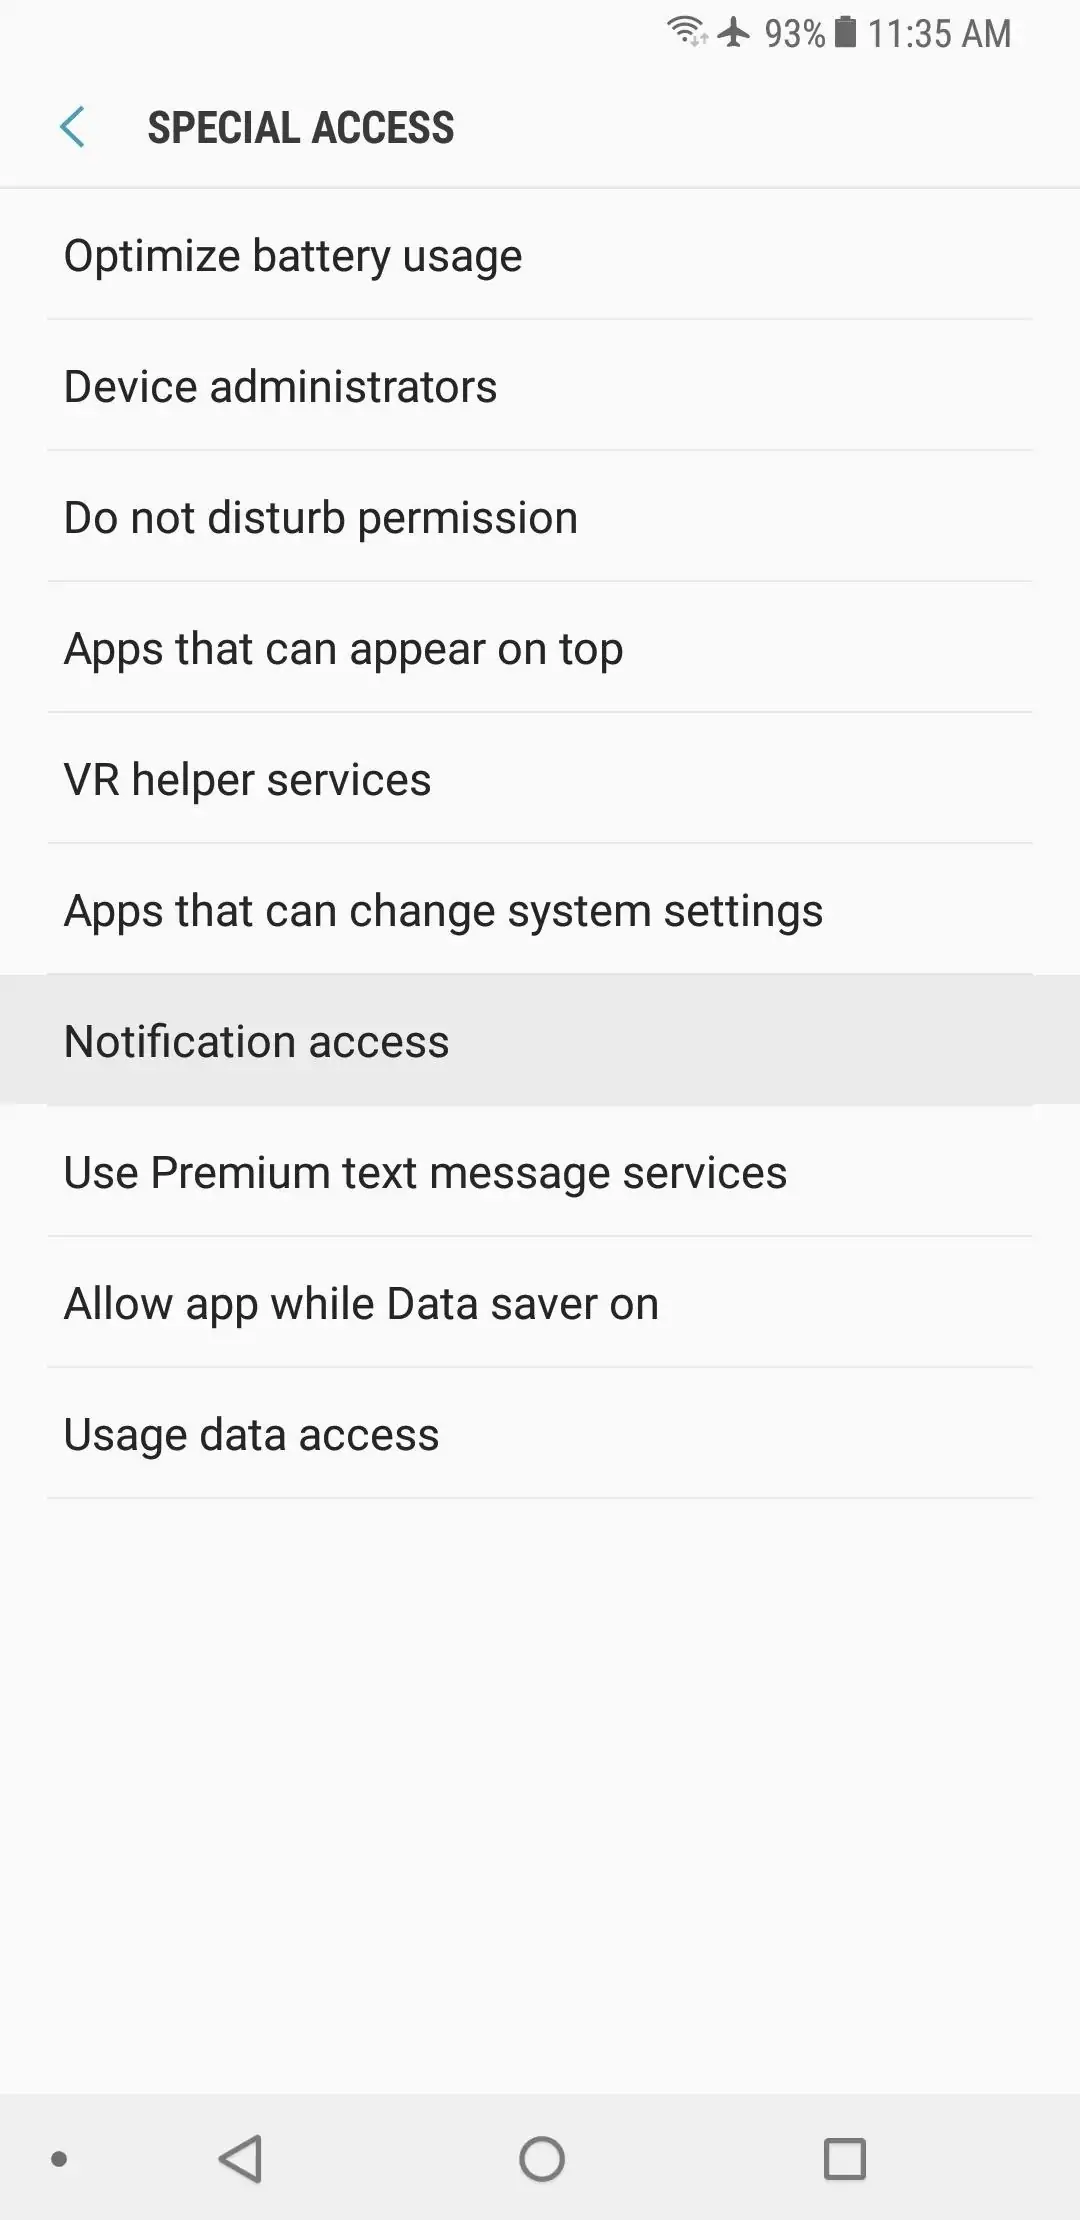
You can review which apps can access your notifications and revoke access to the ones you feel don’t need this permission from Settings -> Apps -> Special permissions (from the upper-left menu icon).
Usage data access
Another permission that’s frequently requested by app is usage data access. This data is used to improve your experience with these apps since it reveals how you interact with your mobile device.
While you might not get that improved experience you might not want to share how you use your phone with just about any app. The list of apps that have usage data access is available in the Special access section which you can open by tapping on the top-right menu icon in Settings -> Apps.
Google data collection
Speaking of data collection, Google collects various types of data from each Android user. After all, it’s their operating system. Even so, if you’re privacy conscious there are some options that can help you limit the data Google collects from your phone.
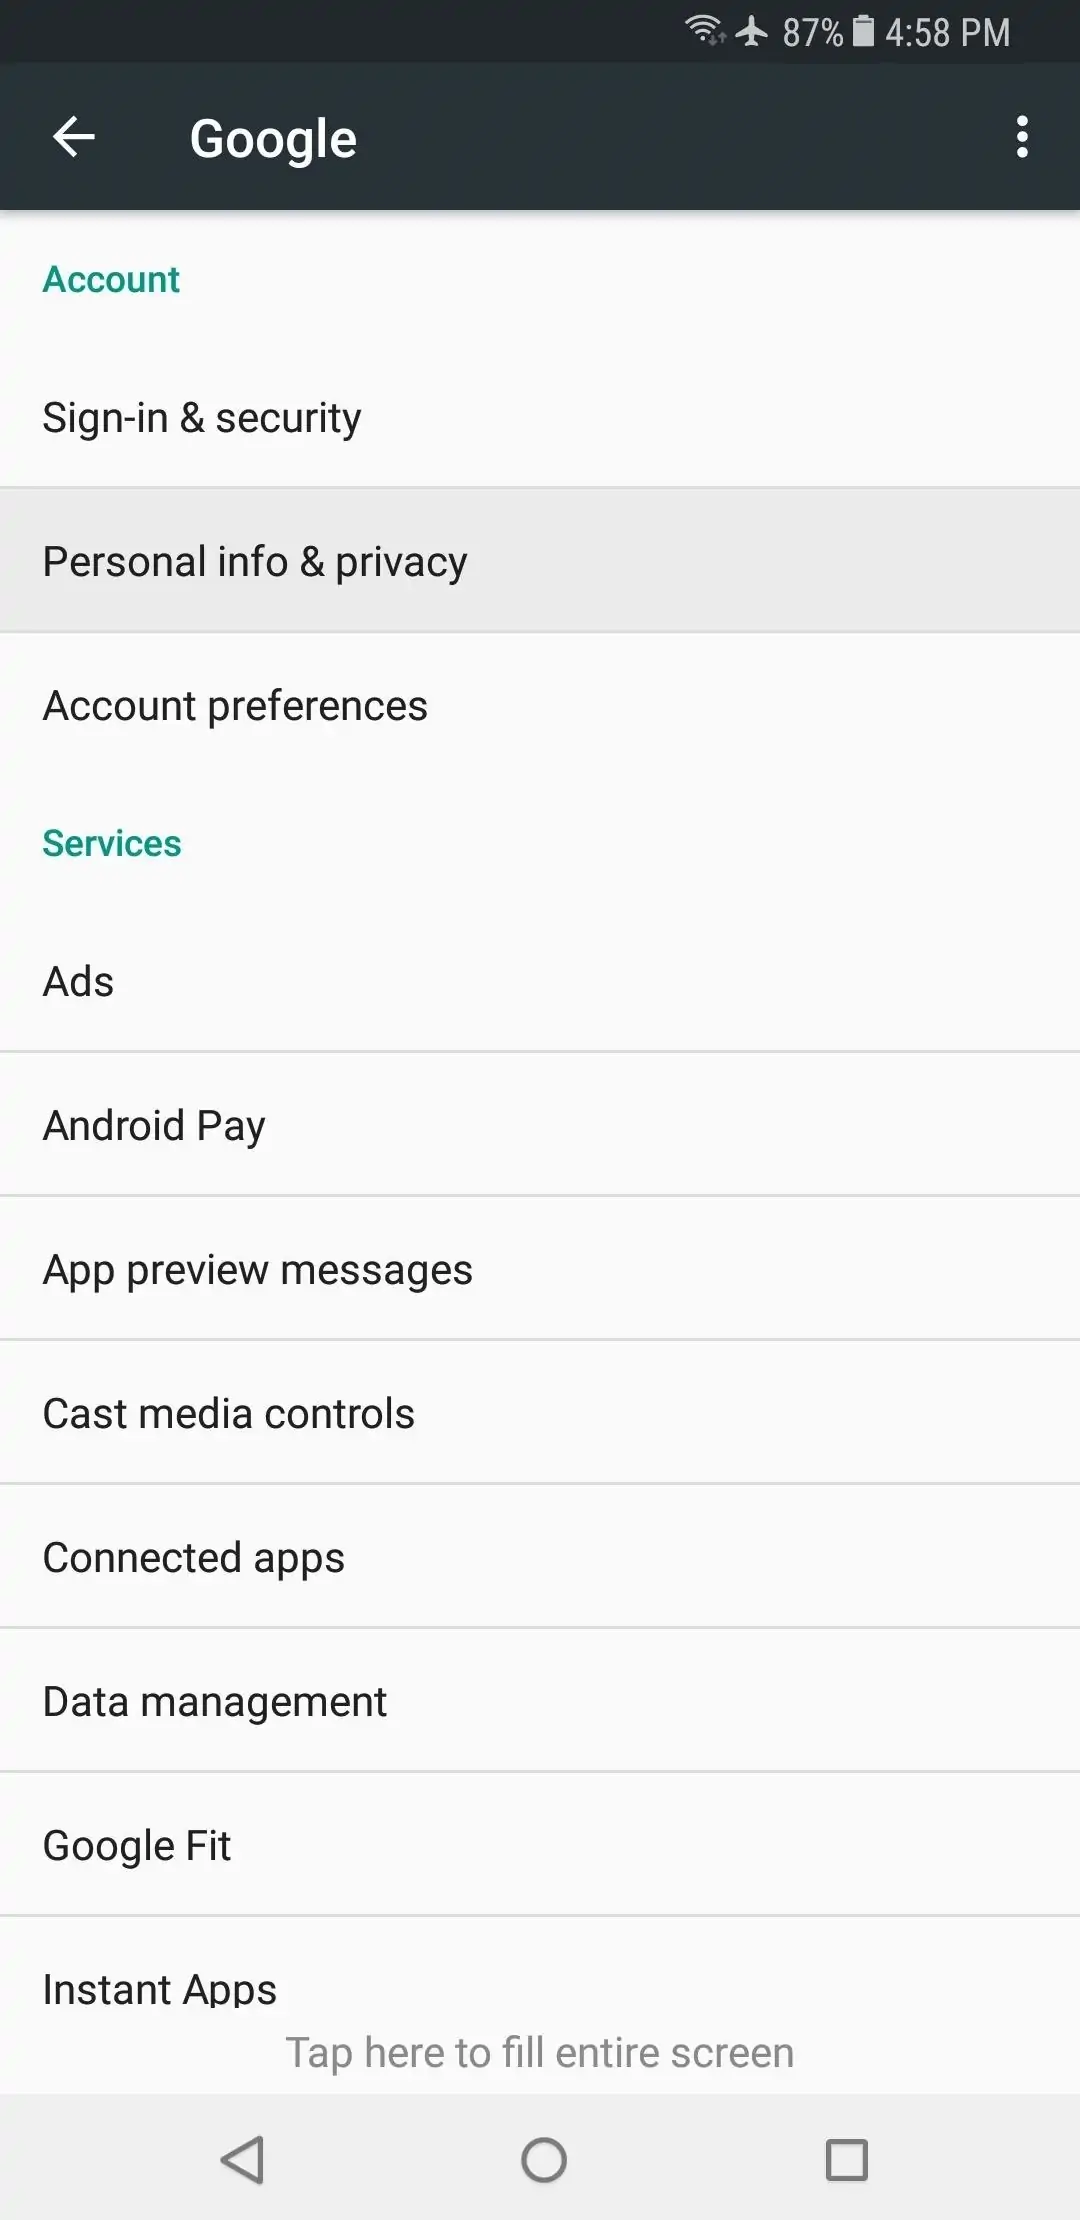
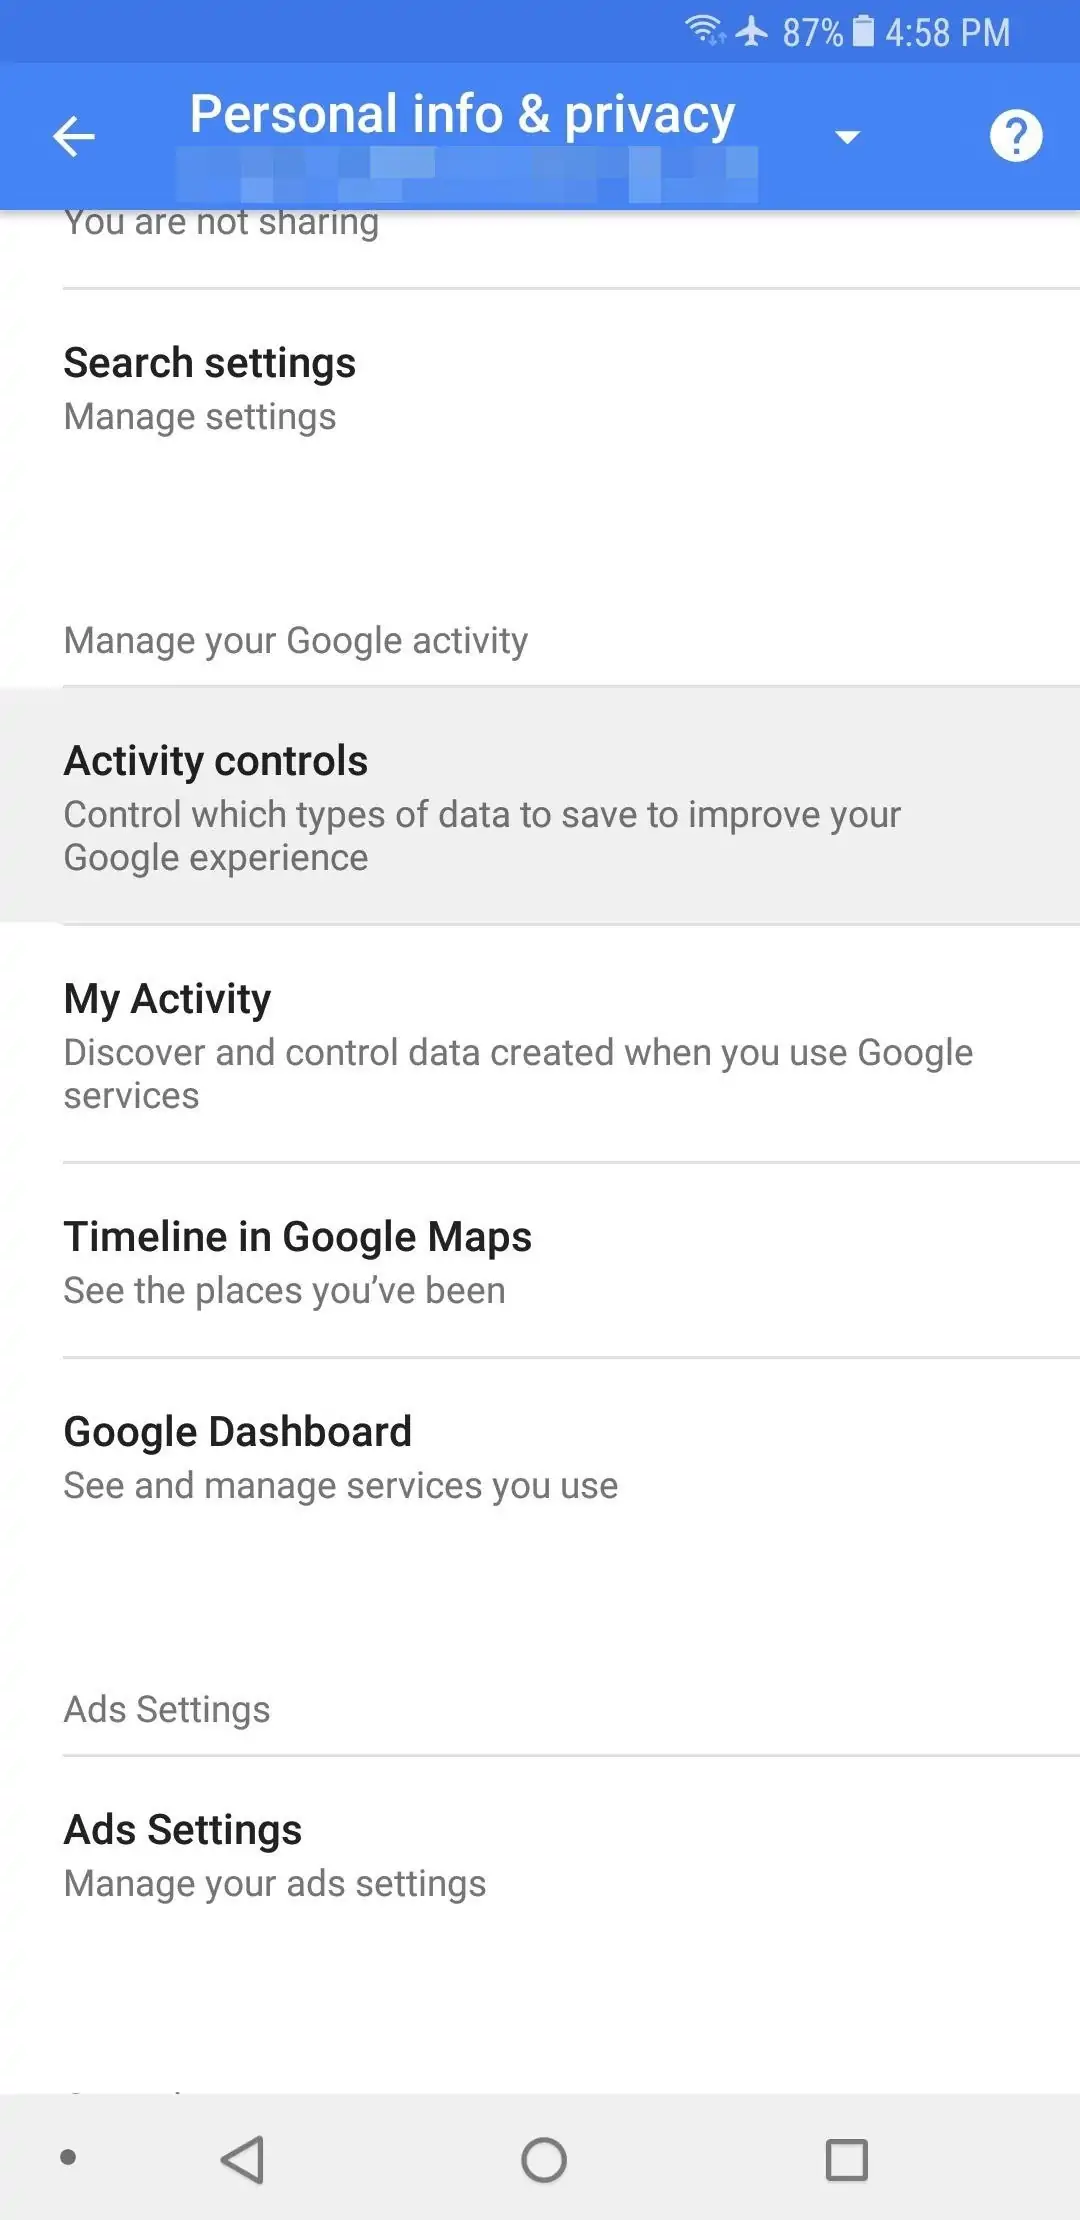
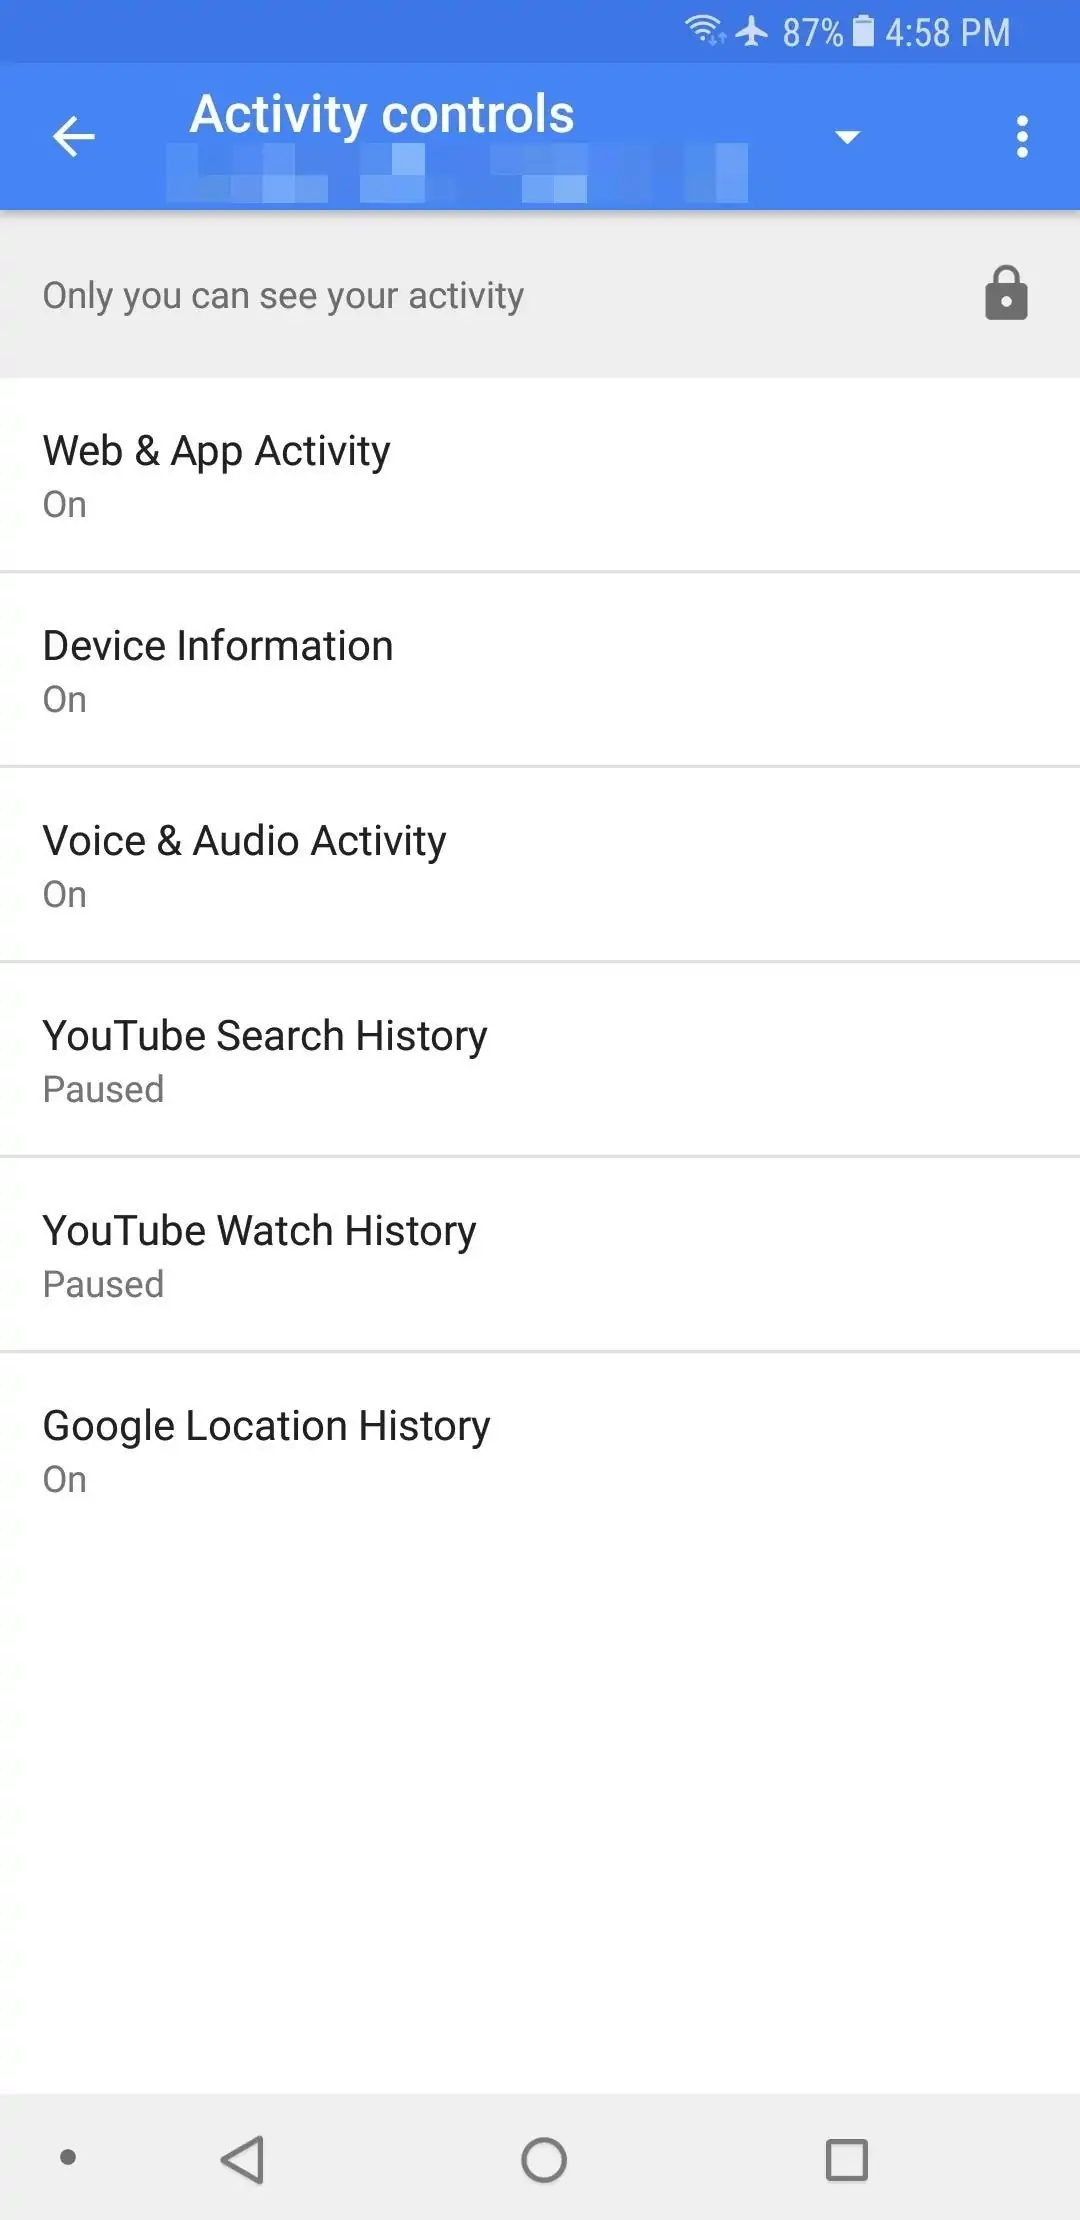
Navigate to Google -> Settings -> Personal info & privacy -> Activity controls (you’ll need to scroll a bit to get to the last option).
Here, you have all the activities Google is recording and you can individually disable them. You can even disable all of them but keep in mind privacy comes at a cost. For example, Google Assistant is using “Voice & Audio Activity” to get smarter and “Device information” is used by Google to store your calendar and contact entries in the cloud.
These are the most important security & privacy settings you need to disable on Samsung Galaxy S8. There are others of course, but once you take care of these settings your phone will be more secure and you’ll enjoy a higher degree of privacy.
What other security and privacy settings have you disabled on your S8? Let us know in the comments section!
Share this post if you liked it and follow us on Facebook, Twitter and Google+ to stay up to date with the latest apps, games, guides and everything Android, and iOS.




![[Guide] Enable the hidden ‘Condensed’ display mode on Samsung Galaxy S7 and S6 Enable the hidden 'Condensed' display mode on Samsung Galaxy S7](https://www.bytesin.com/wp-content/uploads/2016/04/Activate-the-hidden-Condensed-display-mode-on-Samsung-Galaxy-S7-120x70.webp)


![[Review] Traffic Rider – Just Ride](https://www.bytesin.com/wp-content/uploads/2016/02/traffic-rider-review-feat-120x70.webp)