The Walking Dead: No Man’s Land (read our review) is now available on Android, too. If you haven’t tried it, yet, we suggest you to try this gory TV show tie-in that gets many TWD aspects right.
Free-to-play Worth Playing
Free-to-play games are a turn off by default to some players who prefer to pay for a premium game and have access to the full feature set, rather than go through the tedious process of finding that sweet spot in a freemium game, if there is one. The catch with free-to-play is you can’t just pay one entrance fee and hope to get a premium set for it. The freemium sucks you in and gives you just enough advantage to keep you coming back for more and paying more.
Luckily, TWD No Man’s Land has a mild approach to IAPs, and you can bypass them quite elegantly. In the first place, the developer capitalizes on video ads, and at times you will wish there would be more of them. So, all IAP aspects considered, this game is a worthy download even if you steer clear of the freemium.
Now, let us see how we can help you wrap your head around all the goodness that’s packed in this title. The game play consists of two parts roughly – the base-building (+character upgrading) and the missions. So, let’s divide this guide into the two corresponding parts for your convenience.
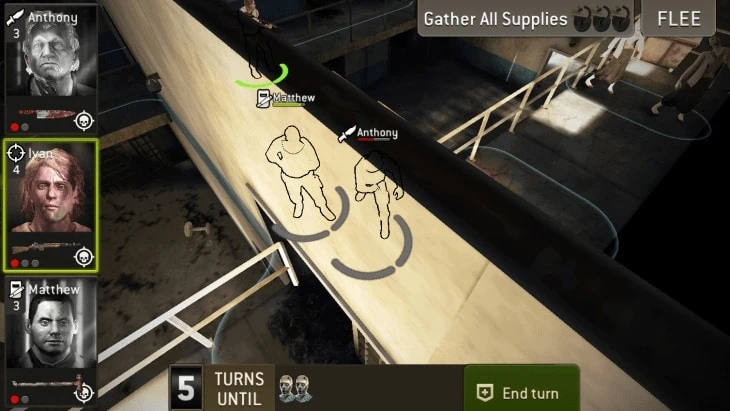
The Base-Building and Character Upgrades
The Council is the core of your camp, your headquarters, and its level affects many things, including your ability to build structures and level up as a player.
The Farm Plots generate tomato cans, and alas, your survivors don’t eat them. What they eat is a question we shall leave to the developer, but the fact is the cans are the currency you need to upgrade your structures. Let us just suppose that the survivors need to eat the tomatoes before they can work on buildings’ upgrades. That way it makes more sense.
I have read some advisers recommending users should build as many farm plots as they can early on, but the truth is you can build only as much as your Council level allows you to, and early on it won’t be more than two-three. It takes a Council of level 6 to build a third farm plot, so there you have it. What you can do, however, is upgrade your farm plots and your supplies storage to produce and store more goods. Overall, whenever a new building becomes available in the Shop (the icon in the bottom left corner), build it as soon as you can. It will most likely grant you an Achievement, and with achievements comes the gold.
Campfire is purely cosmetic while the Memorial lets your survivors honor the deceased. A Mission Car produces the gas you need to enter the missions. Whether or not you need to upgrade it depends on how you play. If you want to advance aggressively in the missions, you might have to. I have only done this once and see no need to have more gas canisters produced, but I play moderately and spend equal time in the missions and in the camp.
Tents generate XP coins while the Training Grounds let you train and level up your survivors. Workshop is where you upgrade the weapons and ammo.
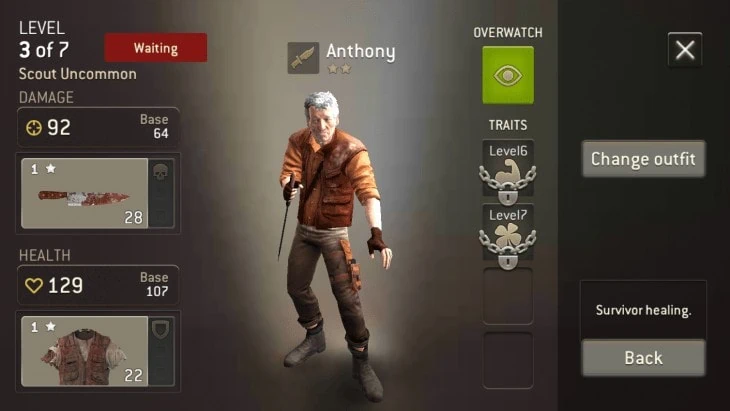
Upgrading your camp structures
- In terms of the upgrades, moderate your appetites. Depending on how you play, you will either need to upgrade your mission car to have more entrance tickets to the missions, or the council to be able to build more farm plots. Overall, you will have to upgrade more or less all your structures because that’s how you level up – by upgrading or building structures.
- Leveling up as a player is tied into the BP, building points, so upgrading your farm plots and the tents seems to be the primary objective since they generate the two most important currencies but gold – the food cans and the XP.
- I would not bother too much upgrading the hospital. First of all, because this upgrade is ridiculously expensive and costs 17K tomato cans or 107 gold to upgrade it to level 3 and have 2 healing slots instead of one. Second, because the healing process does not take that much time, and you can spend it beefing up your camp, or taking your second team for a mission.
The most frequent activity you should be doing in the camp is upgrading your survivors, so think carefully who you take to the battle. Hence, here are a few ideas for the team management.
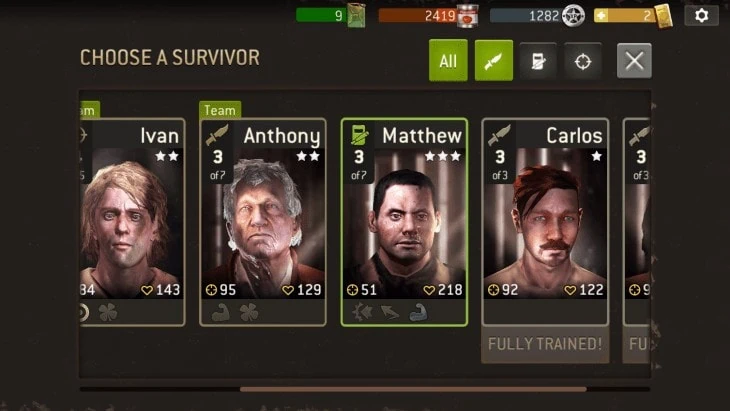
Building a crew
There are quite a few configurations you can have in your team, and yet they are limited because in most missions you can have only three survivors, while the select ones let you take two only. There are six classes of the survivors:
- Assault – automatic weapons, are good against the crowds of walkers;
- Bruiser – blunt weapons like baseball bats, are good at taking out big walkers or stunning them;
- Hunter – rifles, are perfect for long-range combat, but the shots attract more walkers;
- Scout – knives, are good at sneaking past the walkers and scout for loot;
- Shooter – wield pistols, aim well;
- Warrior – wield swords, can take out several walkers.
Never underestimate the class abilities and skills because they help you build stronger strategies, and knowing how to combine a better crew may make a difference between a failed mission and a success.
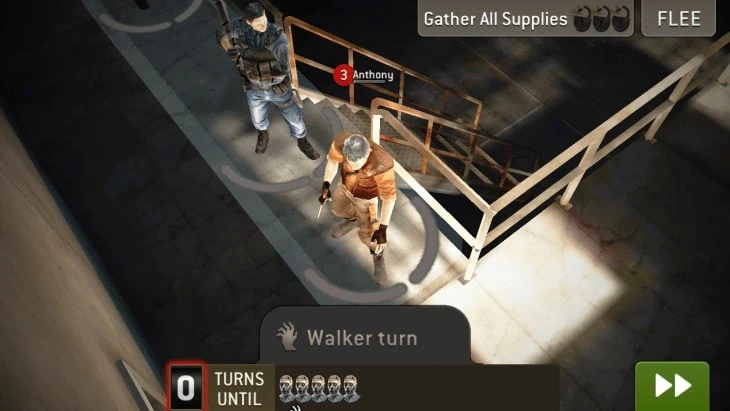
Survivors Do’s and Don’ts
#1 Bruisers
It took me a while to figure out how to use the bruisers properly. They seemed like the most useless class because even though they have the most health, their strike force is small, so what’s the catch? Note: the catch is to never have a crew of three bruisers, simple as that. In most cases, you want to have one bruiser to use as a shield to your hunter, who is low on health but can take out multiple walkers in a single turn. A bruiser can stun a big walker, so your hunter or scout can take it out. In some cases, you don’t want a bruiser in your team at all.
Update 14-Apr-2016: we got some feedback from our readers (see the comments section below): the bruisers can not stun tank walkers, so pay attention.
The best way to use a bruiser is with an Overwatch, 1 AP move, when he can attack a walker during the walker’s turn. The best placement is somewhere next to the low-health members.
#2 Hunters
Hunters are super-useful when it comes to cleaning a path clogged by several walkers, but the noise of the fires attracts more walkers with each shot. Hence, if you find yourself in the position when you have to flee the battle because the walkers outnumber you heavily and you can neither complete the requirements of a mission, nor make it out to the exit, consider how you use your hunters. Can you skip a turn, or move a hunter without shooting not to attract more walkers? Or maybe you can make do with two scouts and a bruiser, and no hunter at all?
Note: the Hunters can be in Overwatch, too, and when they fire in Overwatch the shots don’t attract more walkers.
#3 Scouts
These tough folks have a relatively powerful attack with their knives, but they are low on health and once cornered, they can get trapped easily. At the same time, they are fast to open trunks and crates and gates, so use them to perform these tasks. The can also sneak past some walkers, but try not to engage them against the big walkers because it takes several hits to take down one big walker, and the next turn it can stun your scout.
#4. Shooter, warrior, assault
Shooters wield pistols and revolvers, and are good at finishing off wounded high-level walkers. Warriors, basically Michonne-type, wield swords, and are accurate and lethal. Assault type is what you should be aspiring for, because they wield semi-automatic rifles that take down multiple walkers in a single turn. You have to make your way past the fourth chapter at least to unlock one or some of these higher-tier characters, so don’t spend too many radio shoot outs early in the game. You unlock your Shooters class when you complete Episode 4, warriors and assaults come even later.
#5. Be picky
- Even though you might have to upgrade your low-tier survivors early in the game, do not invest too much in them. Use your radio to try and get the characters that can be upgraded to 7-9 levels, and get rid of the 3-level survivors.
- Prioritize which survivors and gear you upgrade, and invest in rare, epic and legendary. They have higher level caps, so can be upgraded more times.
- Rejecting common and uncommon survivors gives you experience points, XP. I would not recommend spending 100 gold on unlocking one more survivor slot. Instead, don’t hesitate to replace weaker survivors with the stronger ones.
#6. Gear
- Scrap the low-tier ammo and weapon you are not using.
- When you retire a survivor, his or her weapons and ammo remains in your warehouse automatically.
- Try to keep one extra piece of weapon and ammo for each survivor, so that when you get a higher-tier character, you can assign him a better weapon and leave the lower-tier survivor with that extra piece.
Guilds
One interesting thing I noticed as I tried to join a guild is it’s easier to create one than to join one, so spend those 300 XP to have access to more fun. Creating a guild is absolutely worth the 300 XP because it opens a whole lot of missions-type game play than the episodes in the story mode. The missions in the guilds mode are limited in time, and you advance and get guild points for completing them. You may not care too much for the leader-boards, as I never do, but having some six missions available on top of the episodes missions makes a huge difference in the time you can spend battling.
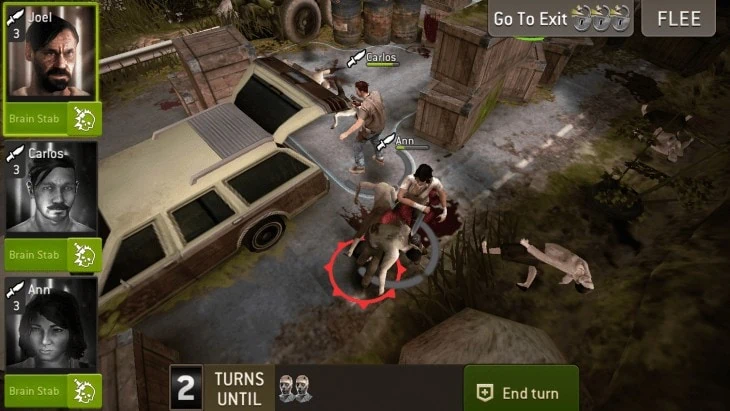
Missions & Tactics, Charge Abilities, Overwatch and Struggles Explained
Charge Abilities – Critical Hits
A per survivor characteristic, charge abilities are a unique combination of accumulative power per each survivor; they get unlocked as you upgrade a character in the Warehouse. It is worth pointing out because charge abilities are too easy to overlook in the heat of the battle. Look at the survivor portraits to your left when in the mission, and see the little indicators at the bottom of each portrait – those are charge abilities.
When a survivor has killed a certain amount of the walkers, the charge abilities become available. To use a charge ability, tap on it first, then tap on the survivor and make the move. You will know you have activated a charge ability right away because the survivor’s green circle indicator will glow yellow. Here is an approximate breakdown of the charge abilities:
- Suppression for the Assault survivors – stun and damage
- Smash for the Bruiser survivor – area stun and damage
- Brain Stab for the Scout survivor – deal extra damage
- Quick Shot for the Shooter – free attack, no AP spent
- Aimed Shot for the Hunter survivor – automatic critical hit
- Quick Slash for the Warrior survivor – Bonus Attack
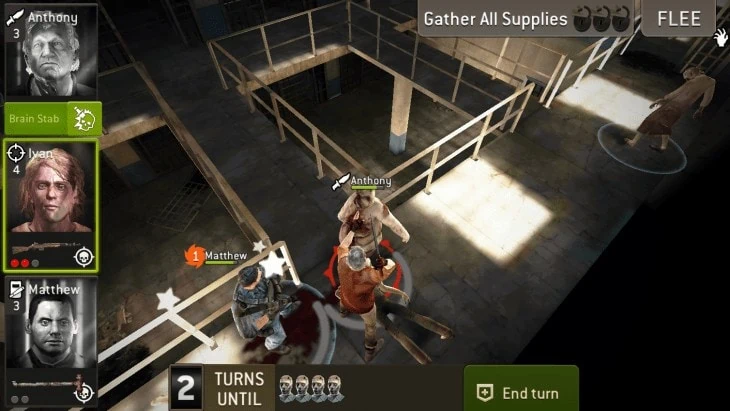
Struggles
When your survivor is attacked by a walker, he or she becomes weaker and may not be able to resist the next attack. So, when the next attack of the walkers is due, your survivor is attacked when being low on health. He or she does not shove off the walkers and gets trapped. In this case, you can’t use that survivor during your turn, and his portrait to the left appears grayed out. You can rescue the trapped team member by sending one or both remaining survivors to attack the walkers that are trying to kill him.
What may not be obvious is you don’t have all the time in the world to rescue that struggling survivor, and if you don’t rescue him or her in three turns, the walkers defeat the struggling survivor. You lose a mission.
Note: never allow this to happen during the deadly missions because your overpowered survivor dies. As in perma-death. So, use the Flee button before it’s too late.
Overwatch
The battles are turn-based, and each of your survivors can take from 1 to 3 steps per turn, which are dubbed AP (Action Points) in The Walking Dead: No Man’s Land. Now, you don’t necessarily need to use them all in a go. For example, when you need to move your Hunter one step to align him with a bunch of walkers and shoot them, you can easily do this within one turn. Just move him not farther than 1 AP, and then aim and shoot the walkers.
Now, if you only move a survivor 1 AP and end your turn, that character gains an Overwatch ability, which is a defensive stance. This way, should any walker come close during the next walker turn and try to attack the survivor, the latter will attack before the walker manages to deal damage. Also mind that a survivor deals less damage when in Overwatch than during a regular attack.
Note: Bruisers are particularly good when in Overwatch because they have more health and last longer than the others. Bruisers also stun the walker and incapacitate it till the next turn.
Note: Hunters can be engaged in Overwatch, and when they shoot the incoming walkers in Overwatch they do not awake more walkers, as they do in regular attacks.
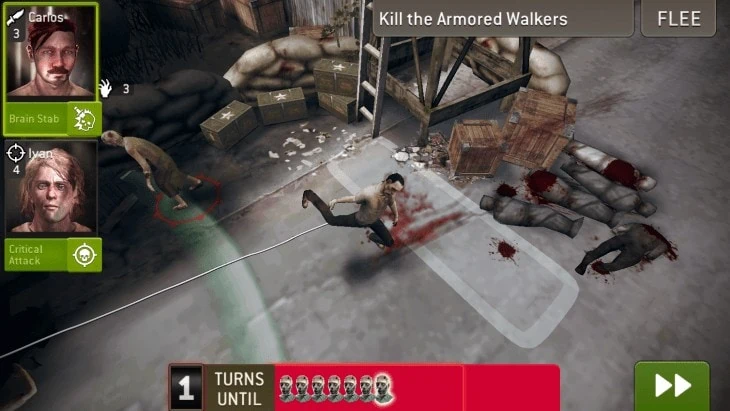
The Walking Dead: No Man’s Land Missions Tips & Tricks
- A few words on the mission types. There are Equipment Runs (loot), Rescue Runs (more survivors to your team), Explore Runs and Deadly Missions, as well as the missions in your Guild corner that are available during a limited time only.
- Don’t underestimate the blind spots of the area, and move cautiously. Sometimes, when you move too far ahead, you may not know the walkers are there. So, when you unknowingly move your survivor too close to the walkers you didn’t see, your survivor does not reach the final step and gets attacked.
- Melee class characters aren’t effective against the higher-tier walkers when they act alone. The scouts don’t kill the high-tier walkers in one turn, and the next turn the walker may stun a scout. Heavy walkers are best eliminated with a combination of survivors. Stunning it, then attacking it with a melee class survivor (twice) is the way to kill it. Better yet, run from it.
- Keep your hunters protected. While the hunters are good at eliminating several aligned walkers, they are low on health. Generally, keep your team close to one another; don’t spread them across the grid too far away from one another. When they’re close, the Bruisers can take the damage if they stand between a Hunter and the walker. Also, when one of the survivors is in a struggle, you can easily rescue him or her.
- Try to avoid the walkers more than you fight them. Remember that your objective is to collect loot, save more survivors or explore areas, not killing all walkers. Get the loot and make your exit. When you feel confident, you can move right next to the exit and keep killing the incoming walkers until it’s too dangerous. The more you kill, the more XP you get, but make sure not to lose a survivor to a struggle.
- Fleeing a mission is not that bad, and quite recommended in the Deadly Missions when losing a survivor to perma-death is an option.
- Take note of how the walkers are positioned. The ones that have their backs turned to the survivors won’t spot the survivors. At least, not as fast as the ones that can see you. Try to sneak past them.
- Always kill the walker closest to your survivors. This is especially true for the Hunters. While you may outrun the ones that are farther away, you can’t escape the ones that will reach you in their next turn, so eliminate the closest.
- This may be obvious, but there is a timer that counts the number of turns until the next wave of the walkers. If you use a hunter, the noise of the gun fire will attract more walkers. Hence, see if you can just move the hunter to open a crate instead of shooting every turn, especially if you are not making it on time to the exit before the next wave of zombies clog the area.
- Grinding is limited in TWD No Man’s Land. When you complete an Episode, you can’t replay any of its missions. However, you can linger in an episode replaying the deadly explore missions time and time again before you complete an Episode. So, keep playing the Deadly Explore missions as much as you can before completing the last level of an Episode to gain more XP and loot.
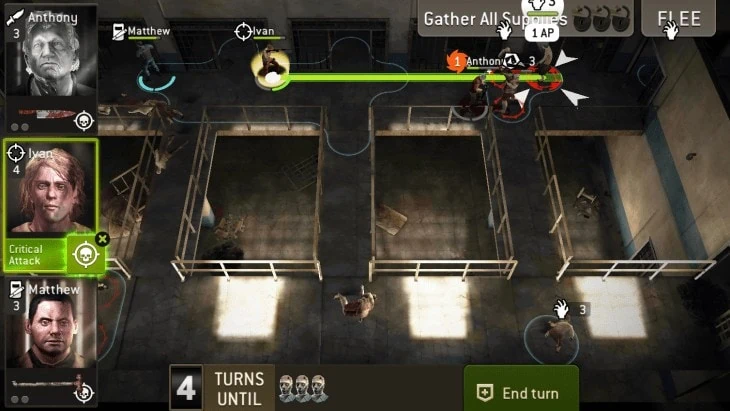
Final Words
This is not the complete guide to the game, but it should be enough to get the newcomers through the basics, since the game does not explain its own mechanics and features too well, if at all. For example, I still don’t understand what the lucky feature means, or how it helps, but it certainly does not show during the battles. As always, we welcome your personal insight into the tactical part of the missions, so share your tips, tricks and achievements in the comments below.









![[Guide] Enable the hidden ‘Condensed’ display mode on Samsung Galaxy S7 and S6 Enable the hidden 'Condensed' display mode on Samsung Galaxy S7](https://www.bytesin.com/wp-content/uploads/2016/04/Activate-the-hidden-Condensed-display-mode-on-Samsung-Galaxy-S7-120x70.webp)


![[Review] Traffic Rider – Just Ride](https://www.bytesin.com/wp-content/uploads/2016/02/traffic-rider-review-feat-120x70.webp)