You might be tempted to consider Windows XP obsolete since newer Windows versions are not only more feature-rich but still receive security updates. However, some might feel nostalgic or have an old rig that doesn’t support a more recent OS edition. Regardless of your reasons, you can download Windows XP for free straight from Microsoft.
Nostalgic people are likely not why Microsoft still lets us download Windows XP. They’re doing it at least for the developers who need to test software and websites on as many platforms and web browsers as possible.
Interestingly, Windows 7 has a Windows XP mode, but not many people are using this version of the OS so it’s not the most practical solution. Luckily, if you need to install Windows XP, Microsoft offers us the possibility to download an official copy for free.
How to download Windows XP for free directly from Microsoft
To get started, you’re going to need some additional apps. The first one is Oracle VirtualBox which you can download and install from the link below. We’ll use this tool to run Windows XP in a virtual machine.
Also, you will need a reliable file archiver. For the purpose of our guide, we’ll be using 7-Zip, but you can use any different app with similar capabilities.
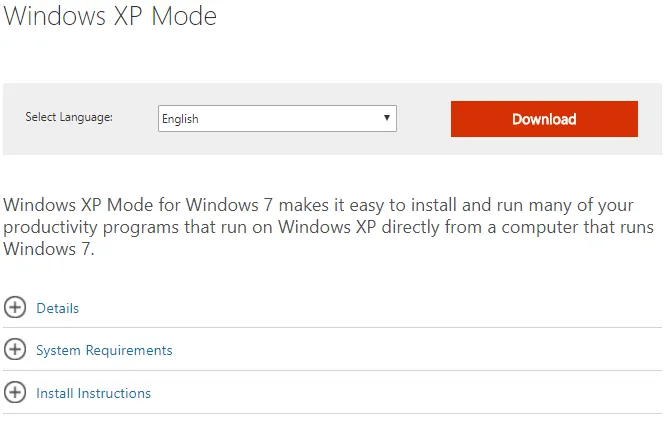
Once you install the applications mentioned above (assuming you didn’t have them already) go to the Microsoft page below to download Windows XP Mode.
Download Windows XP
Click on the Download button and on the following page select WindowsXPMode_en-us.exe and click Next. This will start the download for the Windows XP Mode executable.
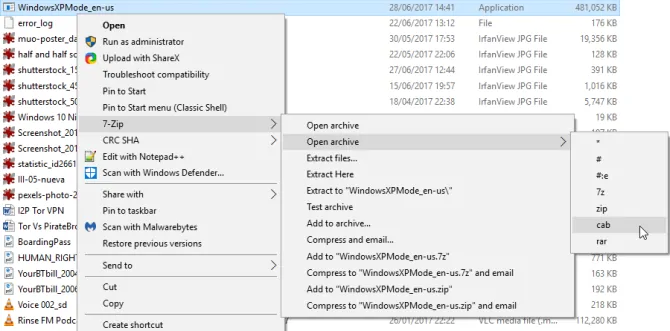
Once the download is finished, browse to the file, right-click on it and from the context menu select 7-ZIP -> Open archive -> cab.
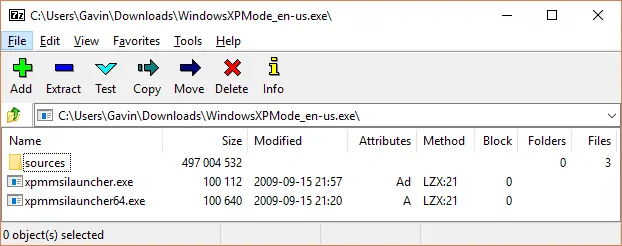
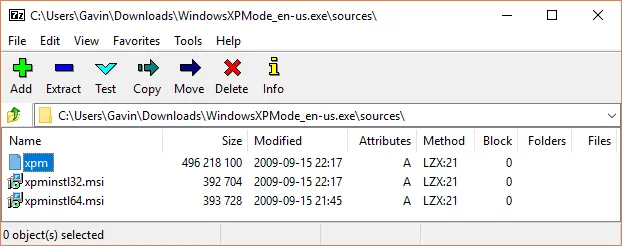
This will open the file you just downloaded in 7-Zip allowing you to view the files it contains. Select Sources.
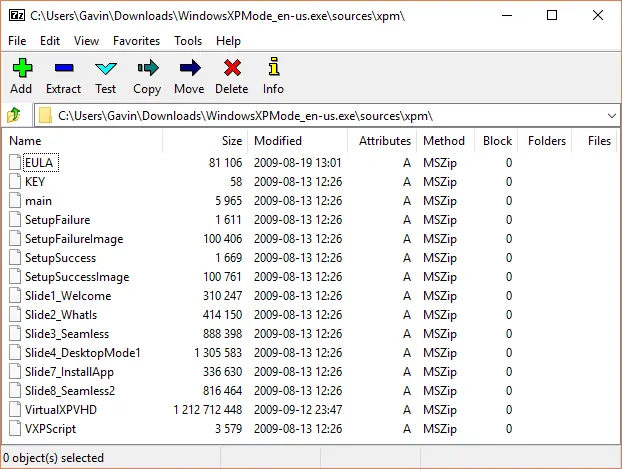
As shown in the image above, the Sources folder contains another three files. Double-click the xpm file. This is the virtual hard drive folder of Windows XP Mode.
Using these files, you’re going to create the XP Mode virtual hard disk. Right now they’re archive files (which means they’re read-only), so you’ll need to extract them to a new folder. From 7-Zip’s toolbar, select Extract then click the ellipsis icon located next to the address bar.
Navigate to the location where you want to extract the files, create a new folder and give it a relevant name. Press OK to start the extraction process and wait for it to complete.
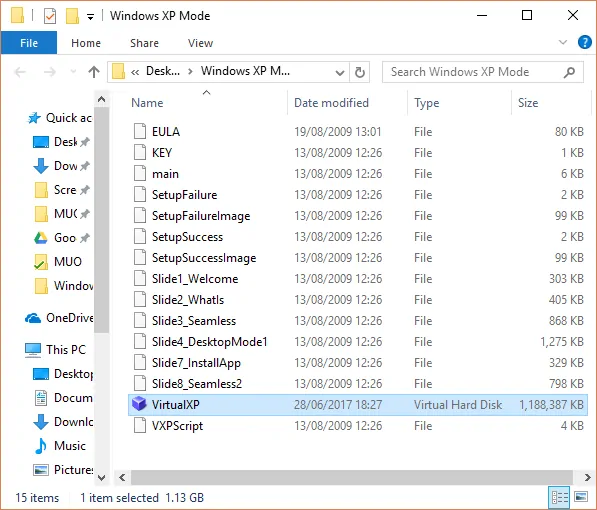
Open the folder where the extracted files are located and select the file named VirtualXPVHD. Press F2 on your keyboard to rename it then insert a period between the P and the V and hit Enter. This will change the file into a virtual hard disk.
How to install Windows XP Mode Virtual hard disk
Now we’re going to use Oracle VirtualBox (the app you downloaded at the beginning of the tutorial) to install Windows XP as a virtual operating system.
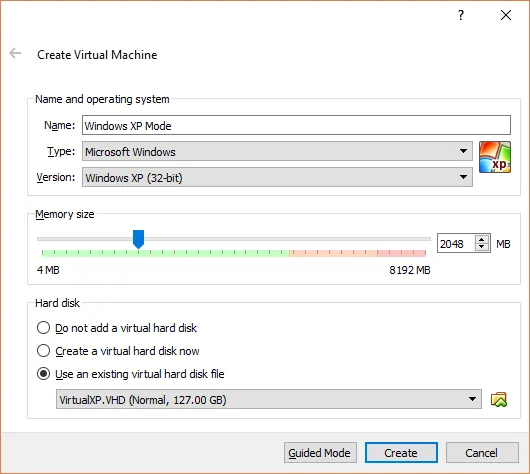
Run VirtualBox and select New. Click Expert Mode at the bottom of the Create Virtual Machine window. If you’re seeing Guided Mode then you’re already using Expert Mode and you don’t need to switch.
To continue, name your virtual machine – ideally, the name should contain “Windows XP” in it. Make sure the version is set to Windows XP (32-bit).
Next, assign some memory to the virtual machine. While both your PC’s operating system and the virtual machine use the same memory, Windows XP doesn’t need to much RAM so you can assign it somewhere between 512 MB and 2048 MB.
At this point, you’ll need to assign a hard disk, which will be the virtual hard disk you extracted from the Windows XP Mode executable. Select “Use an existing virtual hard disk file” in the Hard disk section, click on the folder icon and navigate to the folder where you extracted the files. Click VirtualXP and then select Open.
The setup in the Create Virtual Machine window should look like the image above. Assuming you’ve set up everything properly you can go ahead and click the Create button.
For everything to run smoothly, you’ll need to adjust some settings for the Windows XP virtual machine.
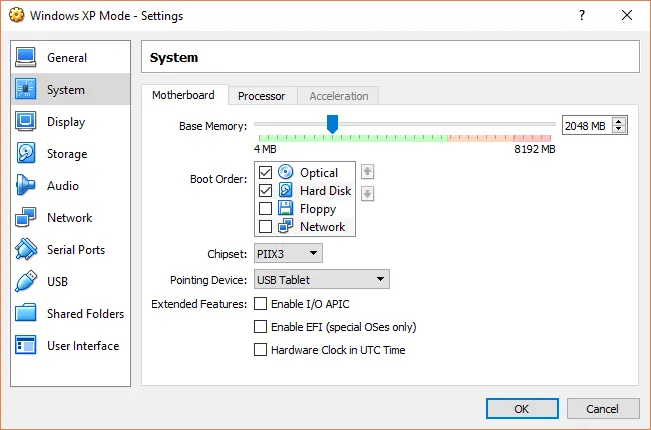
In the VirtualBox toolbar go to Settings -> System -> Boot Order. Uncheck Floppy and move Hard Disk to the top of the list.
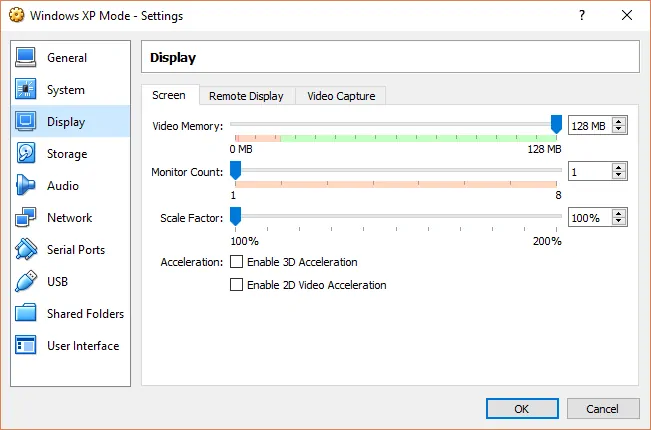
In the Display section, boost Video Memory to 128 MB.
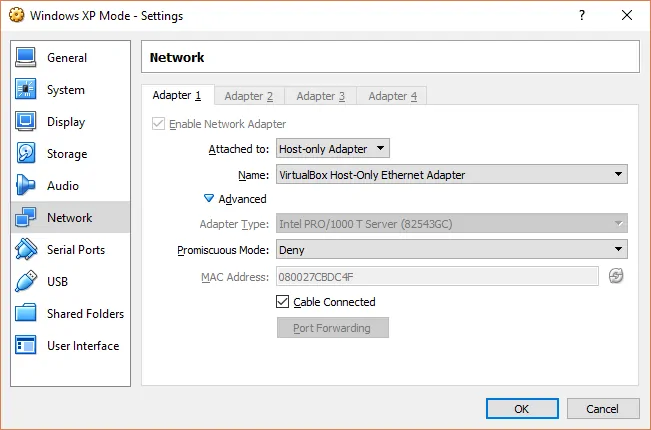
In the Network section, you may need to tweak several settings. Normally, Windows XP Mode should work with the default settings applied by VirtualBox but if it doesn’t , here’s what you need to change.
- Set Attached to: Host-only Adapter
- Set Name: VirtualBox Host-Only Ethernet Adapter
- Set Promiscuous Mode: Deny
- Check Cable connected
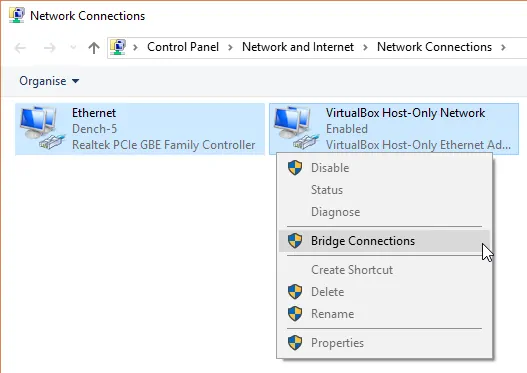
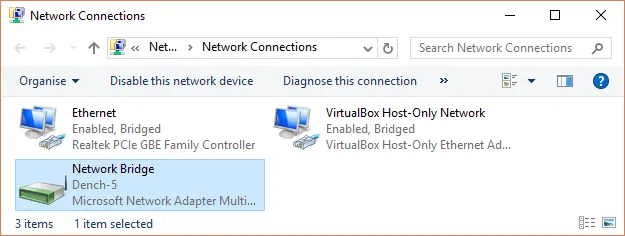
Click Start and type “network”. Select the Network and Sharing Centre from the results and click Change adapter settings in the left pane. Press and hold CTRL and select both Ethernet and VirtualBox Host-Only Network. Right-click on them and select Bridge Connections.
This will create a network bridge which allows the virtual machine to connect to the network even if it cannot access the router directly.
After you enter the virtual machine, you will need to update the network adapter settings. In Windows XP mode, navigate to Control Panel -> Network and Internet Connections -> Network Connections.
Right-click the Local Area Connection and select Properties. Select Internet Protocol (TCP/IP) and click Properties.
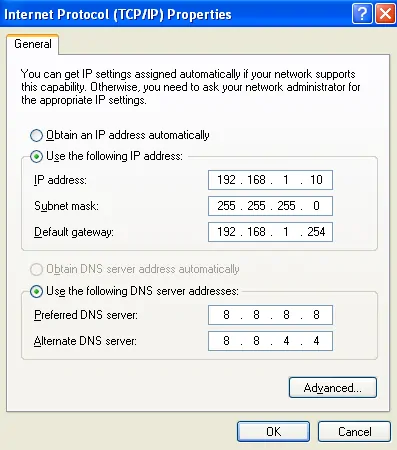
To continue, select “Use the following IP address” and enter an available IP address for your home network. We used 192.168.1.10. You will also need to enter the Default gateway and Subnet mask.
If you don’t know these addresses, press Windows key + R on your PC’s operating system, type cmd in the text field and click OK. Type ipconfig/all and hit Enter. This command will include the information you need under your wireless or Ethernet adapter name. Then you can enter the DNS server addresses in Windows XP mode. Press OK when you’re done.
Now that everything is set up you can finally run Windows XP. In the main window of VirtualBox, select your Windows XP Mode virtual machine and double-click on it.
Your mouse may not work inside Windows XP Mode right away but you can navigate the system setup pages using the arrow keys, Spacebar, Enter and TAB on your keyboard.










![[Guide] Enable the hidden ‘Condensed’ display mode on Samsung Galaxy S7 and S6 Enable the hidden 'Condensed' display mode on Samsung Galaxy S7](https://www.bytesin.com/wp-content/uploads/2016/04/Activate-the-hidden-Condensed-display-mode-on-Samsung-Galaxy-S7-120x70.webp)

