Mobile phones now have a screen recording feature, allowing users to somewhat share their screen with others through a video. The screen recording feature can help you demonstrate how to do something on your phone like tweaking settings, editing photos, and playing mobile games more.
iPhone, with its introduction of iOS 11, did not miss the chance to include a screen recording tool among its updated features. The built-in screen recorder is easy to use but might have limited functionality. For that, there are also third-party apps for screen recording that comes with some add-on tools which you can use to record your screen.
Also: 10 Best Third-Party Widgets for Your iPhone Home Screen
Here’s how to Screen Record Using Your iPhone
Using iPhone’s Built-in Screen Recorder
As mentioned, iPhone with iOS 11 and beyond has access to the screen record feature. Here’s how to activate and use it in 3 easy steps.
Step 1: Enable Screen Recording Feature
Go to Settings>Control Center.
Scroll down and open More Controls then select Screen Recording.
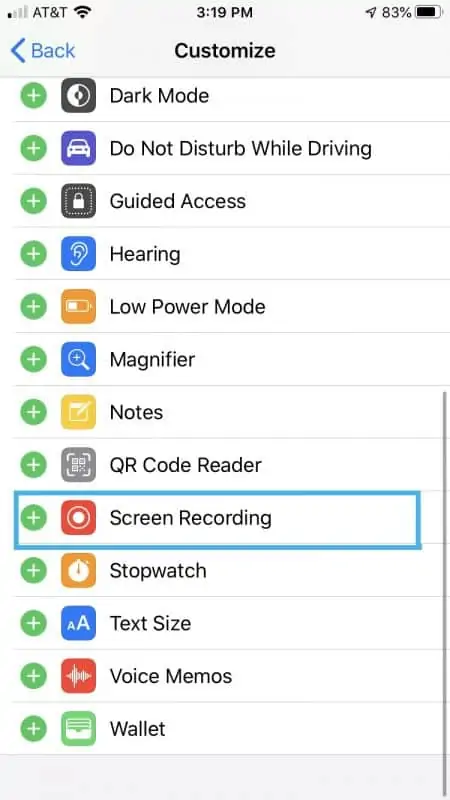
Tap on its corresponding plus icon (+) and drag it up into Included Controls.
Step 2: Start Screen Recording
To initiate the Screen Recording, go to Control Center. For iPhone X and later versions, you can swipe down on the top-right corner of the screen. For previous models or versions, swipe up from the bottom part of your screen.
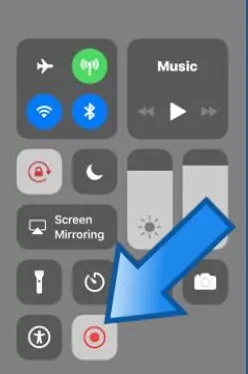
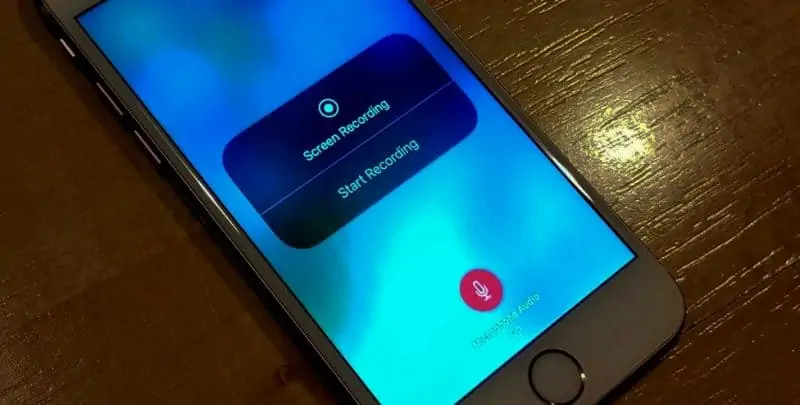
Tap on the Screen Recording button. A countdown starting at 3 will show before the recording starts to let you prepare your screen. Once the countdown’s done, it will begin capturing a video of your screen.

To check if you can capture audio while recording, tap and hold the Screen Recording button then configure the Microphone (On/Off) icon as needed. Then tap Start Recording.
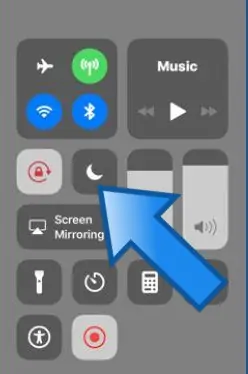
You can turn the Do Not Disturb mode on prior to recording your screen so notifications will not pop up on your screen during the capture. To do this, go to Control Center then tap on the Do Not Disturb button (shaped like a crescent moon) then select a preferred time period.
Step 3: Stop and Save Screen Recording
While the screen is being recorded the top part of your screen will be highlighted in red or a red clock will appear on the top part of your screen. This depends on the version of iOS you have.
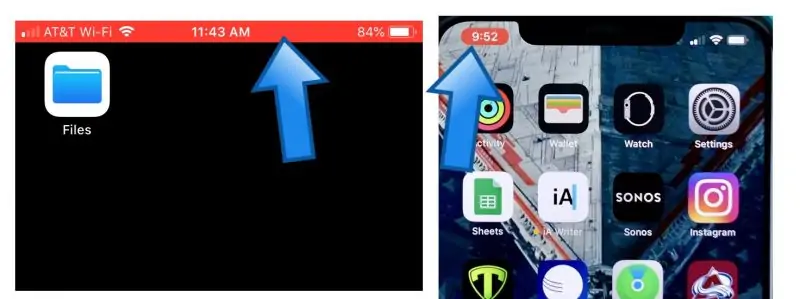
To stop the screen recording process, tap on that red area or clock then tap on Stop to confirm your option. You will then see a pop-up notification that a screen recording is saved on your Photos app.
Using Third-party Screen Recorder Apps
iPhone’s built-in screen recording tool can come in handy and is really easy to use. It requires a very minimal setup. However, if you need some extra features, there are great apps that you can use.
Here are 3 good screen recording apps you can try
Record it!
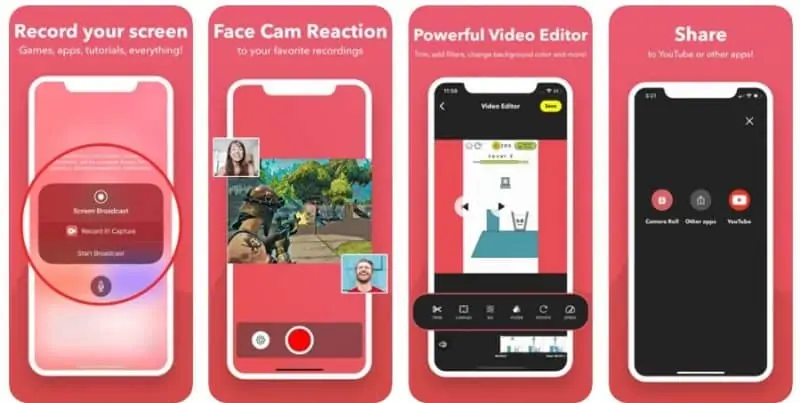
Record it! lets users record gameplays, walkthroughs, and more on their iPhone in a few taps. Simply install the app and open it on your iPhone. Tap the red button then choose Start Broadcast.
The app gives you options to turn the microphone on or off. To stop recording, tap on the red bar or clock on the topmost portion of your screen. You can then find the saved screen recording clip on the Record it! app and you can easily trim it, adjust its canvas size, add a background color, and more before sharing it to your Camera Roll, Youtube, or other apps on your iPhone.
DU Recorder
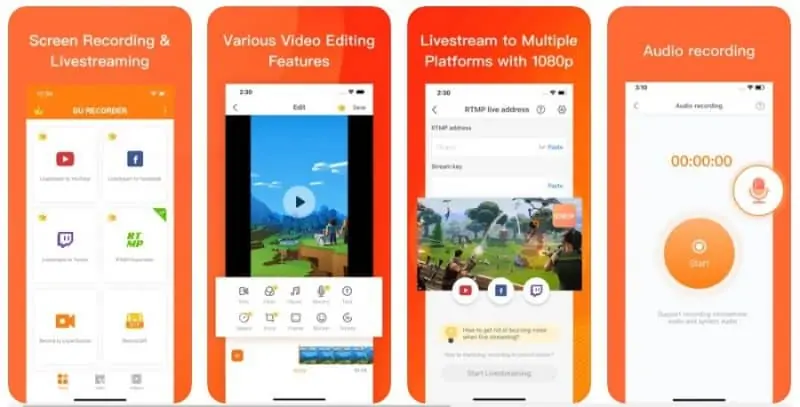
Du Recorder is an all-around screen recording app that can also be used for live streaming. To start recording your screen only, tap on Record to Local Device> Start Recording>DU Recorder then choose Start Broadcast.
This will start recording your screen and the clip will be saved to your Photos App. To stop, tap on the red bar or red clock on the top part of your screen the confirm by tapping Stop Recording on the pop-up notification. The app allows users to instantly stream video on Twitch, Facebook and Youtube. It also has some basic video editing features and a face cam reaction capture capability.
Go Record
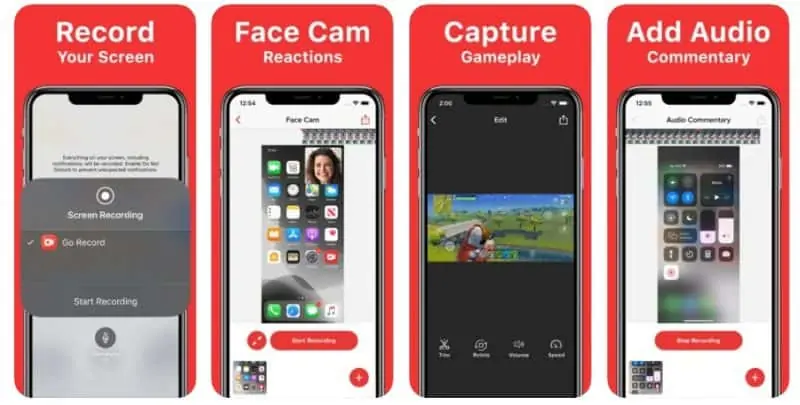
Go Record is an intuitive app that lets users record their screen and additionally use the mic to record audio and add a face cam to their screen while recording. This feature can come in handy especially if you’re creating a tutorial or recording gameplay. You can simply open the app and tap Start Recording to initiate.
You can also open the Control Center and press then hold the Screen Record button. Choose Go Record then set up the Microphone (On/Off). Afterward, tap Start Broadcast. Tap on the red bar or clock on the top of your screen to stop. When done, go to the Go Record app and find the screen recording. You can then use the app’s useful editing suite to fine-tune it a bit. You can also start recording a face cam reaction and audio commentary that will be laid over your video instantly.
Screen recording is a handy feature that requires minimal effort to use but has endless possibilities with what you can use it for. You can easily record your screen and share it with everyone. Whether you use third-party apps or you choose to stick with the built-in iPhone screen recorder, you can enjoy making different guides or simply record the best gameplays you want to rewatch or share in a tap.







![[Guide] Enable the hidden ‘Condensed’ display mode on Samsung Galaxy S7 and S6 Enable the hidden 'Condensed' display mode on Samsung Galaxy S7](https://www.bytesin.com/wp-content/uploads/2016/04/Activate-the-hidden-Condensed-display-mode-on-Samsung-Galaxy-S7-120x70.webp)


![[Review] Traffic Rider – Just Ride](https://www.bytesin.com/wp-content/uploads/2016/02/traffic-rider-review-feat-120x70.webp)